A few weeks back in discussing my fall garden, I referenced that I would be pilot-testing a low tunnel on one of my garden rows. I want to see how/if I can keep my broccoli and cauliflower growing as our temps begin to drop below freezing on a nightly basis. I wasn’t going at this from a particularly evidence-based or scientific approach and largely wanted to use materials I had on hand. One of my favorite sayings is, “when in doubt, recycle!” Ha, that’s not a saying but it should be. We have been very lucky in that the previous owners of this property left lots of tools and supplies, in addition to the fact that Cactus loves picking up “the best trash” from people’s driveways on trash day. And over the last two years I keep having creative spurts for projects that can utilize something I saw in our shed, workshop or barn.
Here is the SUPER simple approach I took:
- Identify the location I wanted for the low tunnel.
- Determine the size of the low tunnel – how long did I want it to be? I suggest starting small.
- What did I want to use for my support structure? The sky (or shed or wallet) is the limit here, friends. You can be really creative (and frugal) and pretty much use anything – PVC, mesh fence, bamboo, tomato cages, etc.
- Figure out how many supports I need. I wanted my supports to be pretty close together so that the cover doesn’t sink in as we get more moisture.
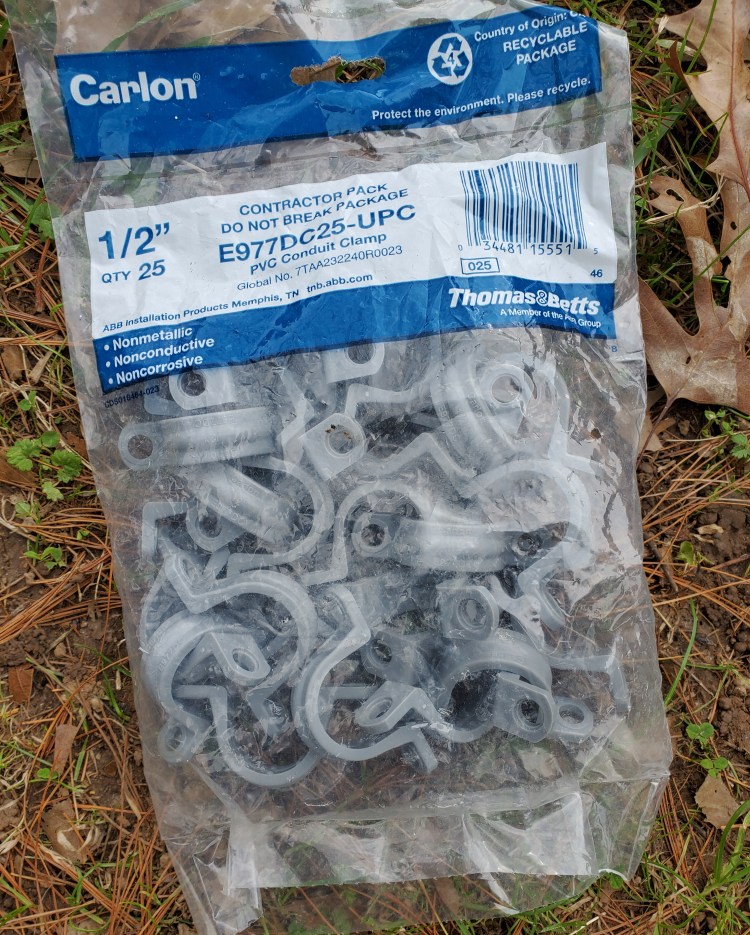
- How did I need to anchor my supports? Can they go right in the ground or do they need to be fastened to something? Cactus bought me these thinking we would nail them to the boards that divide my garden rows.
- What do I want to cover it with? There are (you guessed it!) lots of options on this front too, but I went with the material I had on hand.
- How do I want to fasten/attach the covering to the supports? There are probably 517 ways you can attach the thermal covering but I would recommend keeping in mind that you will likely want to remove and re-attach the covering depending on the weather. You will also want to consider what sort of weather it will need to endure – wind, rain, snow, sleet, etc.
Supplies I used:
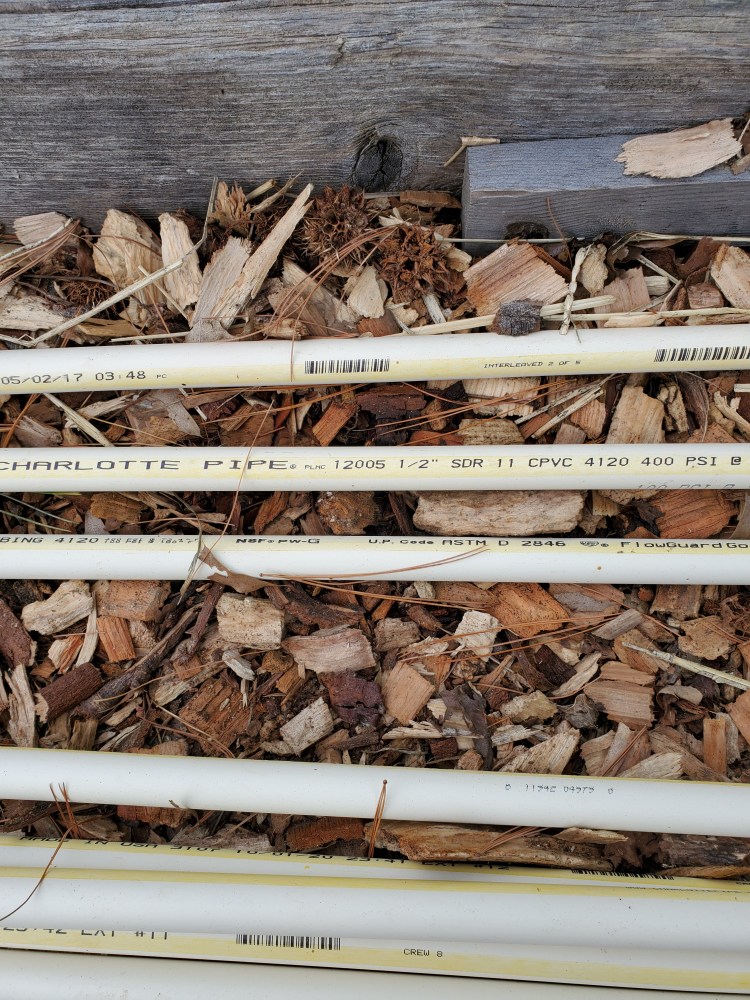
- Eight 1/2” ten foot long PVC tubes
- PVC clamps
- Plastic sheeting
- Two sets of hands
- One brain (being generous 😉)

Steps I followed:
- Gather supplies and bring them to my garden.
- Ask Cactus to hold opposite end of each PVC line.
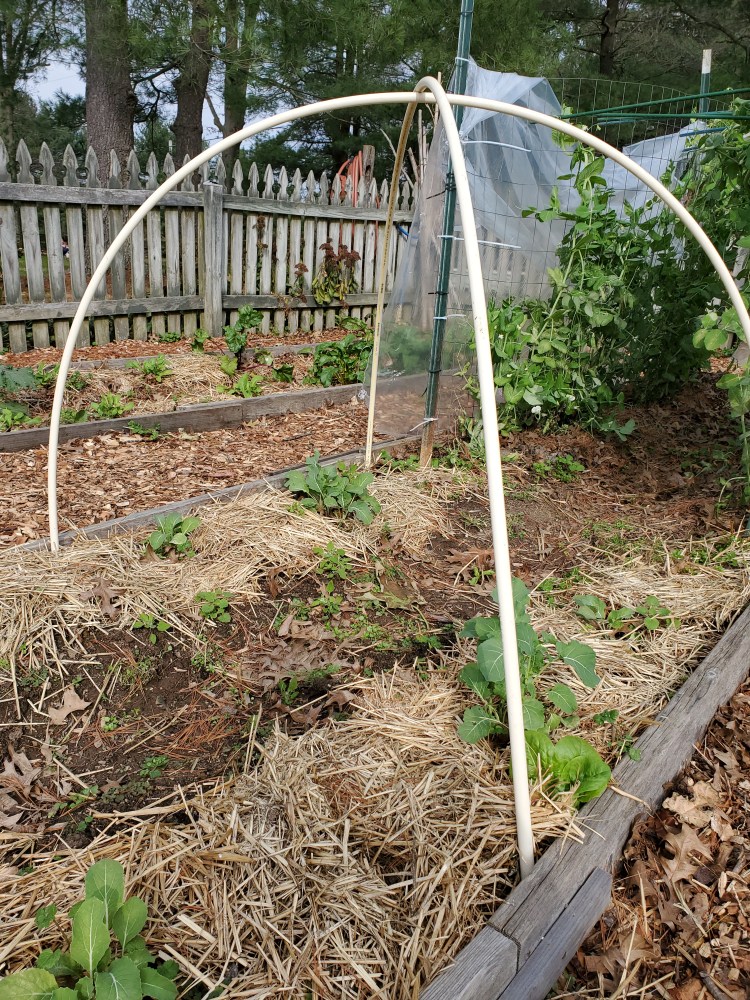
- At this point, as we were about to attach each end of the PVC to the row border with the above clips, Cactus suggested why not just push them into the ground and see if they will be secure enough.
- Ta-da, we saved ourselves the work of screwing and measuring and aligning, and were done in about 5 minutes.
- We aligned the PVC pipes to make ‘X’s’ thinking that would be stronger support than individual hoops.
- Overlay the plastic sheeting on top of the PVC tunnel.
- Secure with your choice of tomato clips, bricks, 2x4s. I laid 3 bricks down each side.


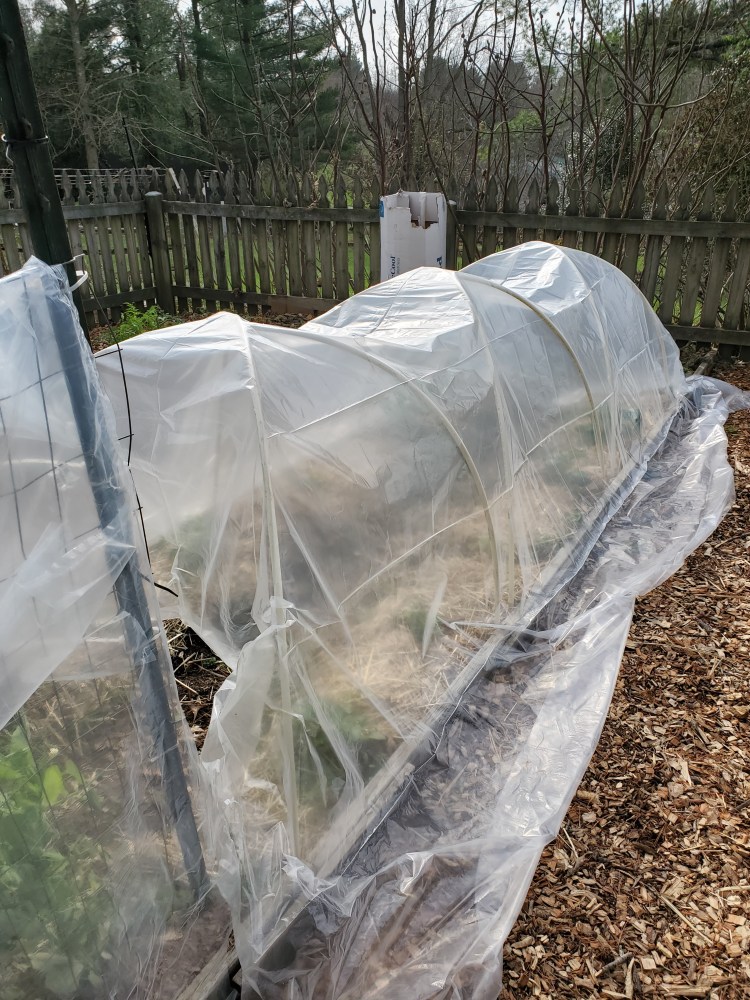
I’ll keep you posted on how effective this little tunnel is. I’m pretty sure the plastic sheeting is not the right material, but I’m recycling an item I have before buying something new.
