I love those days when I get on a roll in the garden. I used to make lists of what I planned to do each day. Or set out to work on a certain section or bed. Ha! That’s like telling God your plans.
Now I meander out and usually head for one spot with the full knowledge and acceptance that I will grab a bucket here, pick up a shovel there, do some weeding in that corner, travel down the hill to that other bed, and so on and so forth. You get the point. Now I just let my eye wander to wherever grabs its attention. I think that’s the whole point. Go where the wind blows you.
Here were a few things I tended to on a recent Spring day.
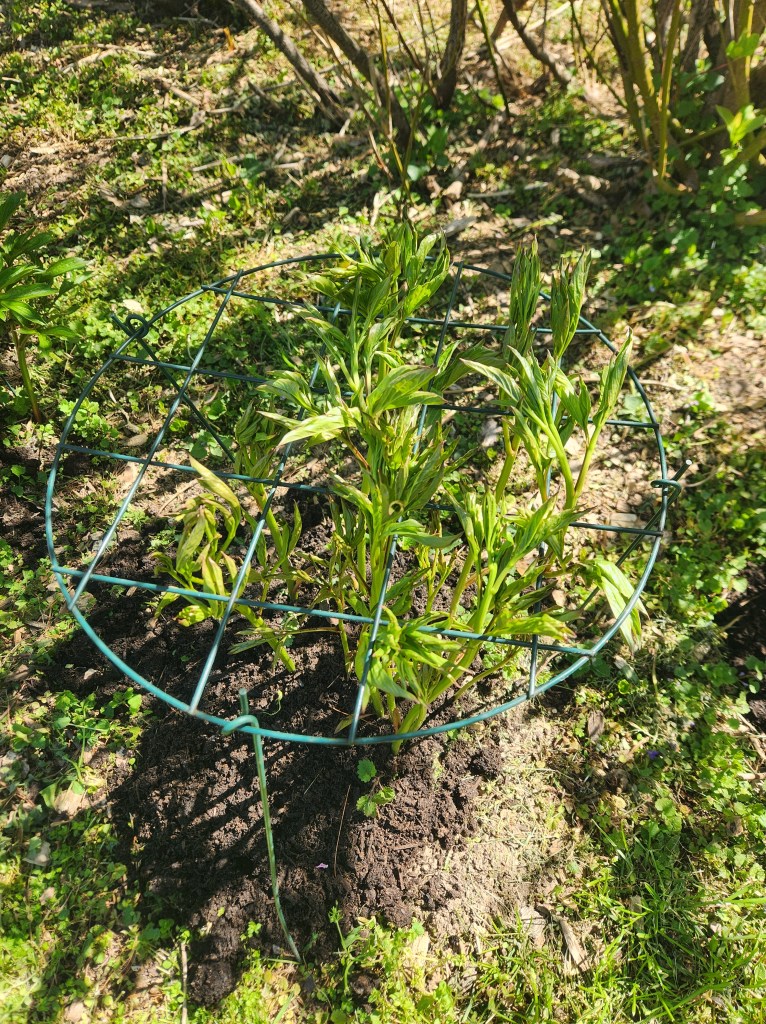
Set up my peony waffle supports
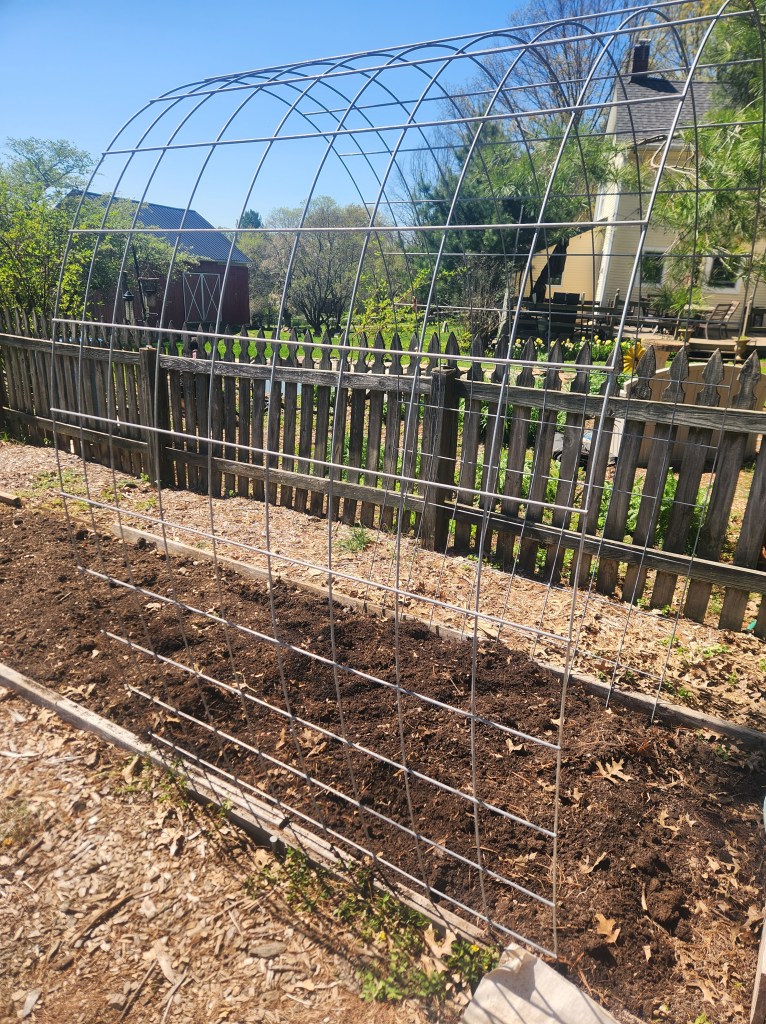
Installed a new bean trellis from cattle panel
Weeding the berry brambles (that’s always necessary)
Planted another succession of lettuce and spinach
Relocated a few perennials to different parts of the yard
It’s so much more enjoyable this way. The lists and the planning made it feel like a chore. This way, I just do what I feel like doing and happen to notice.
Anybody else realize that when you loosened your grip on something, it got done even better?
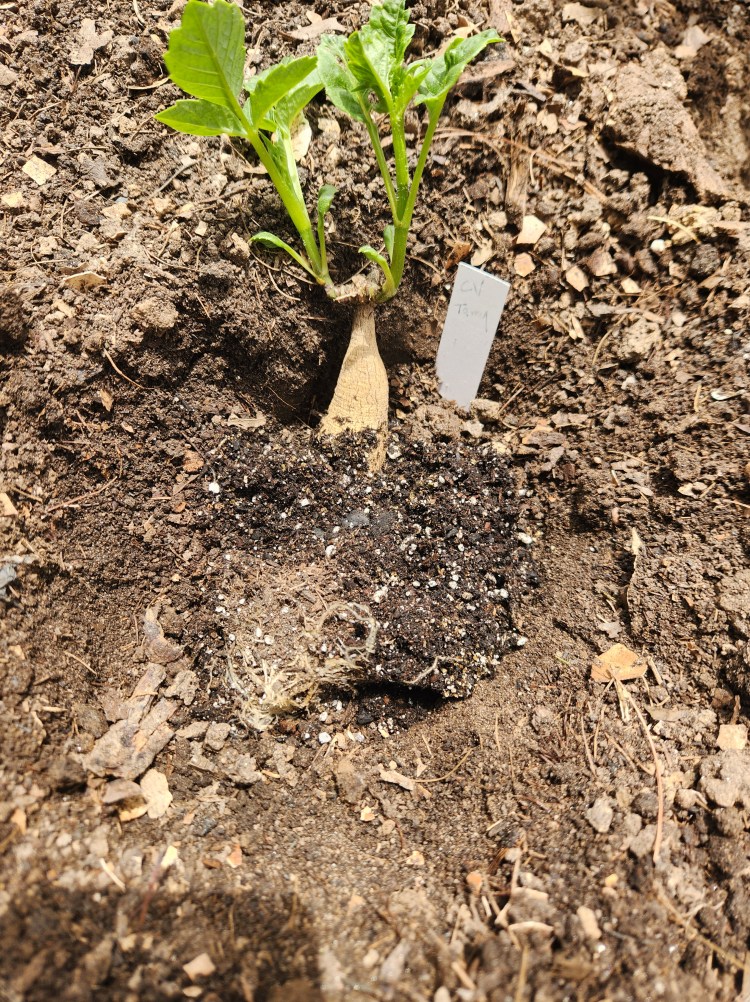
Planting my dahlia tubers was an exciting moment. I delayed it about a week longer simply because I wanted to do some more reading and be sure I wasn’t going to make any preventable mistakes.
The two biggest considerations with planting are spacing and depth. Spacing matters for all plants so that they aren’t competing for sun, moisture, and nutrients if planted too close together or the flip side that they are so far apart you didn’t maximize your space. Spacing is also important in terms of being able to install the right supports and staking to keep the plants upright. Dahlias should be 12” apart with 18” between rows. Because I planted them too close together last year, I literally laid out my tape measure and got to work.
For depth, they should be planted 4-6” down. I would say this varies based on the size of the tuber, where the eye is, how long the neck is, and whether it’s already sprouted. I lay mine flat or at about a 45° angle in the hole so they can sort of rest in a cradle. The main idea is just for them to NOT be vertical and for the eye to be facing upward because that is the direction it will grow.
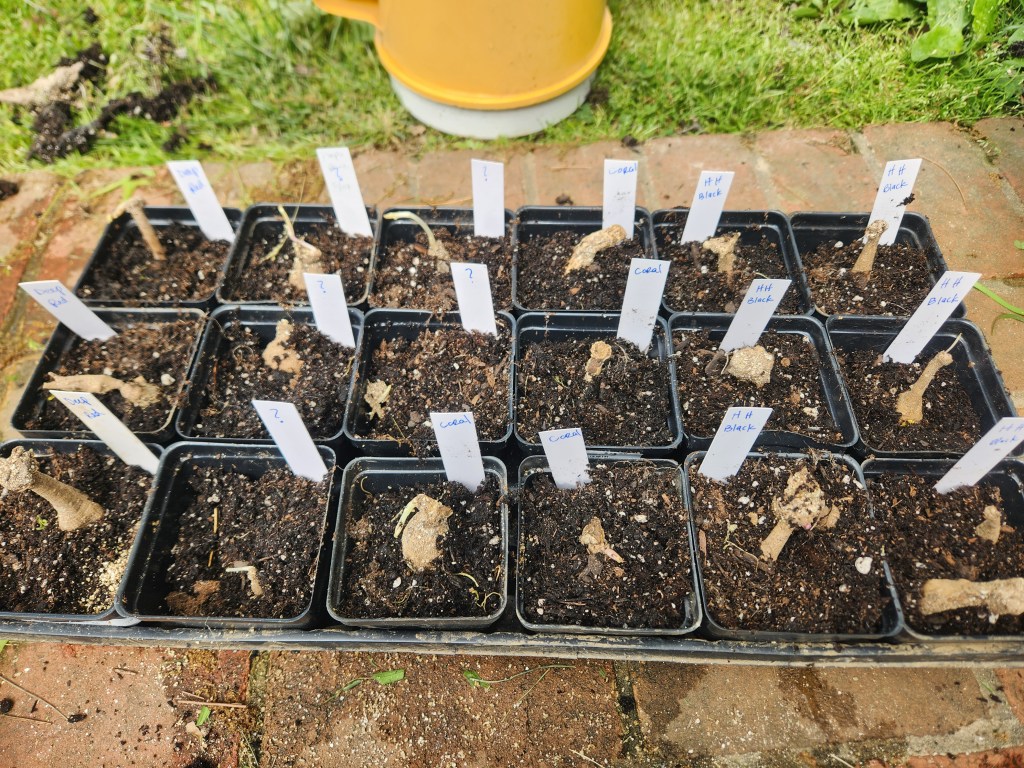
I dug my 34 holes in a zig zag pattern so that each plant isn’t directly across from another. Because I had labeled my tubers to the best of my ability (thought still managed to have four I could not identify), I attempted to plant them in an ombre fade from white to deep scarlet (listed below) but we’ll see if that actually pans out. That was the suggestion of my lovely Master Gardener friend.
CV Tamy (6)
Coral (2)
Colorado Classic (3)
Sonic Bloom (3)
Ivanetti (3)
HH Black (4)
Deep Red (3)
Wildcard??? (4)
Bishops Children (5)
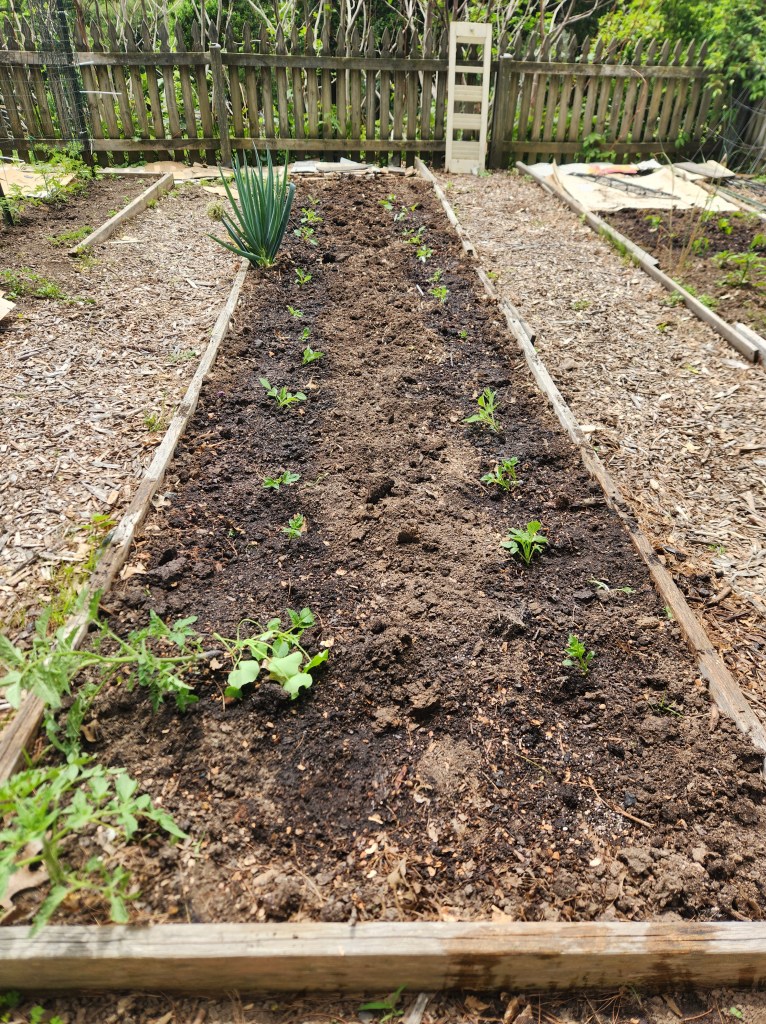
Once I got them all in the ground, I watered them in well. Like any plant, the first few days are really important for strong watering so the plant isn’t stressed and consistent watering thereafter. Next, I’ll be installing my drip irrigation in all three beds.
Remember how I added a cutting garden last year? I experimented with a wild flower direct sow section (AKA hands off), a perennial section, and then two designated 3×10 foot bed of intentionally planted, started indoors, known for growing easily cut flowers – largely zinnias, celosia, snapdragons, sunflowers, and dahlias. I had gomphrena and yarrow for fillers too.
I think I spent about $40 on dahlia tubers. Everything else was started from seed that I spent about $30 on. My goal was to sell ten bouquets for $15 each and make all my money back as well as cover the costs for my seeds this year. That didn’t happen. Hence why most businesses go under in the first 3-5 years. This year, having not met my goal last year, I’m committed to an even bigger goal. I’m going to sell $250 worth of flowers this summer June-August. Ha – I hope you are reading the irony here. If at first you don’t succeed, make it even harder 😊
I’d like to think I’m a bit more experienced and have solved for some of the challenges that slowed me down last year.
I’ve got soil blocking down (post coming soon!). Way more starts in way less space!
I’ve got a good handle on a two-week succession planting schedule.
I’ve got a plan for drip irrigation. Key word – PLAN.
I’ve realized the error of my ways in loving how pretty the flowers are and not wanting to cut them. They are getting harvested two days a week.
I’ve got buckets for storing flowers in cool water the moment I cut them, and I’ve got flower feed packets.
While I don’t want to play favorites with flowers – I LOVE THEM ALL – I am very excited about my dahlias this year. I knew they were a good investment because they multiply on their own. I borrowed Discovering Dahliasfrom the library over the winter and was fascinated with all the different types. I fell in love with the pom pom, water lily, and cactus styles. So I bought a six dahlia sampler kit from Hudson Valley Seed Company {perfect time to buy as they are on sale}. And then I bought four more from Connel’s Dahlias.
Last year, I really knew nothing other than watching some short videos on the Floret website. I pretty much only got them started correctly. I didn’t space them or support them adequately, and I certainly didn’t harvest them frequently enough. When there was beautiful blossom, I was so enamored by it I couldn’t cut it. Oh Dear! This year will be different.
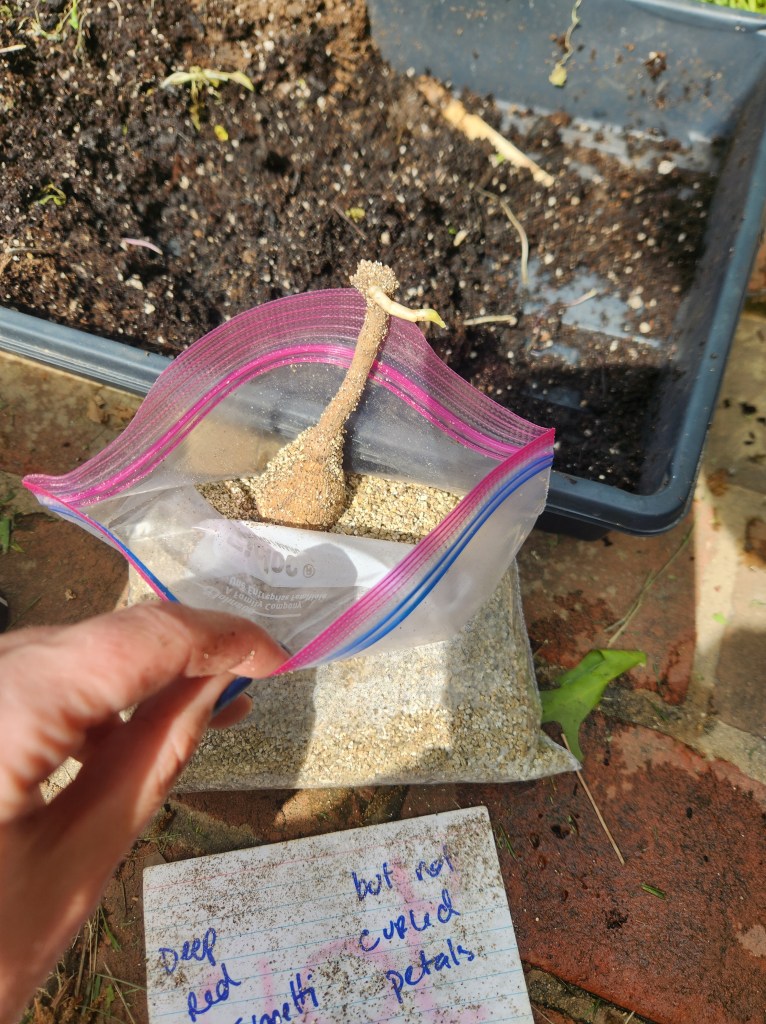
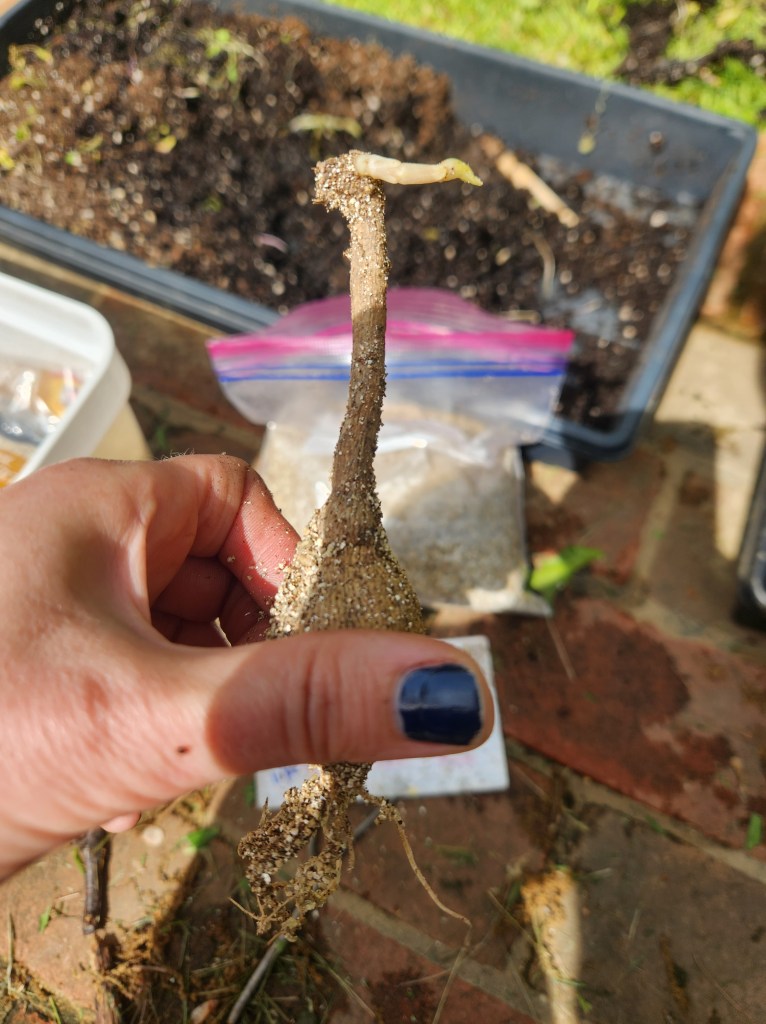
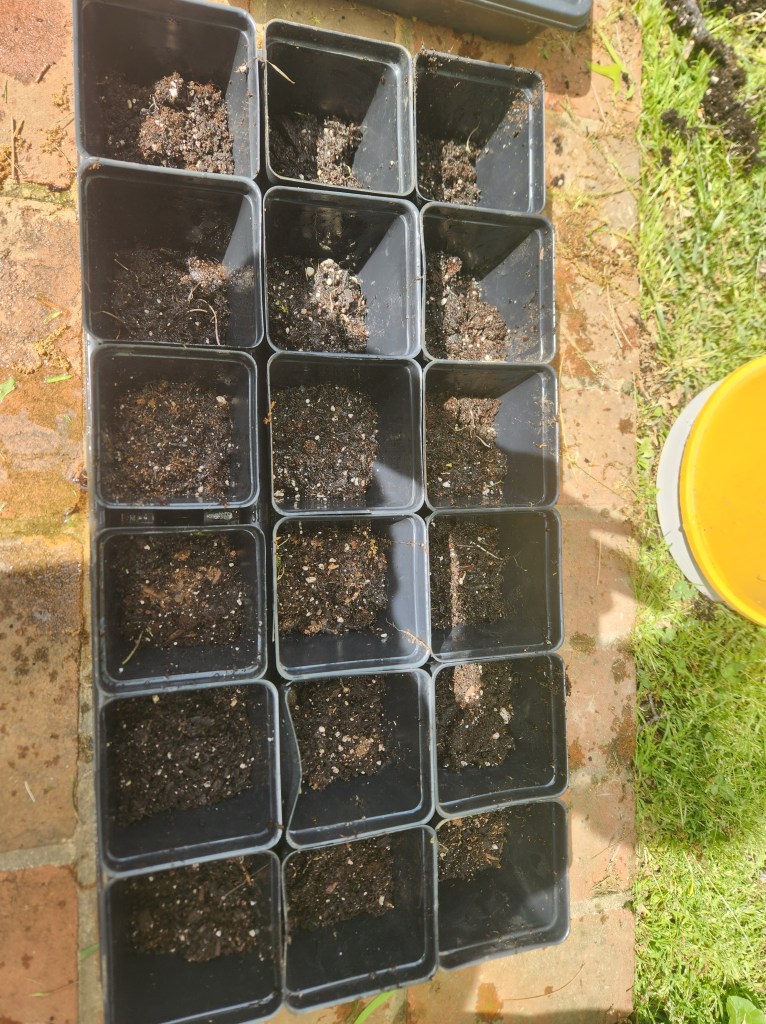
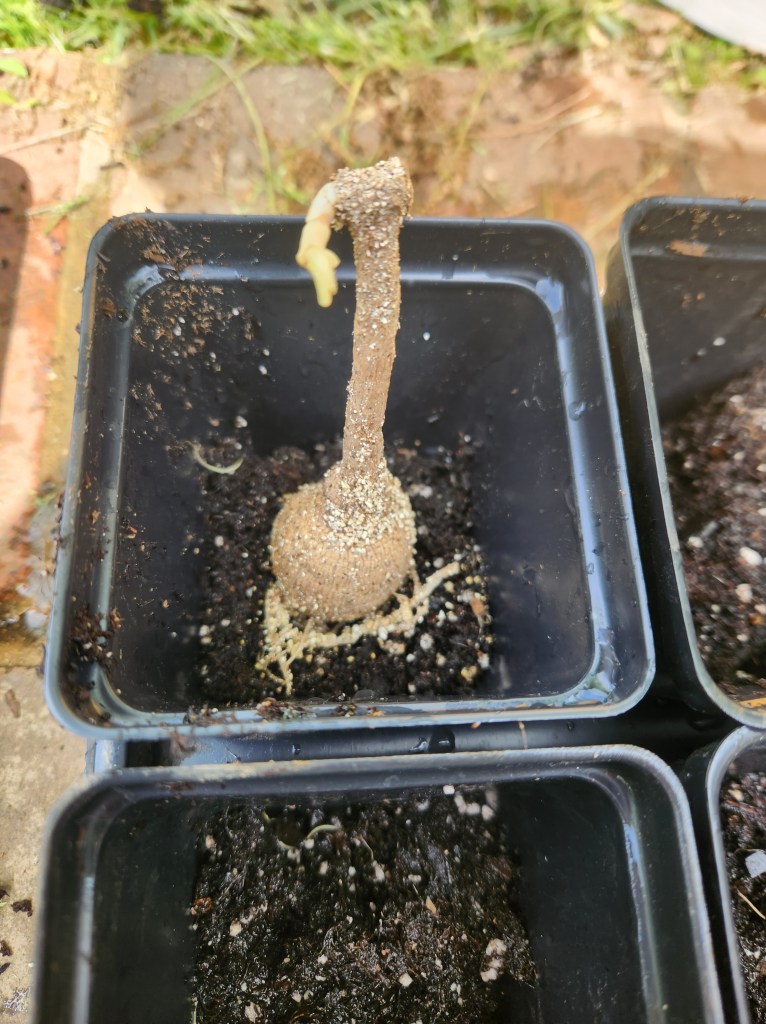
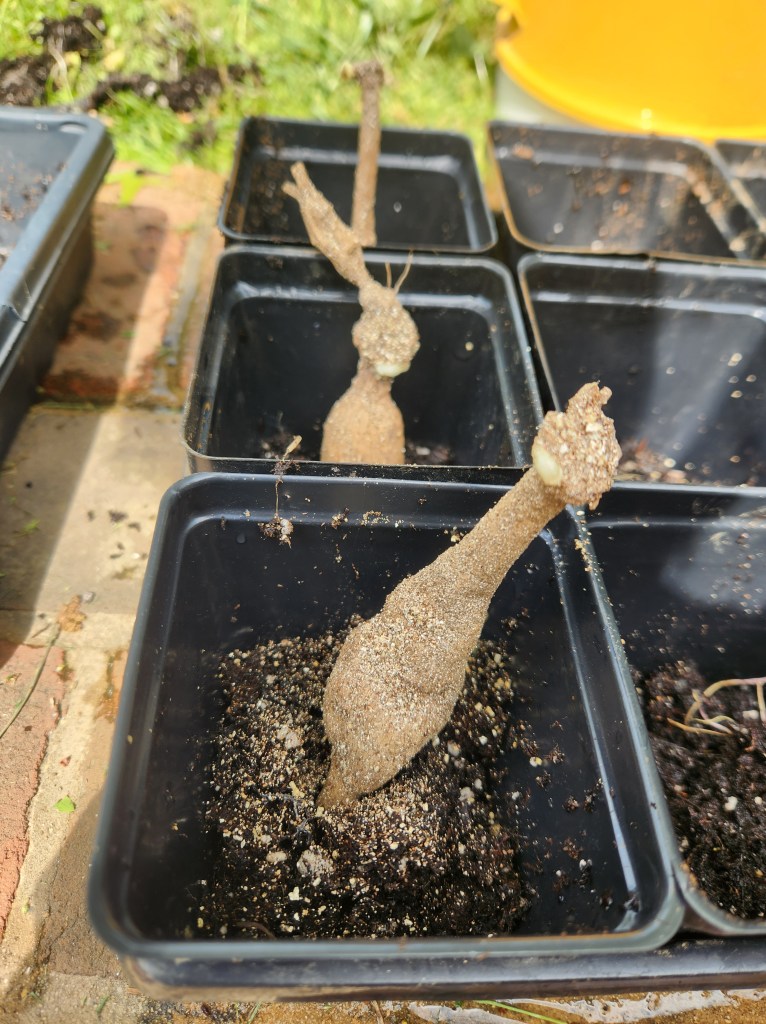
So I’m off to a strong start with more than 30 tubers. That’s what the ten I bought last year turned into. Yippee! The first stage is to get your tubers pre-sprouted as follows:
Fill a container with growing medium. I do a mix of 1/3 potting soil, 1/3 peat moss, and 1/3 vermiculite.
Nestle your tuber in so the neck and eye are exposed.
Label them as you go.
Keep them in a warm sunny place and keep the soil moist. Not wet, not dry, just moist. I have left mine outside from day one because I didn’t have room on my growing shelves.
Watch and wait…
Stay tuned, a post will be coming very soon on planting the tubers, setting up drip irrigation, and staking them correctly.
I turned the big 4-0 recently. Not sure how others feel about this milestone but it’s been surrounded with many mixed feelings that I won’t go into now. Little to do with the actual number and more with all the other reckonings I’m facing down that I didn’t think I would be dealing with at this age. Alas, it was a reason to gather people together, throw a party, sing some karaoke, and drink some drinks. Have the laughs I haven’t had in quite some time. To forget about the darkness of life. The questions life’s experiences pose without proffering an answer or explanation.
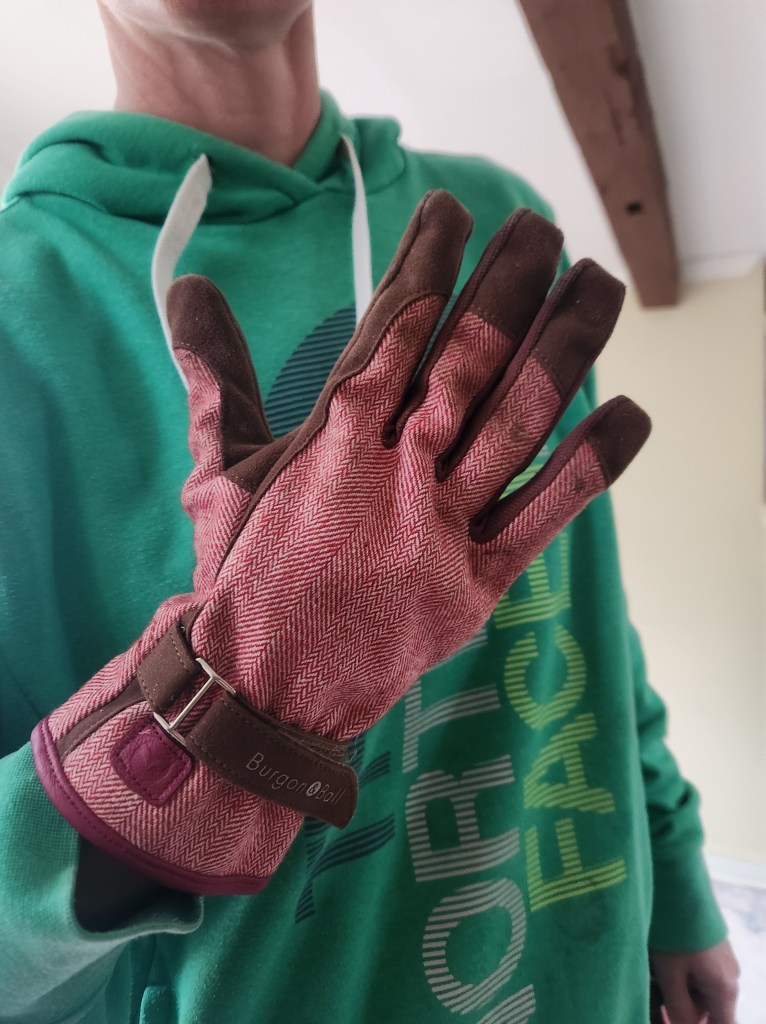
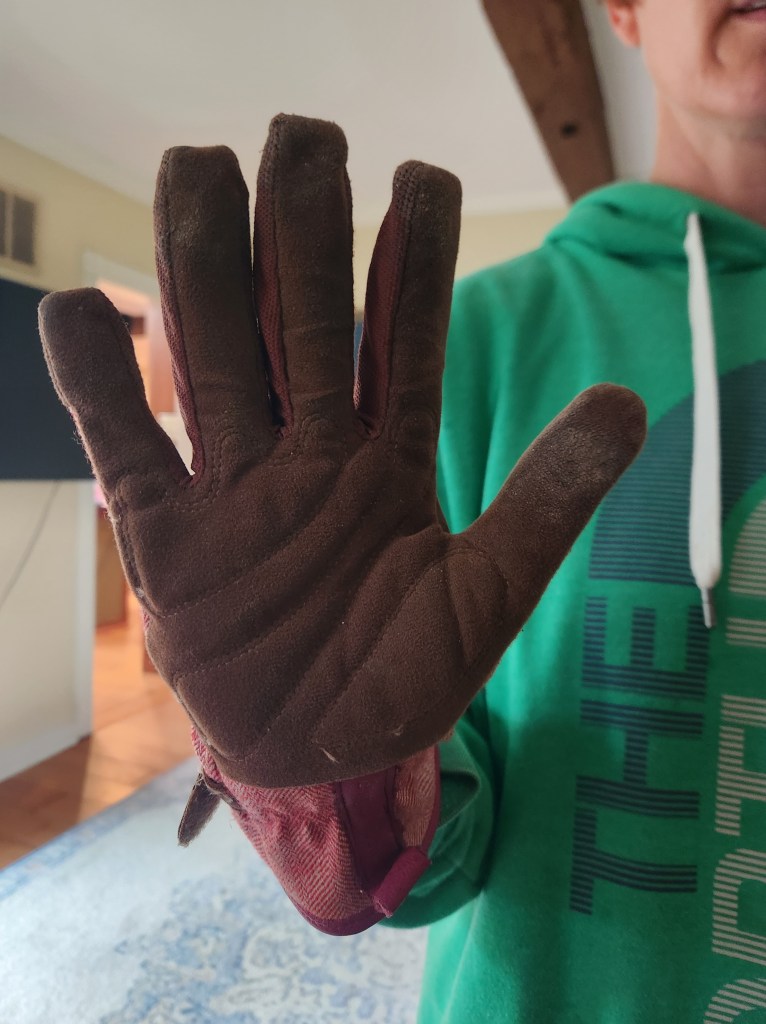
It was a fun night and people brought gifts. Yay! I didn’t ask them to, but they did. My request was “bring your singing voice.” I was serendipitously gifted a seed storage tin to go with this pair of Red Tweed Burgon and Ball gloves I received from my boss. Among countless positive things I can say about her, one of her many remarkable talents is gift giving. Either she is addicted to shopping – possible! – or she simply has a knack for distilling someone’s interests down to the essential ingredients and then has very specific ideas in mind when she peruses whatever shopping outlet she chooses.
I’ve been using the gloves for over a month (I’m irked by people who write a review the day they get something) and have these notes on their quality and functionality.
Great overall! I have not yet encountered a feature about them I don’t like.
Love the fabric on the back and leather on the palm. Looks nice on the outside and camouflages the dirt. Kind of like a mullet – business in the front, party in the back. The stitching is also good quality.
They dry really quickly. When I’m weeding in wet or damp soil, I usually feel like gloves stay wet the whole time. Not these. The moisture doesn’t really get through unless I accidentally spray myself with a hose. Which also means my hands don’t smell when I take them off.
Wrist adjusters – amazing! Keeps debris out very well.
Not so bulky that you can’t shove them in your back pocket or belt when you need to take them off for a minute.
My hands feel clean when I take them off. There isn’t a residue of dirt on my fingers or under my nails like other garden gloves.
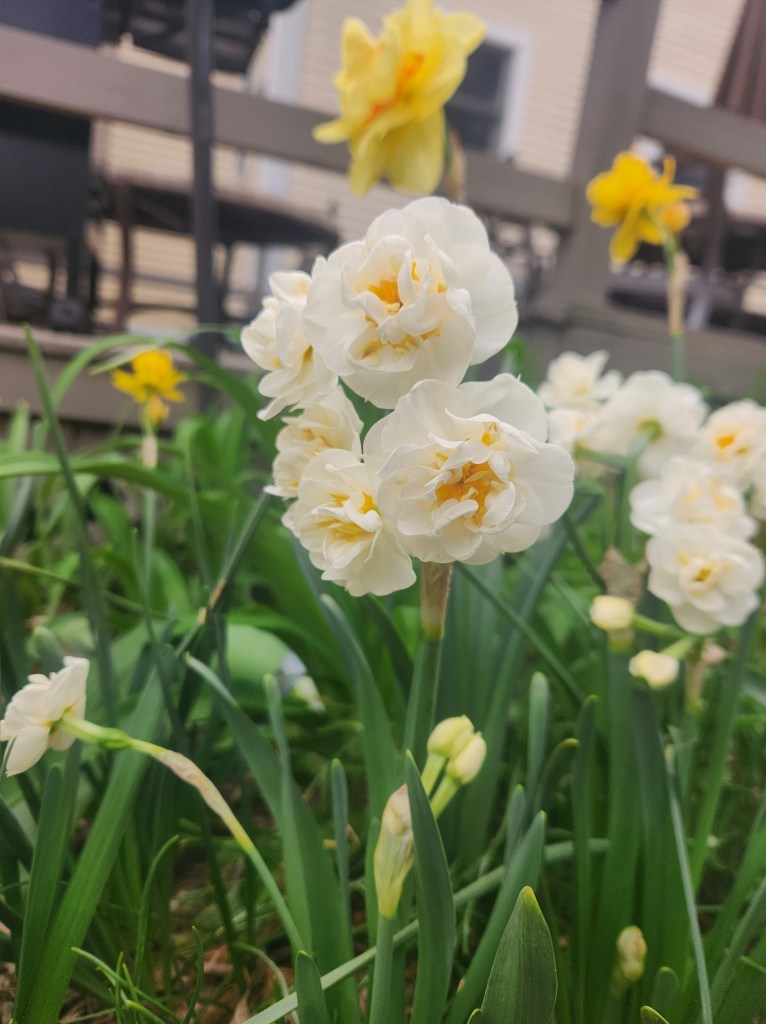
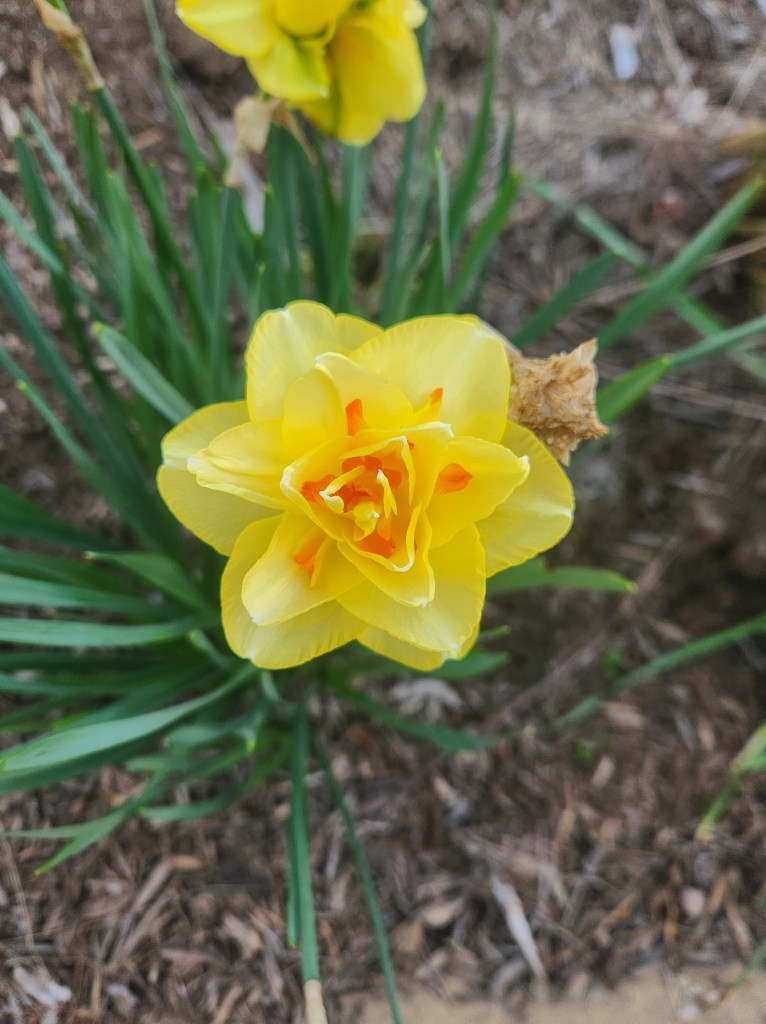
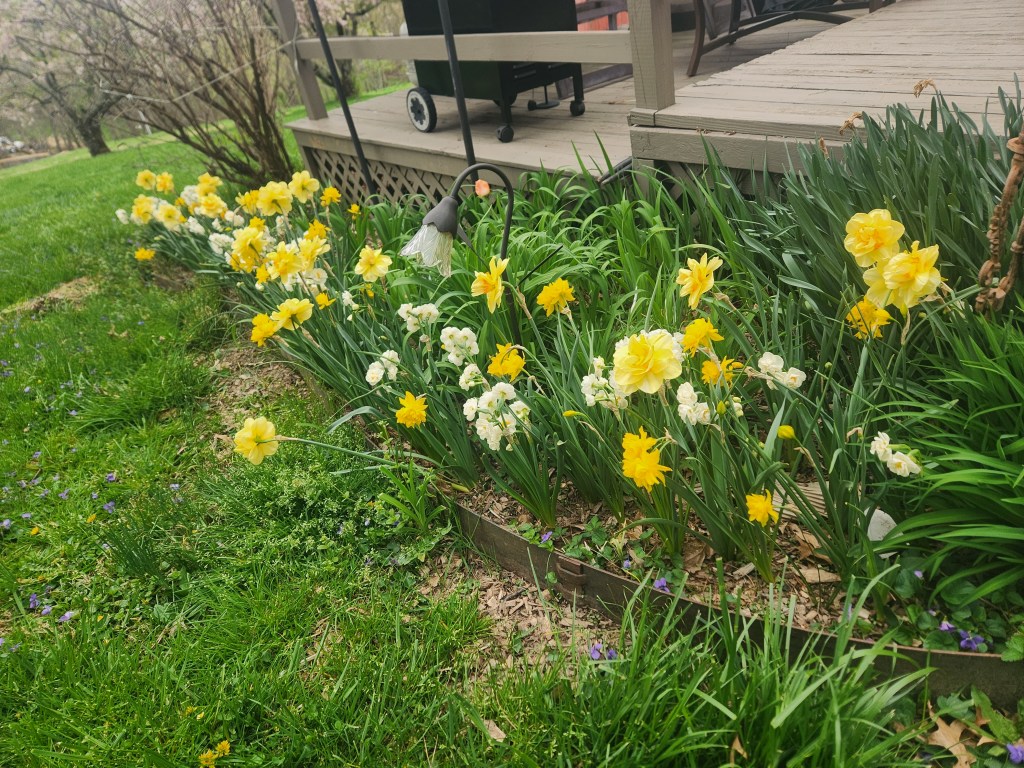
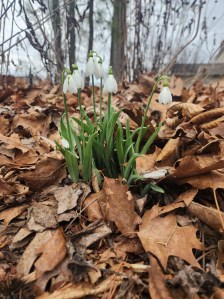
I believe I’ve said before that as I’ve grown older, Spring has become my favorite season. My daughter’s name means Spring and I love it. Obviously, I picked it 😉 As a child, I loved summer – playing in the pool, being out of school. Now I see the beauty and value in all the seasons. But there is something about the transition with everything coming to life, filling in the blank spaces of dormancy, and regaining color that renews and restores my spirit. Having just lost my Mom to cancer, that is more true now than ever.
In Spring we have Easter, Passover, and Ramadan all falling within a few weeks of each other. It’s clear that regardless of your unique religious beliefs, the major religious traditions all share this emphasis on rebirth and renewal. Hence why we have Spring cleaning. After many months indoors, it’s time to freshen things up, let the breeze blow, and feel the sunshine on your cheeks.
I hope you can get out and watch in wonder the new life unfolding all around. It’s inspiring and magnificent.
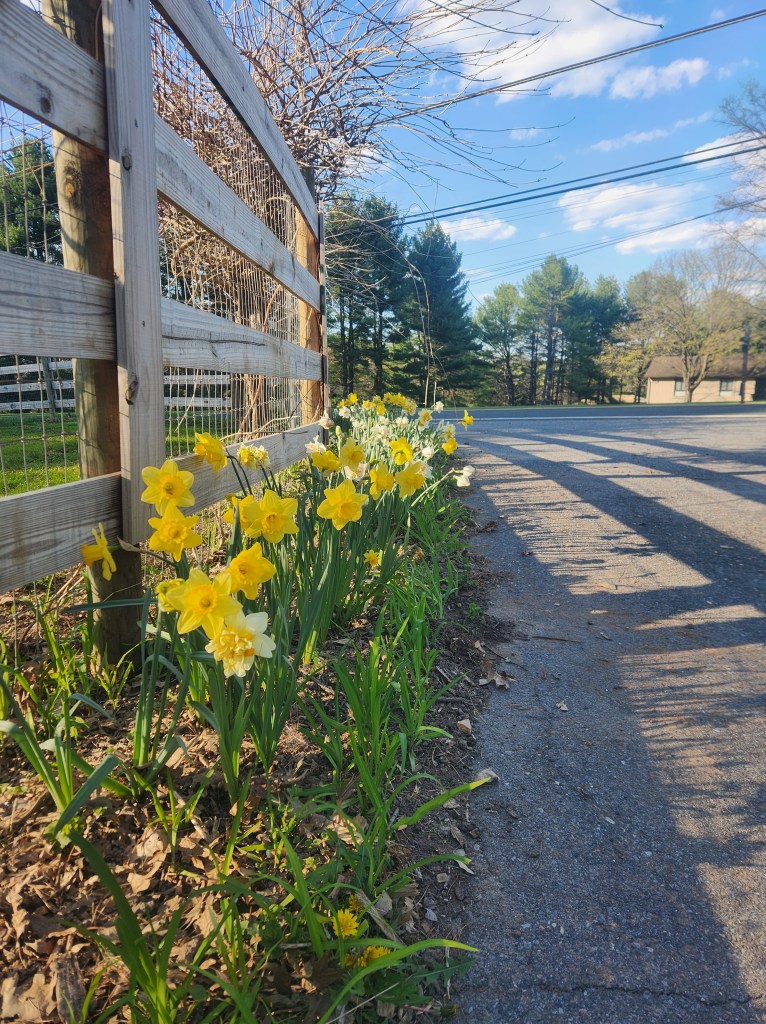
I have posted about starting peppers and tomatoes a few times over the last few years. It’s one of my favorite signs of spring after a long, dark, and cold winter. Like seeing the crocuses and daffodils pushing through the ground. You know brighter days are ahead.
Having successfully started my own plants for the last three years, I’ve learned a few tips and tricks and *seem* to have a pretty good system. I say that now… and next year will be an epic disaster I bet.
Seed Starting Tips and Tricks:
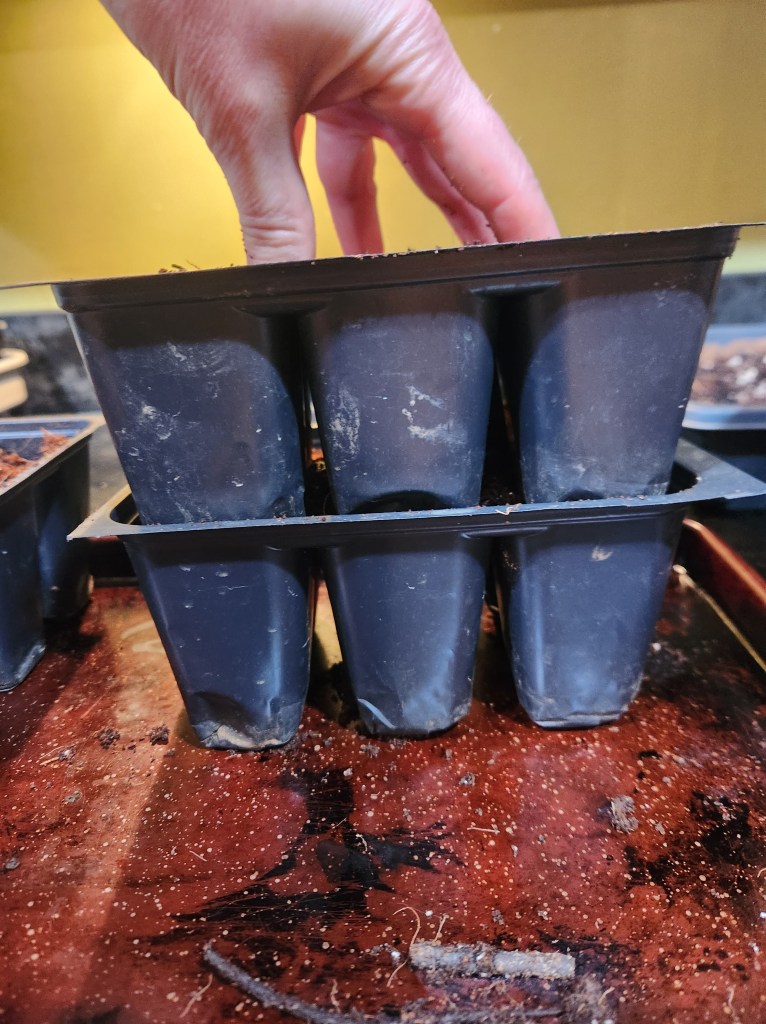
Wash your containers. Start with a clean slate. If anything was wonky last year with your plants, don’t let it carry over to this year.
Saturate your seed starting mix with boiling water. This helps protect against those pesky little gnats.
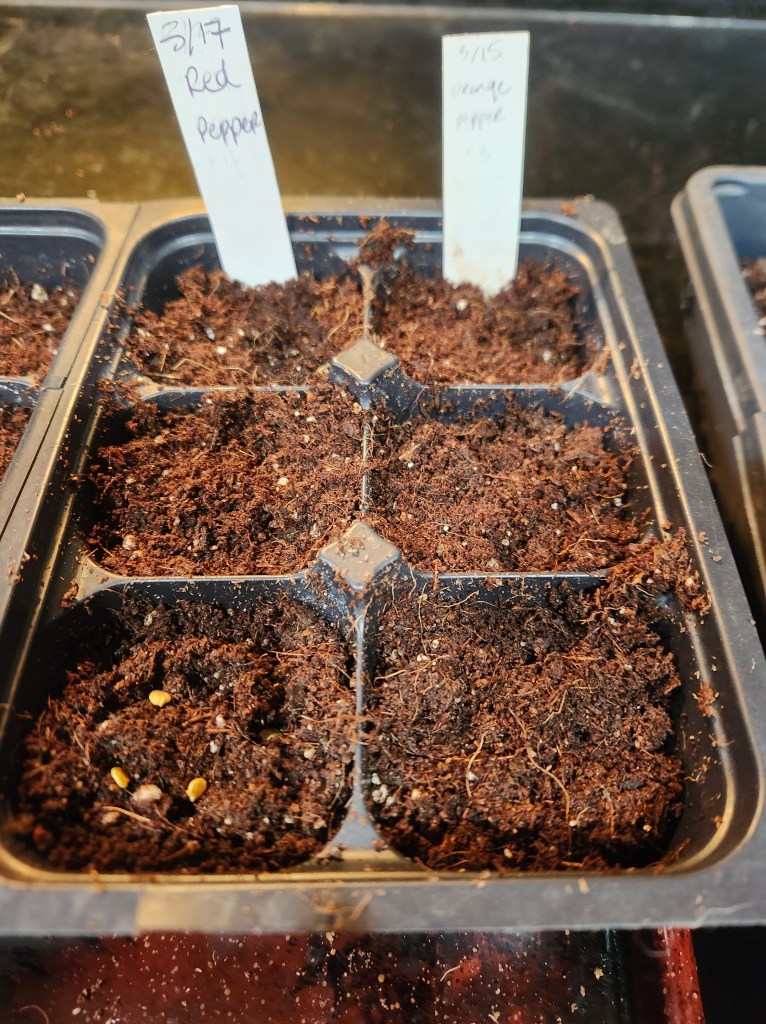
Start 3-4 seeds per cell if you are doing standard 6 packs. Don’t drop them all in one hole. Make a triangle or a diamond shape so you can get two or three strong plants per cell that aren’t on top of each other and can be more easily separated when it’s time to plant them outside.
Leave your starts alone for the first three days. Then give them 24 hours of light for four days (that’s Week 1). Give them 16 hours of light daily Week 2. And 12 hours of light daily for weeks 3 and 4.
Fertilize weakly every other week.
Now I’m going to write one massive disclaimer for all of this. What if you forget? What if your life is absolutely crazy and you don’t have time? What if you just don’t feel like starting and tending to pepper and tomato plants for three months in a part of your house that you’d rather designate for something else? What if you did start plants and all went to hell? TOTALLY FINE and UNDERSTANDABLE. Happens to ALL OF US. Go buy them instead. I’d just strongly encourage you to find high school doing a plant sale, a nature center doing a fundraiser, or the Mom and Pop nursery down the street and give them your money instead of a big box store.
Even for someone like me who intentionally avoids the news and social media, I’ve heard about microgreens as one of the latest super foods.I as at the local farmers’ market last fall when I saw a stand selling just small, essentially Ziploc sandwich-sized, bags of microgreens for upwards of $7 each. Yowza!
Up to that moment, I’d had exactly two experiences with this genre of green fluff lettuce confetti:
As a kid, my mom always included alfalfa sprouts on taco night. Call her ahead of the curve and ahead of her time, this was the 80s in Missouri. My dad was in the military and assigned to Ft. Leonard Wood and people lovingly called it “Ft. Lost in the Woods.” Knowing that, I have no idea how my mom decided sprouts were the thing to take taco night to the next level. I loved filling my hard, yellow tach shell to the brim with the white, hair-like sprouts with little green bulbs on the tips.
A few years back, I was into making ‘bowls’ for my work lunches. You know the trend of Buddha bowls or green bowls where it’s some grain like quinoa or brown rice, topped with sauteed veggies like kale, sweet potato, and mushrooms, and drizzled with some sort of goddess sauce. A co-worker of mine suggested adding sprouts to it so I started sprouting my own mung beans.
So when I saw this outrageously priced (IMHO) bag of microgreens, I thought “I can grow these for way less.” And I did (#MIM). Very easily. In case you’re wondering, yes, I bought them. Then immediately thought “why did I buy these?!?”
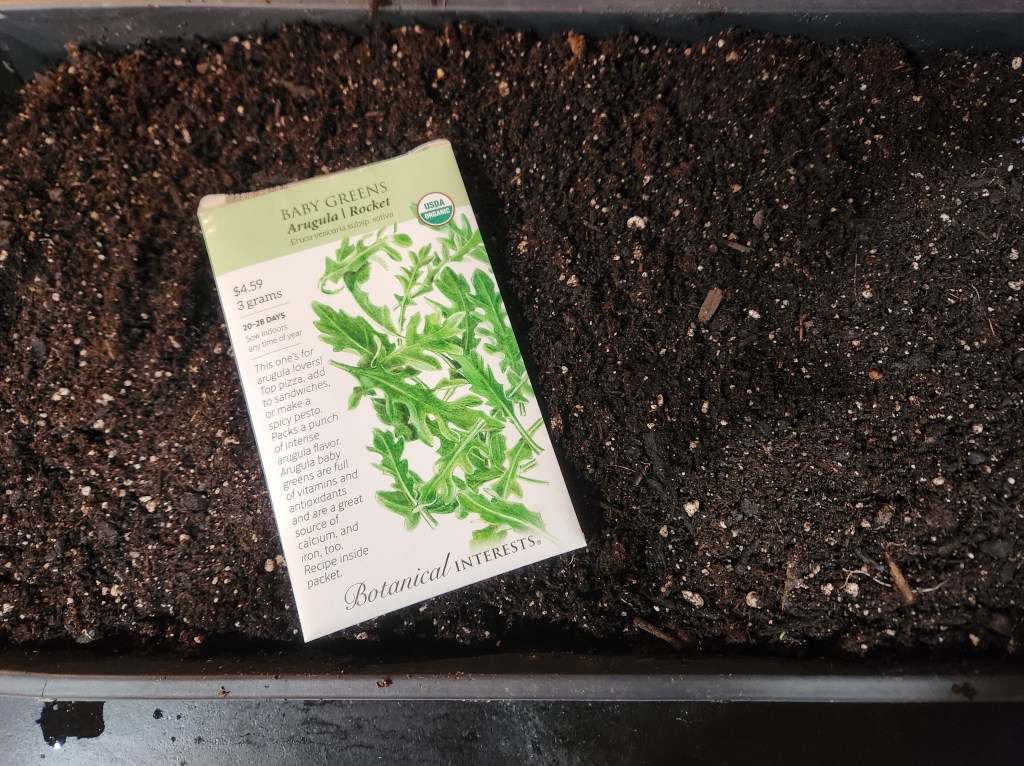
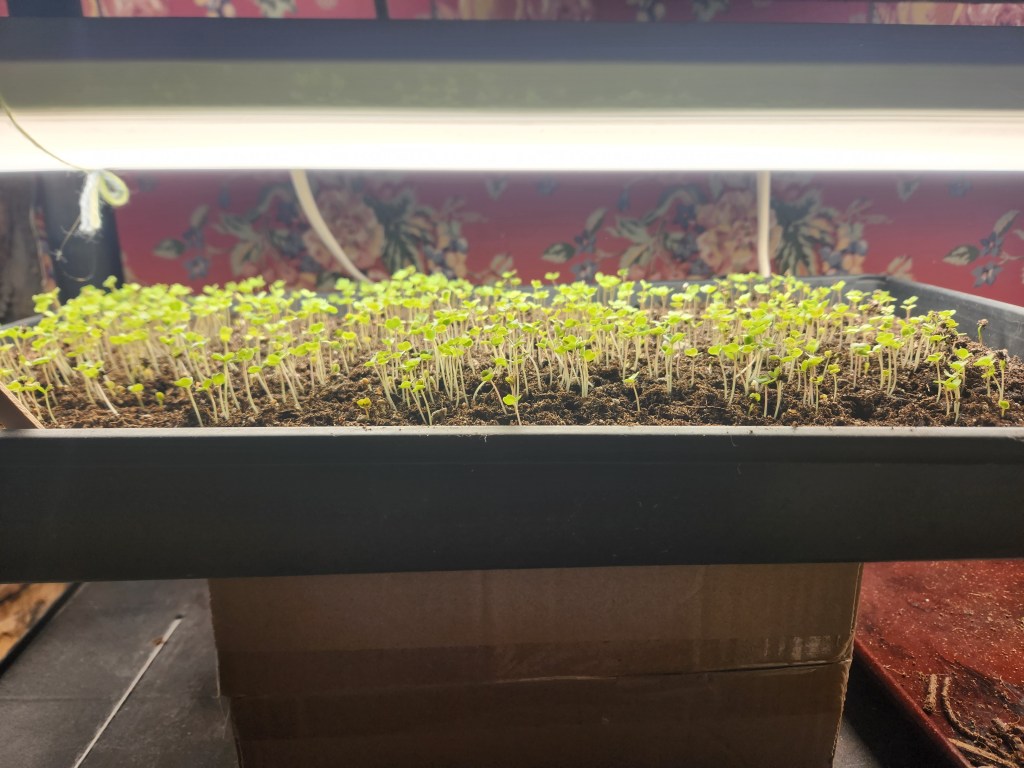
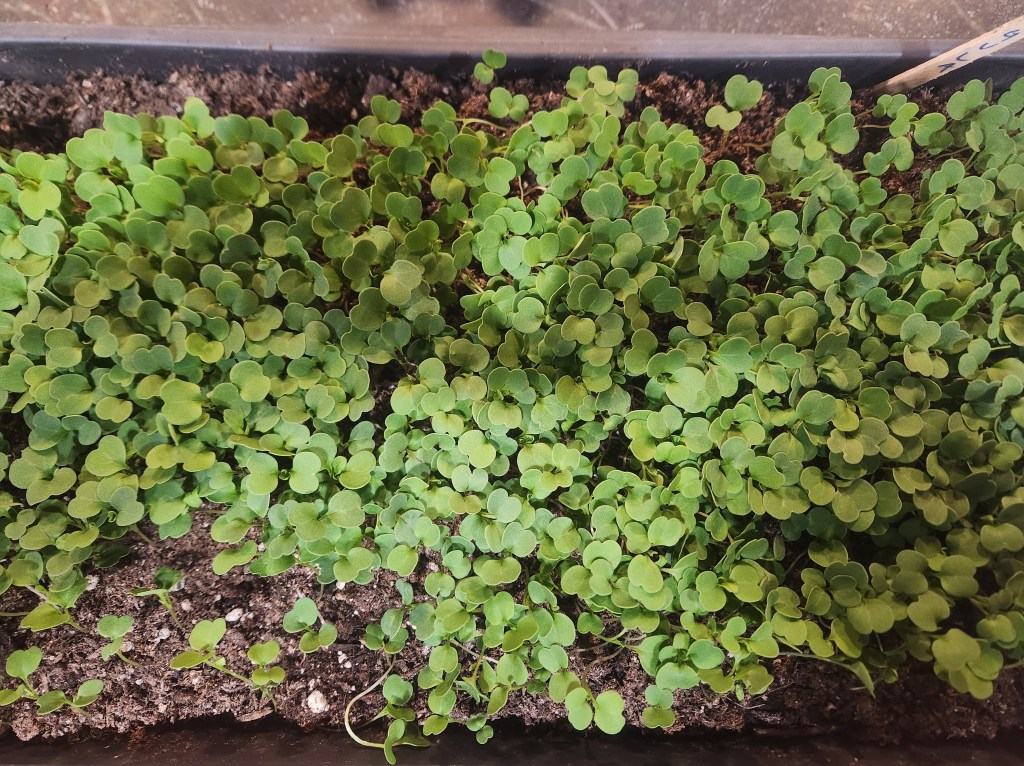
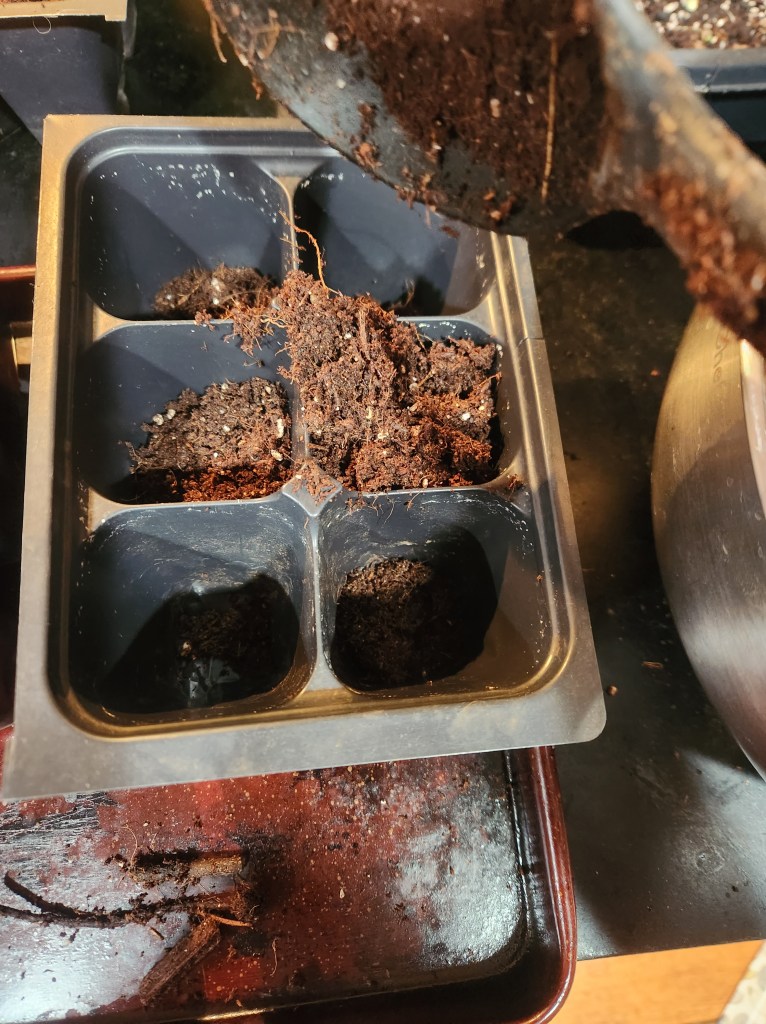
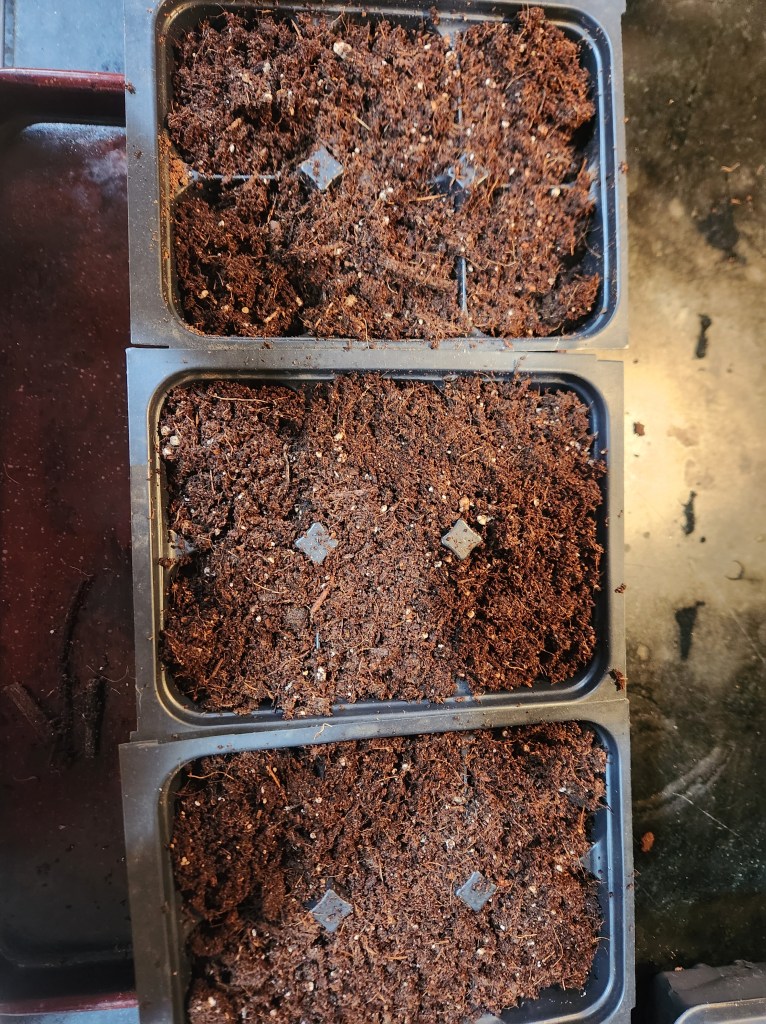
How to Grow Microgreens
Fill a tray with potting soil. Doesn’t need to be deep, like 1-2 inches. The size of the tray depends on how much you want to grow.
Sprinkle the entire surface with seeds. I grew arugula for this first stint.
Wait three days, then let the tray sit under grow lights. To save you some struggle, since my first attempt was an utter failure, the grow lights are essential. I put my tray in the sunniest, warmest room in my house and they just got too leggy and pathetic looking.
Within 10-14 days, you will have microgreens to fulfill all your heart’s desires.
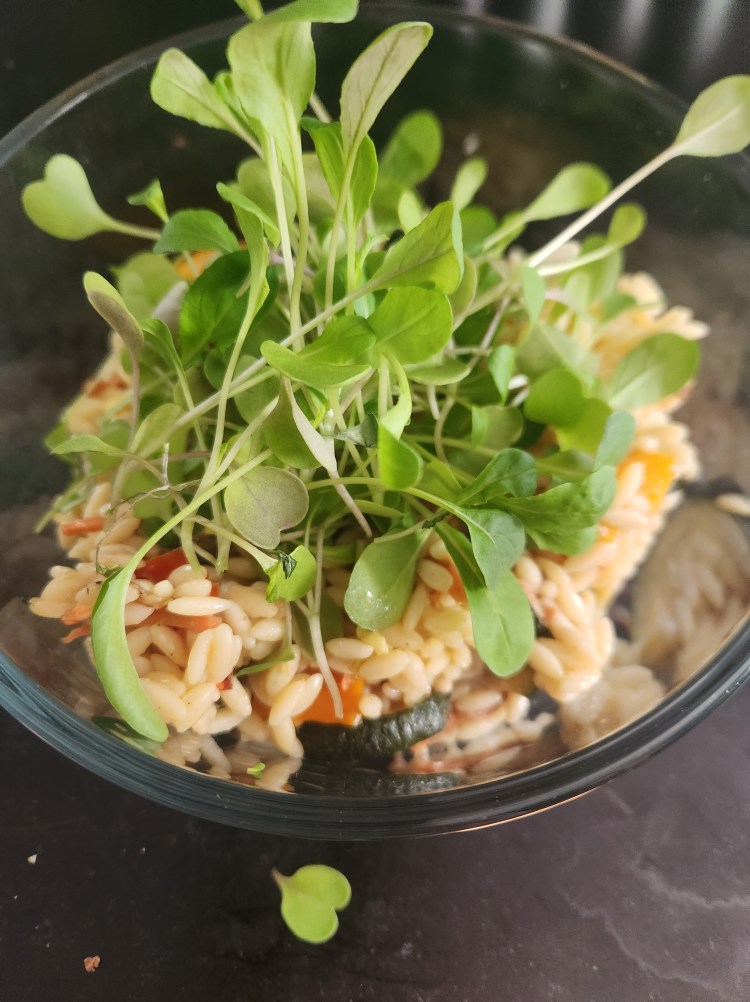
It was seriously that simple. Minimal effort and zero fuss. I’ve put the greens on grilled cheese sandwiches (any panini or regular sandwich would be delicious, I’m sure – just not PBJ), mixed in with regular lettuce salads, and used as a topper for an orzo or other pasta salad, and on pizza. My good friend had delivered this orzo salad with grilled veggies and the arugula greens were a super yummy addition.
I hope you appreciated the Spice Girls reference in this title. Who doesn’t miss a good 90s girl band? I recently had an opportunity to partake in some karaoke and not gonna lie, a Spice Girls song was on my list of contenders. Didn’t make the cut but it is a crowd pleaser. Alright, moving on…
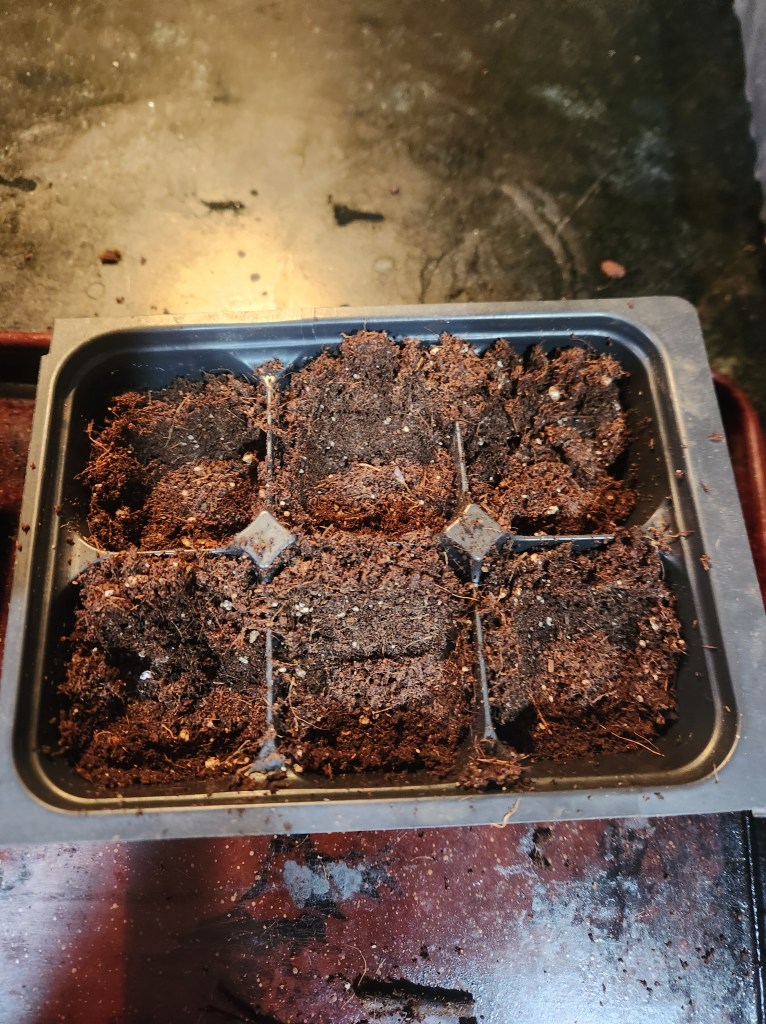
I’ve posted so many times about starting peppers that I honestly don’t think I have anything novel to add. You can read here and here about the tips and process I follow. It’s also good to remember that spicy peppers are pretty much the official start of seed starting season for me in Zone 7. Then every 2-3 weeks or so there are another couple veggies to start. I made this simpler calendar to follow that may or may not be helpful. I just found all the charts that list “start 2-3 weeks before your last frost” were not that easy to actually apply on a weekly basis. I wanted to know in biweekly increments what I should start and not have to do a ton of math every time.
If I had to list my top 5 ‘Do’s’ for starting peppers, they would be:
Wash your supplies well in soapy water. You don’t want any remnants from last year’s plants.
Pick a good seed starting mix. I had tons of gnats last year with the Burpee mix that were quite annoying in my home office. As much as it pains me to use the Miracle Gro mix, I’m using it.
Plant 3-4 seeds per cell to be sure you achieve your desired germination rate. It’s disappointing to plant two six packs because you want 12 jalapeno pepper plants and only 8 germinate. You can always thin them later.
After the first 2 weeks, I use a ‘feed weakly weekly’ approach. To keep track, I only fertilize on Fridays (lots of memory tricks here).
Don’t overwater. Wait for the soilless mix to be light brown before bottom watering. Fill your tray about 1/4 full and let the plants soak up as much as they can for 20 minutes.
My kids have been watching Mary Poppins lately. Do everyone’s kids pick a movie and just watch it so many times you can’t stand it? I did that as a kid so I sort of understand. But gee whiz.
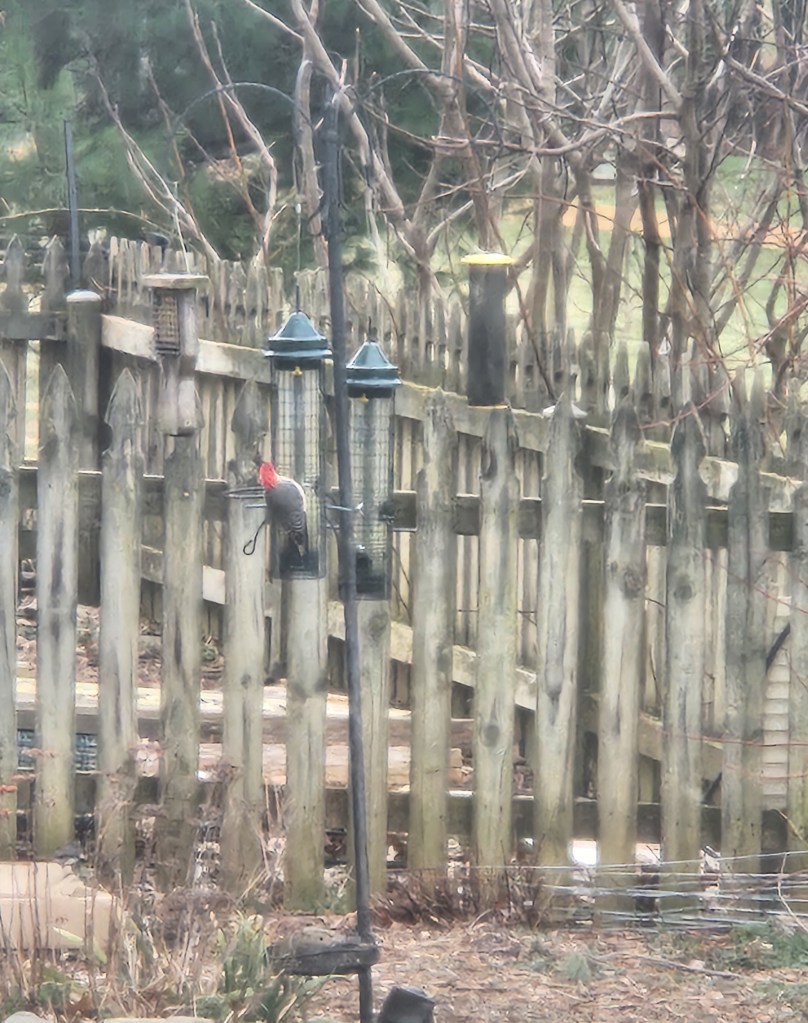
In any case, who doesn’t love the song Feed the Birds? And now is precisely the time of year we need to be feeding the birds and helping them out.
Over the last few years I’ve purchased two of these squirrel buster bird feeders and have to say I am quite impressed with them. I was gifted one by my boss as well that is even snazzier. And at some point last year I bought this window bird feeder that I simply find incredible. It’s like I’m in my very own national geographic special every single day. I can honestly say I never knew that birds hold seeds with their little feet to eat them. Did you?
Anyway, I think you get the point. I have developed a love and appreciation for birds that I never expected to. I love hearing their songs and seeing their beautiful feather patterns.
And if you are a gardener or homesteader, attracting birds to your property is a huge benefit. They eat bugs, weed seeds, certain pests, and they can help pollinate. The type of bird seed you buy doesn’t really matter that much. Just ask at your local nature store what they recommend. The only warning I have is to please put the feeders high enough up so that you aren’t luring birds to their death by a cat lurking below.
It’s seed season. January can be a bit blah from a weather standpoint. Gray days, whipping winds, dark mornings. But thinking about and planning your seedlings can bring a little sunshine.
This year I’ve had the most catalogs show up in my mailbox. Ordinarily, I can’t pass up the temptation to order at least a few packs from each supplier. The glossy pages and photos are just too beautiful to pass up. But I’m pretty proud of how sensible I have stayed on the veggie front (flowers are another story so don’t ask).
While this is mostly an exciting process, it can be a bit overwhelming to start thinking about what you need to start in February and March to get the harvest you want later in the year.
To avoid the overwhelm, here are a few tips.
Take inventory of the seeds you already have. If you aren’t keeping them organized in a photo album, binder with plastic sheet protectors, or one of these storage boxes, you aren’t doing yourself any favors. There are many different ways to organize your seeds so do whatever makes sense to you – alphabetical, cool vs warm, etc. The key here is to just do it.
Discard the seeds in your compost that were a flop last year. Flop is loosely defined in my book – didn’t germinate well, took too much effort to grow, didn’t like the taste, or any combination.
Think about what produce you buy most often at the grocery store each week and over the course of a month. Could you grow any of this yourself and make a dent in your spending? My suggestion would be salad ingredients, like cherry tomatoes, cucumbers, carrots and lettuces. You can’t go wrong with green beans, fresh herbs and leafy greens either.
Try something new to challenge yourself. Go with something that should work well in your growing zone – a spicy pepper, a wonky eggplant, a crazy crucifer. It’s all learning and you may find a new favorite.
Most importantly, don’t go crazy. If it helps to rein yourself in, I’d go with 5-7 cool crops and 5-7 warm crops. You want to enjoy going out to the garden every day, not dread it.
Lastly, don’t forget the flowers. You won’t regret a boarder of sunflowers, zinnias at your entrance, or some celosia as book ends on one of your beds. And the impact on your harvest will be noticeable.