Anybody else ready to hibernate? I’m slowly putting things away and tidying up. It makes me happy to see that being a bit lazy has actually been to my benefit. I know some people will pull out their plants as soon as the last piece of fruit ripens or the first frost threatens. I’m a little more of the ‘wait and see’ mindset and like to see what happens. There is always a lesson to learn or observe.
As I was meandering around this past weekend, I got another handful of jalapenos and saw my beautiful okra plants had gone to seed. A reminder that all seasons of life are beautiful and have purpose. It’s easy to focus on the flashy and exciting times, but the slow stillness is essential to a complete cycle. Yin and Yang. I guess the goal is to transition smoothly through these ups and downs.
As you’ll read in my 2021 lessons, okra is one of my unsuspecting MVPs. A beautiful plant, a surprising standout in the vegetable category, it creates the perfect canopy for shade loving lettuces and produces an immense harvest with very little effort.
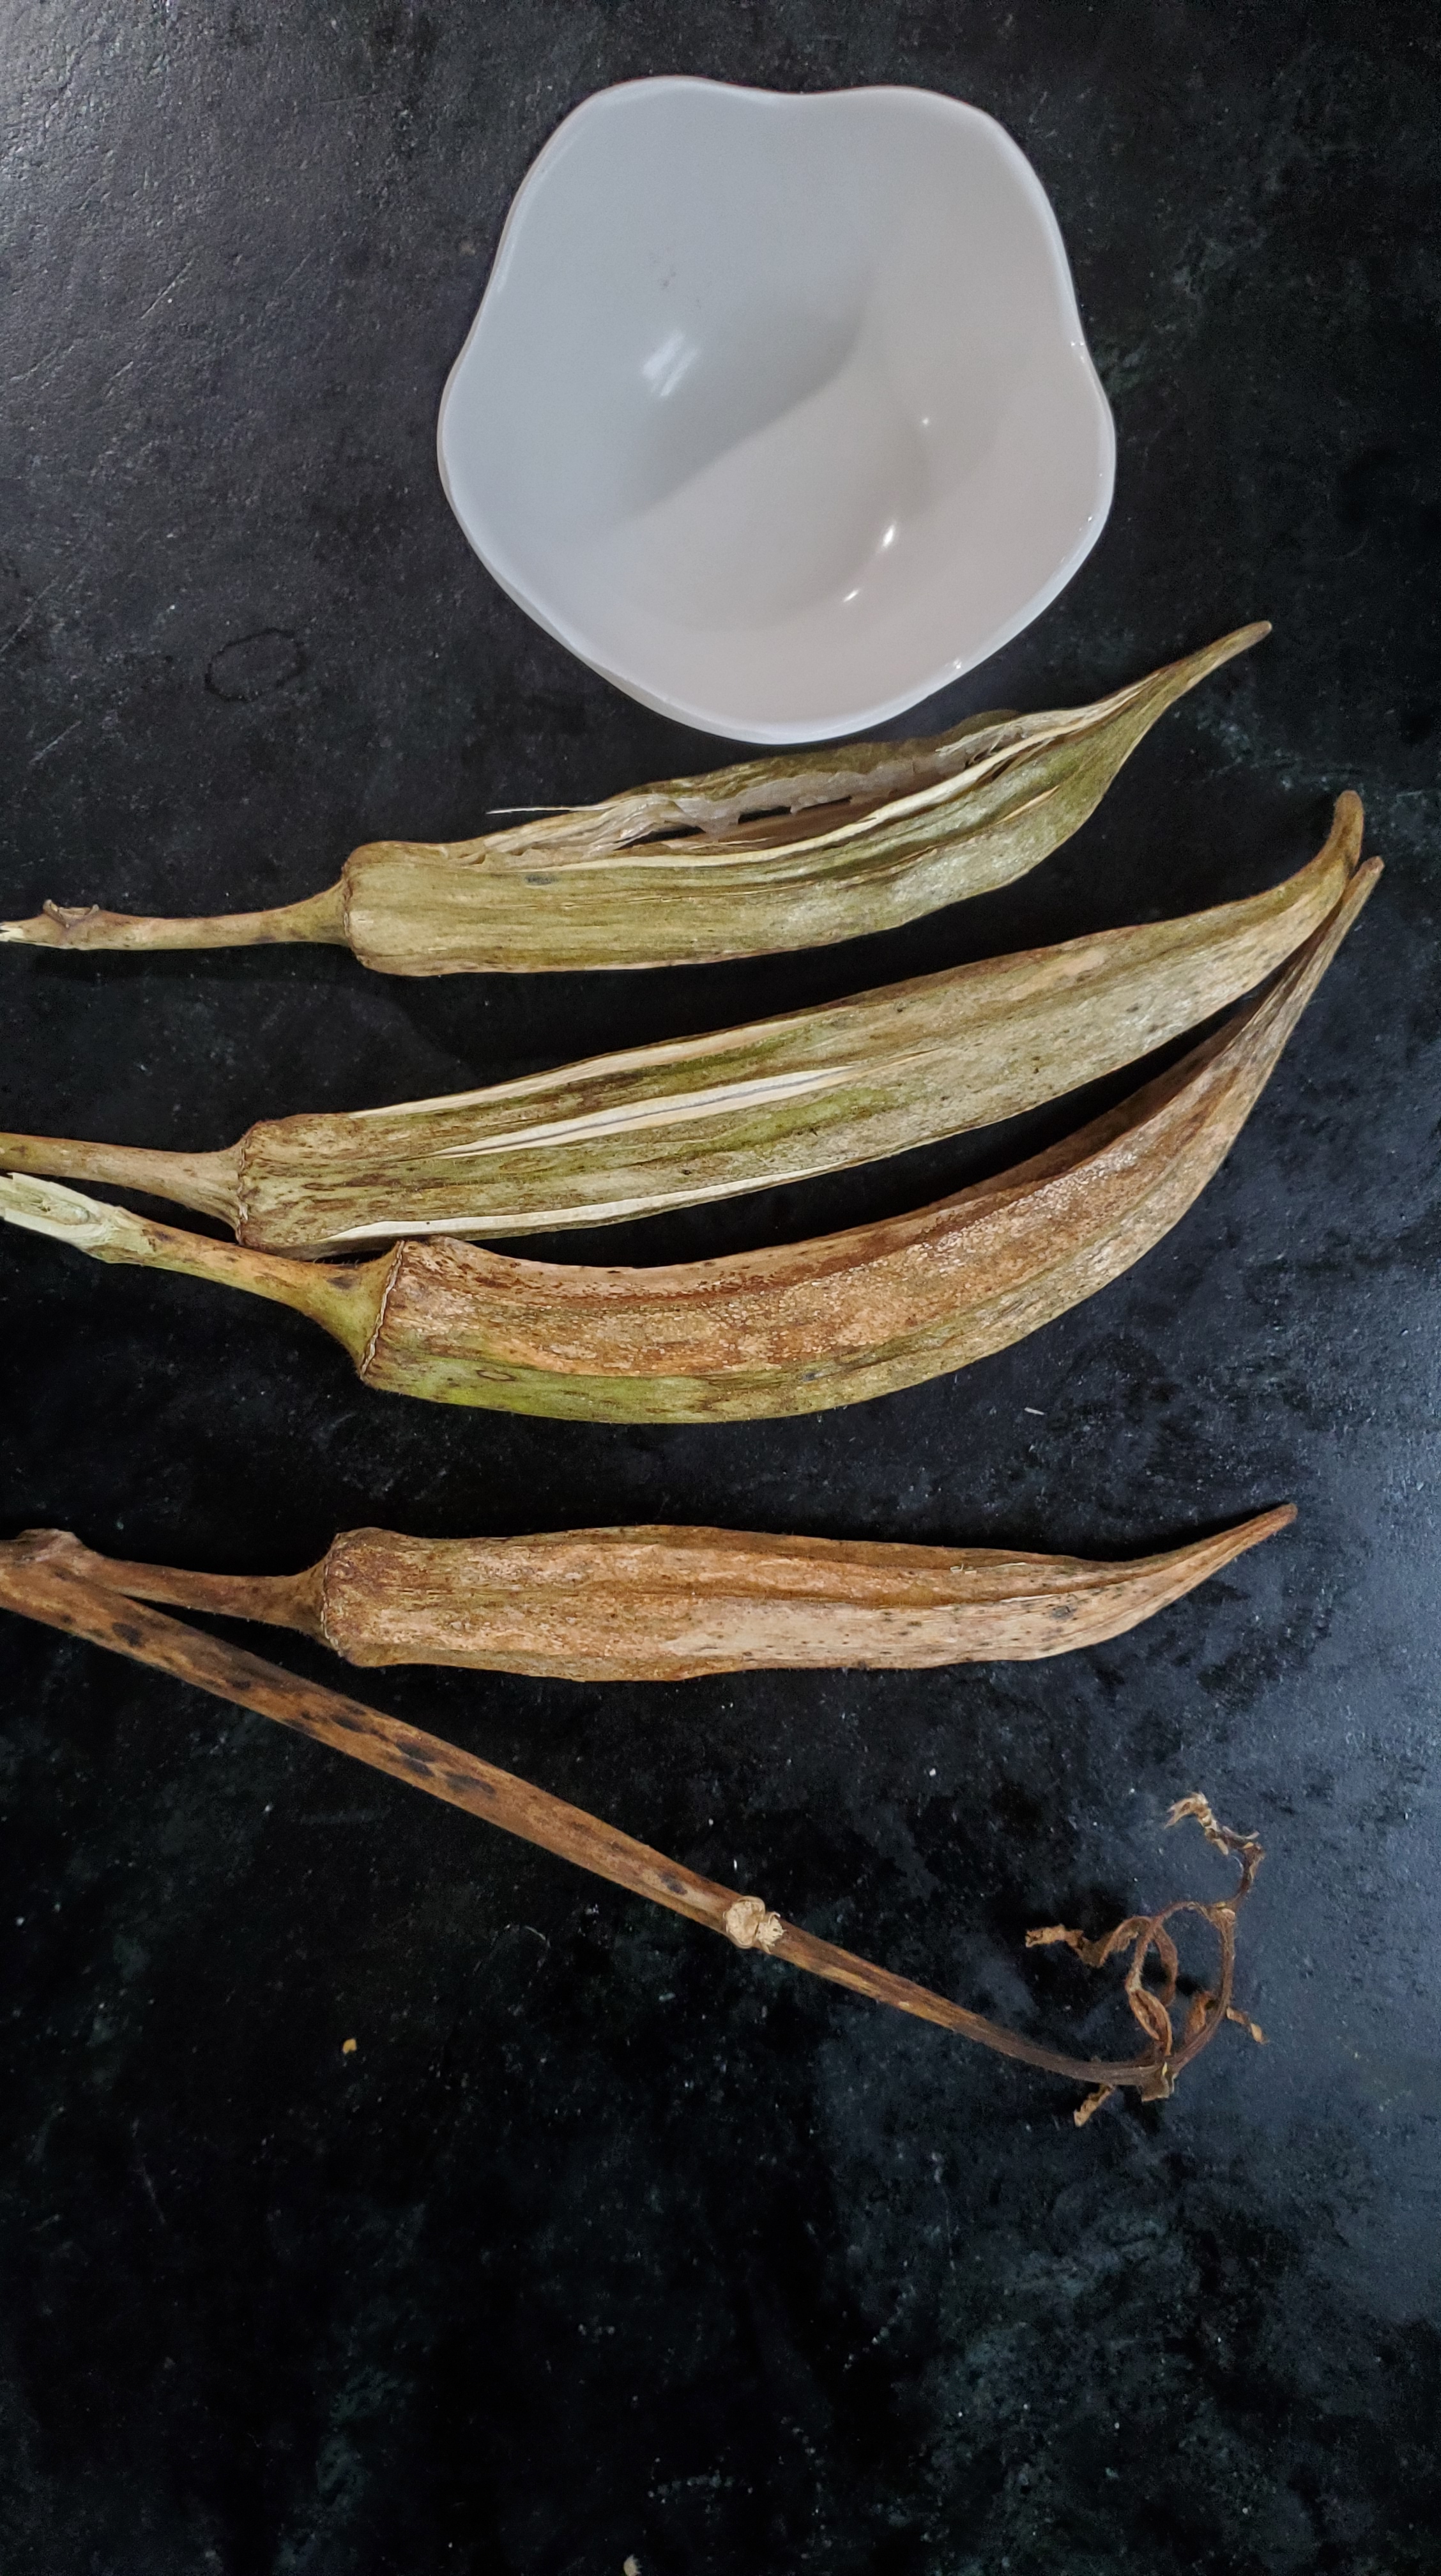
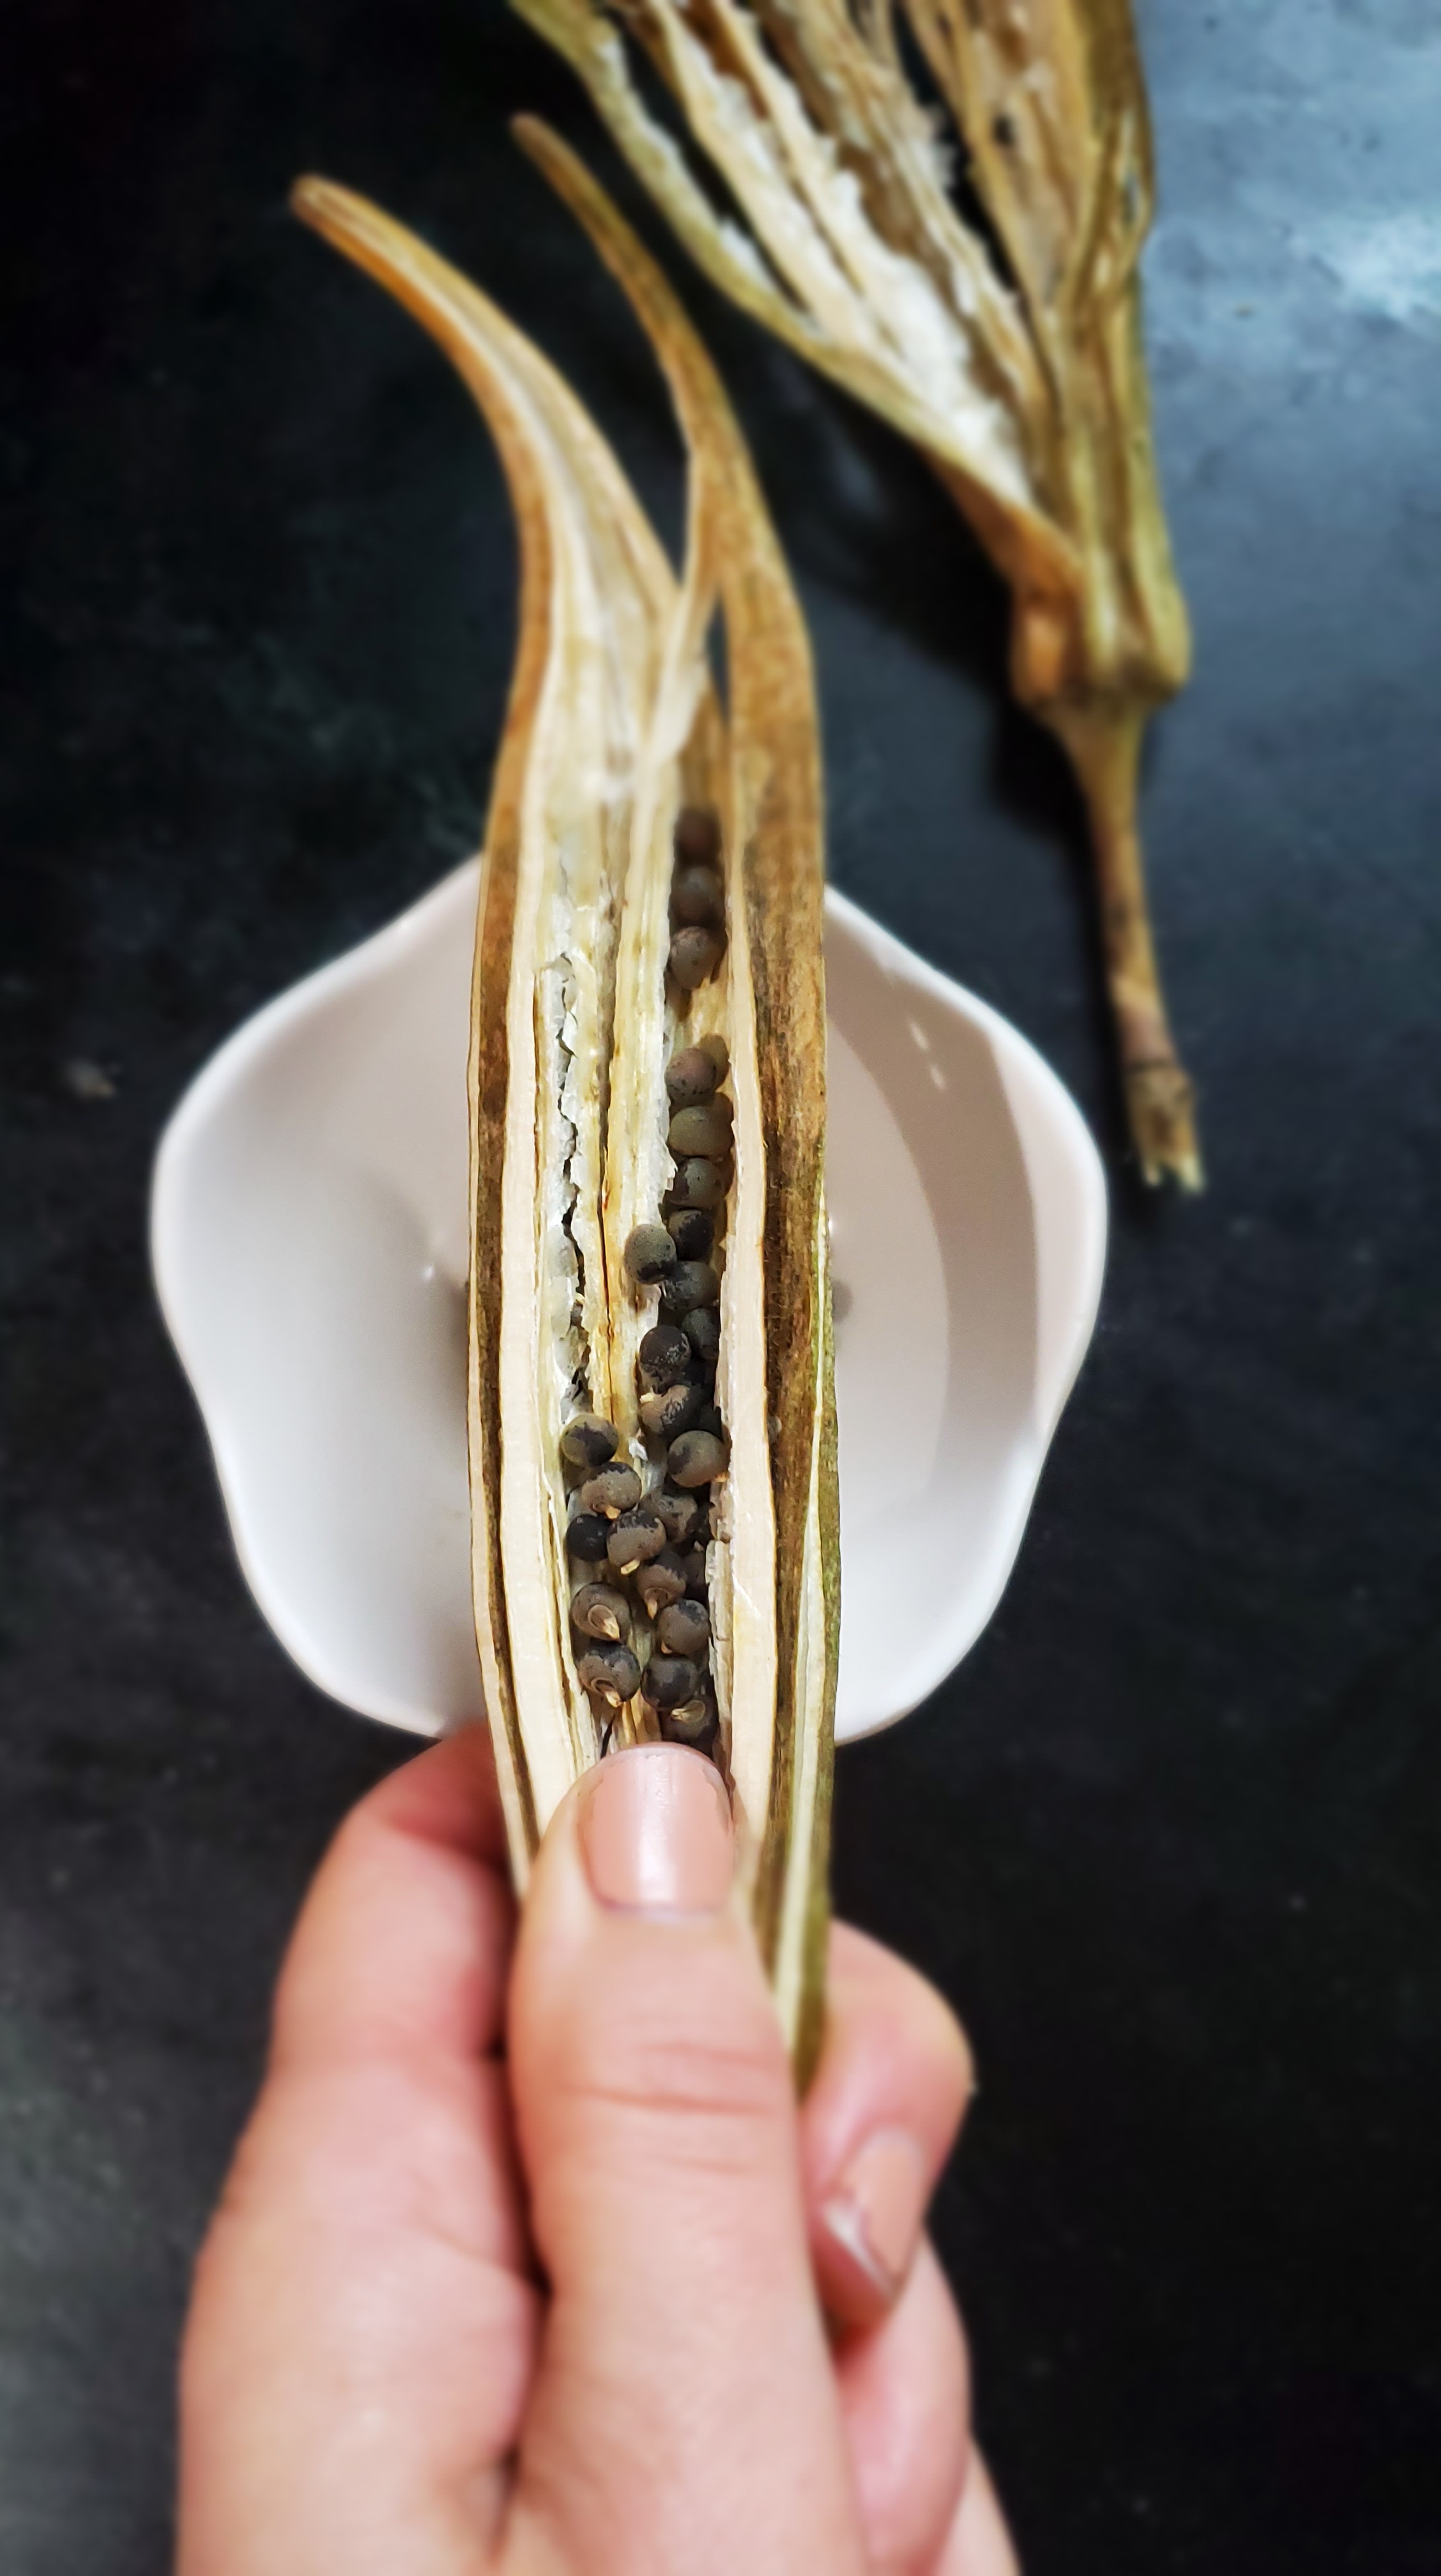
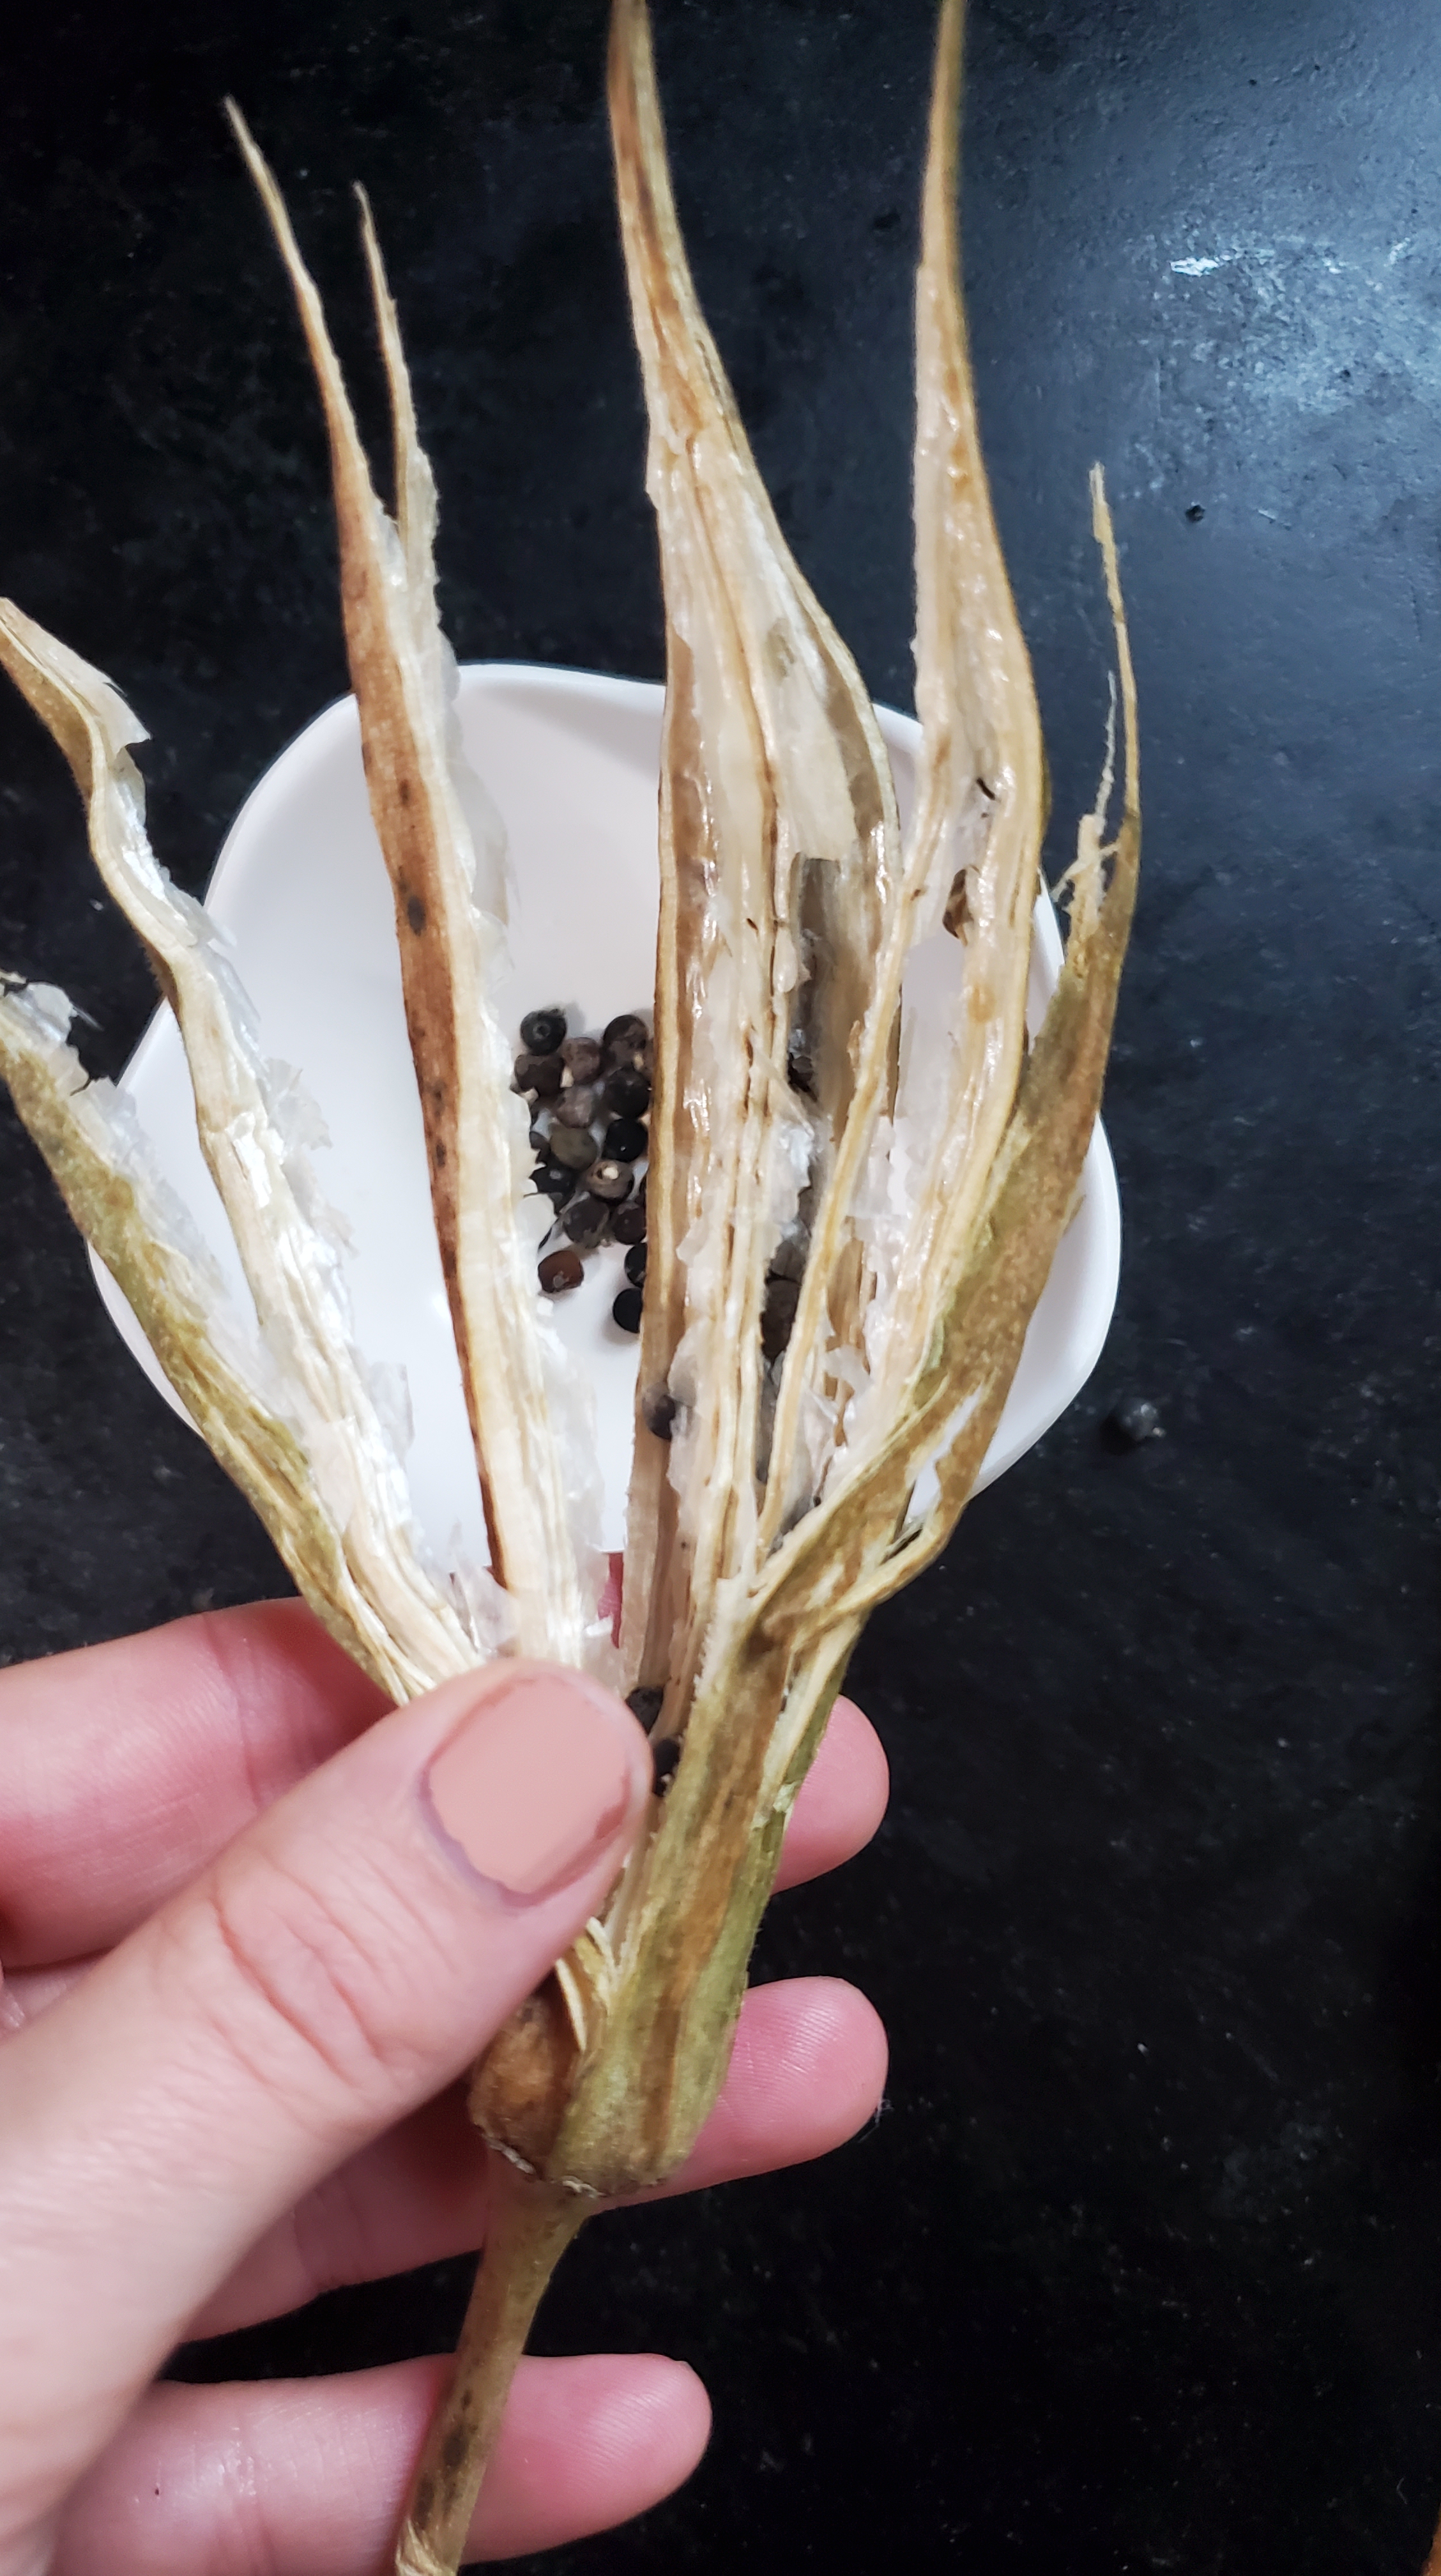
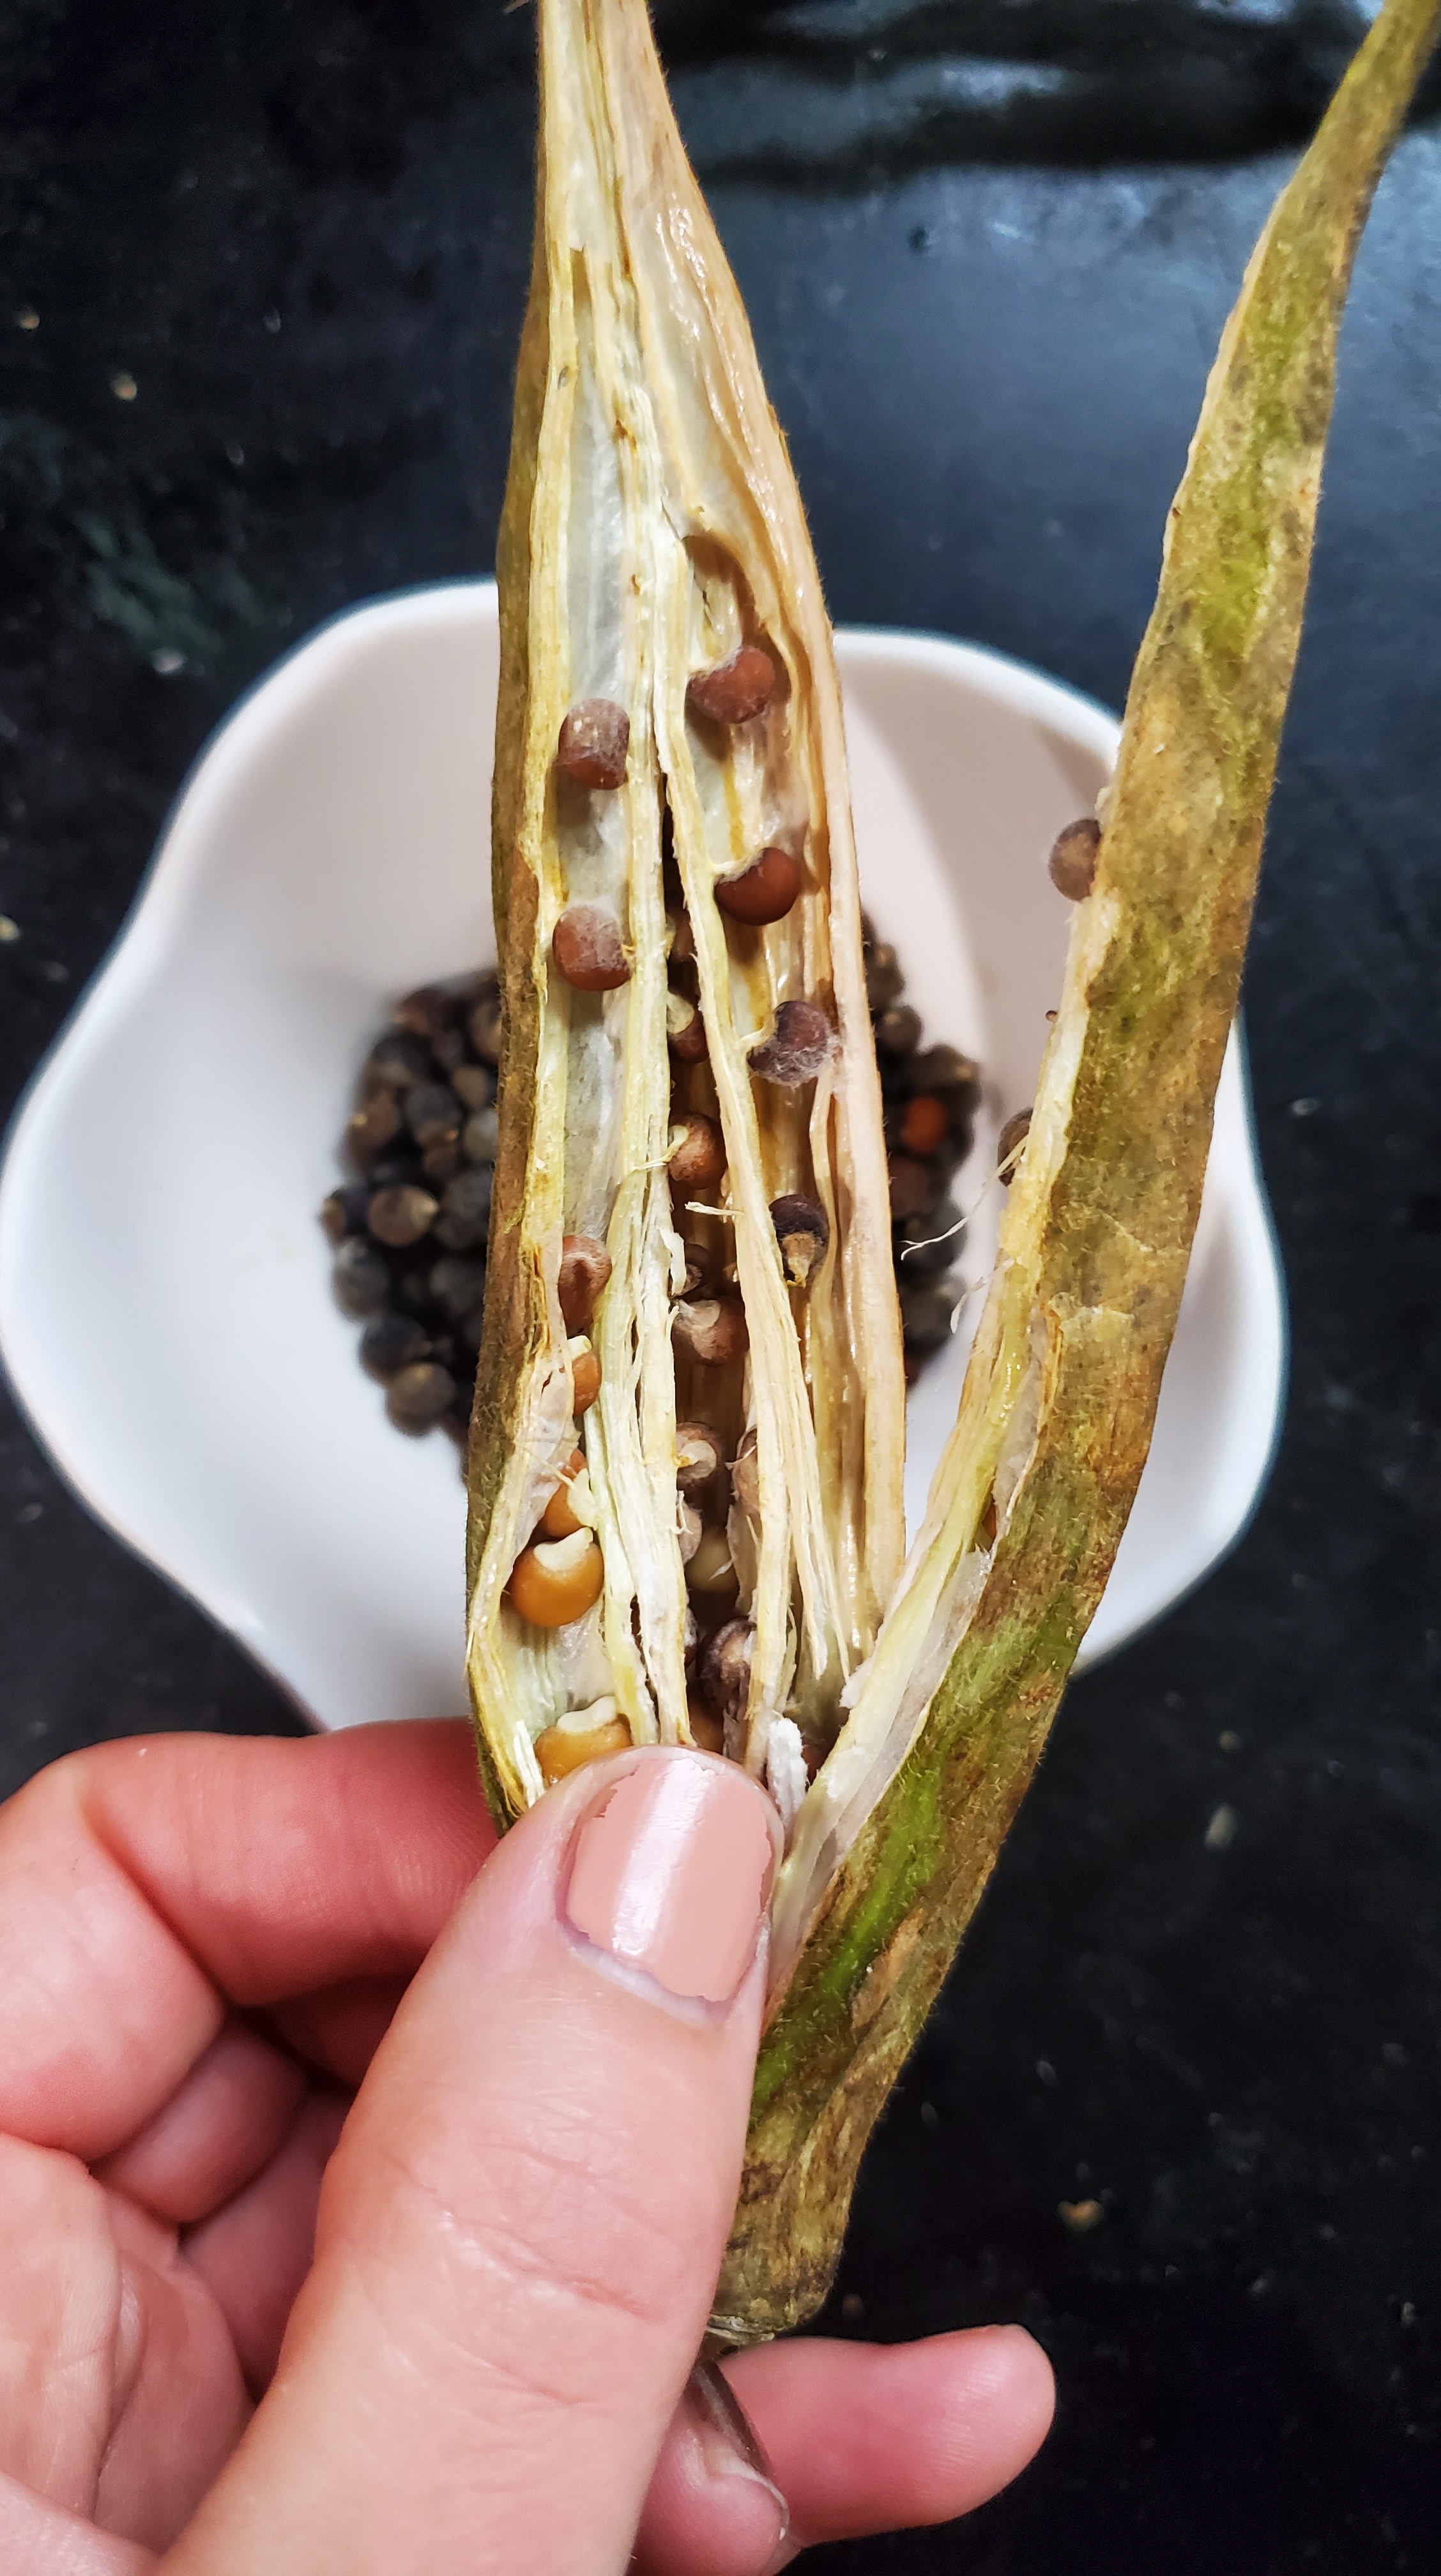
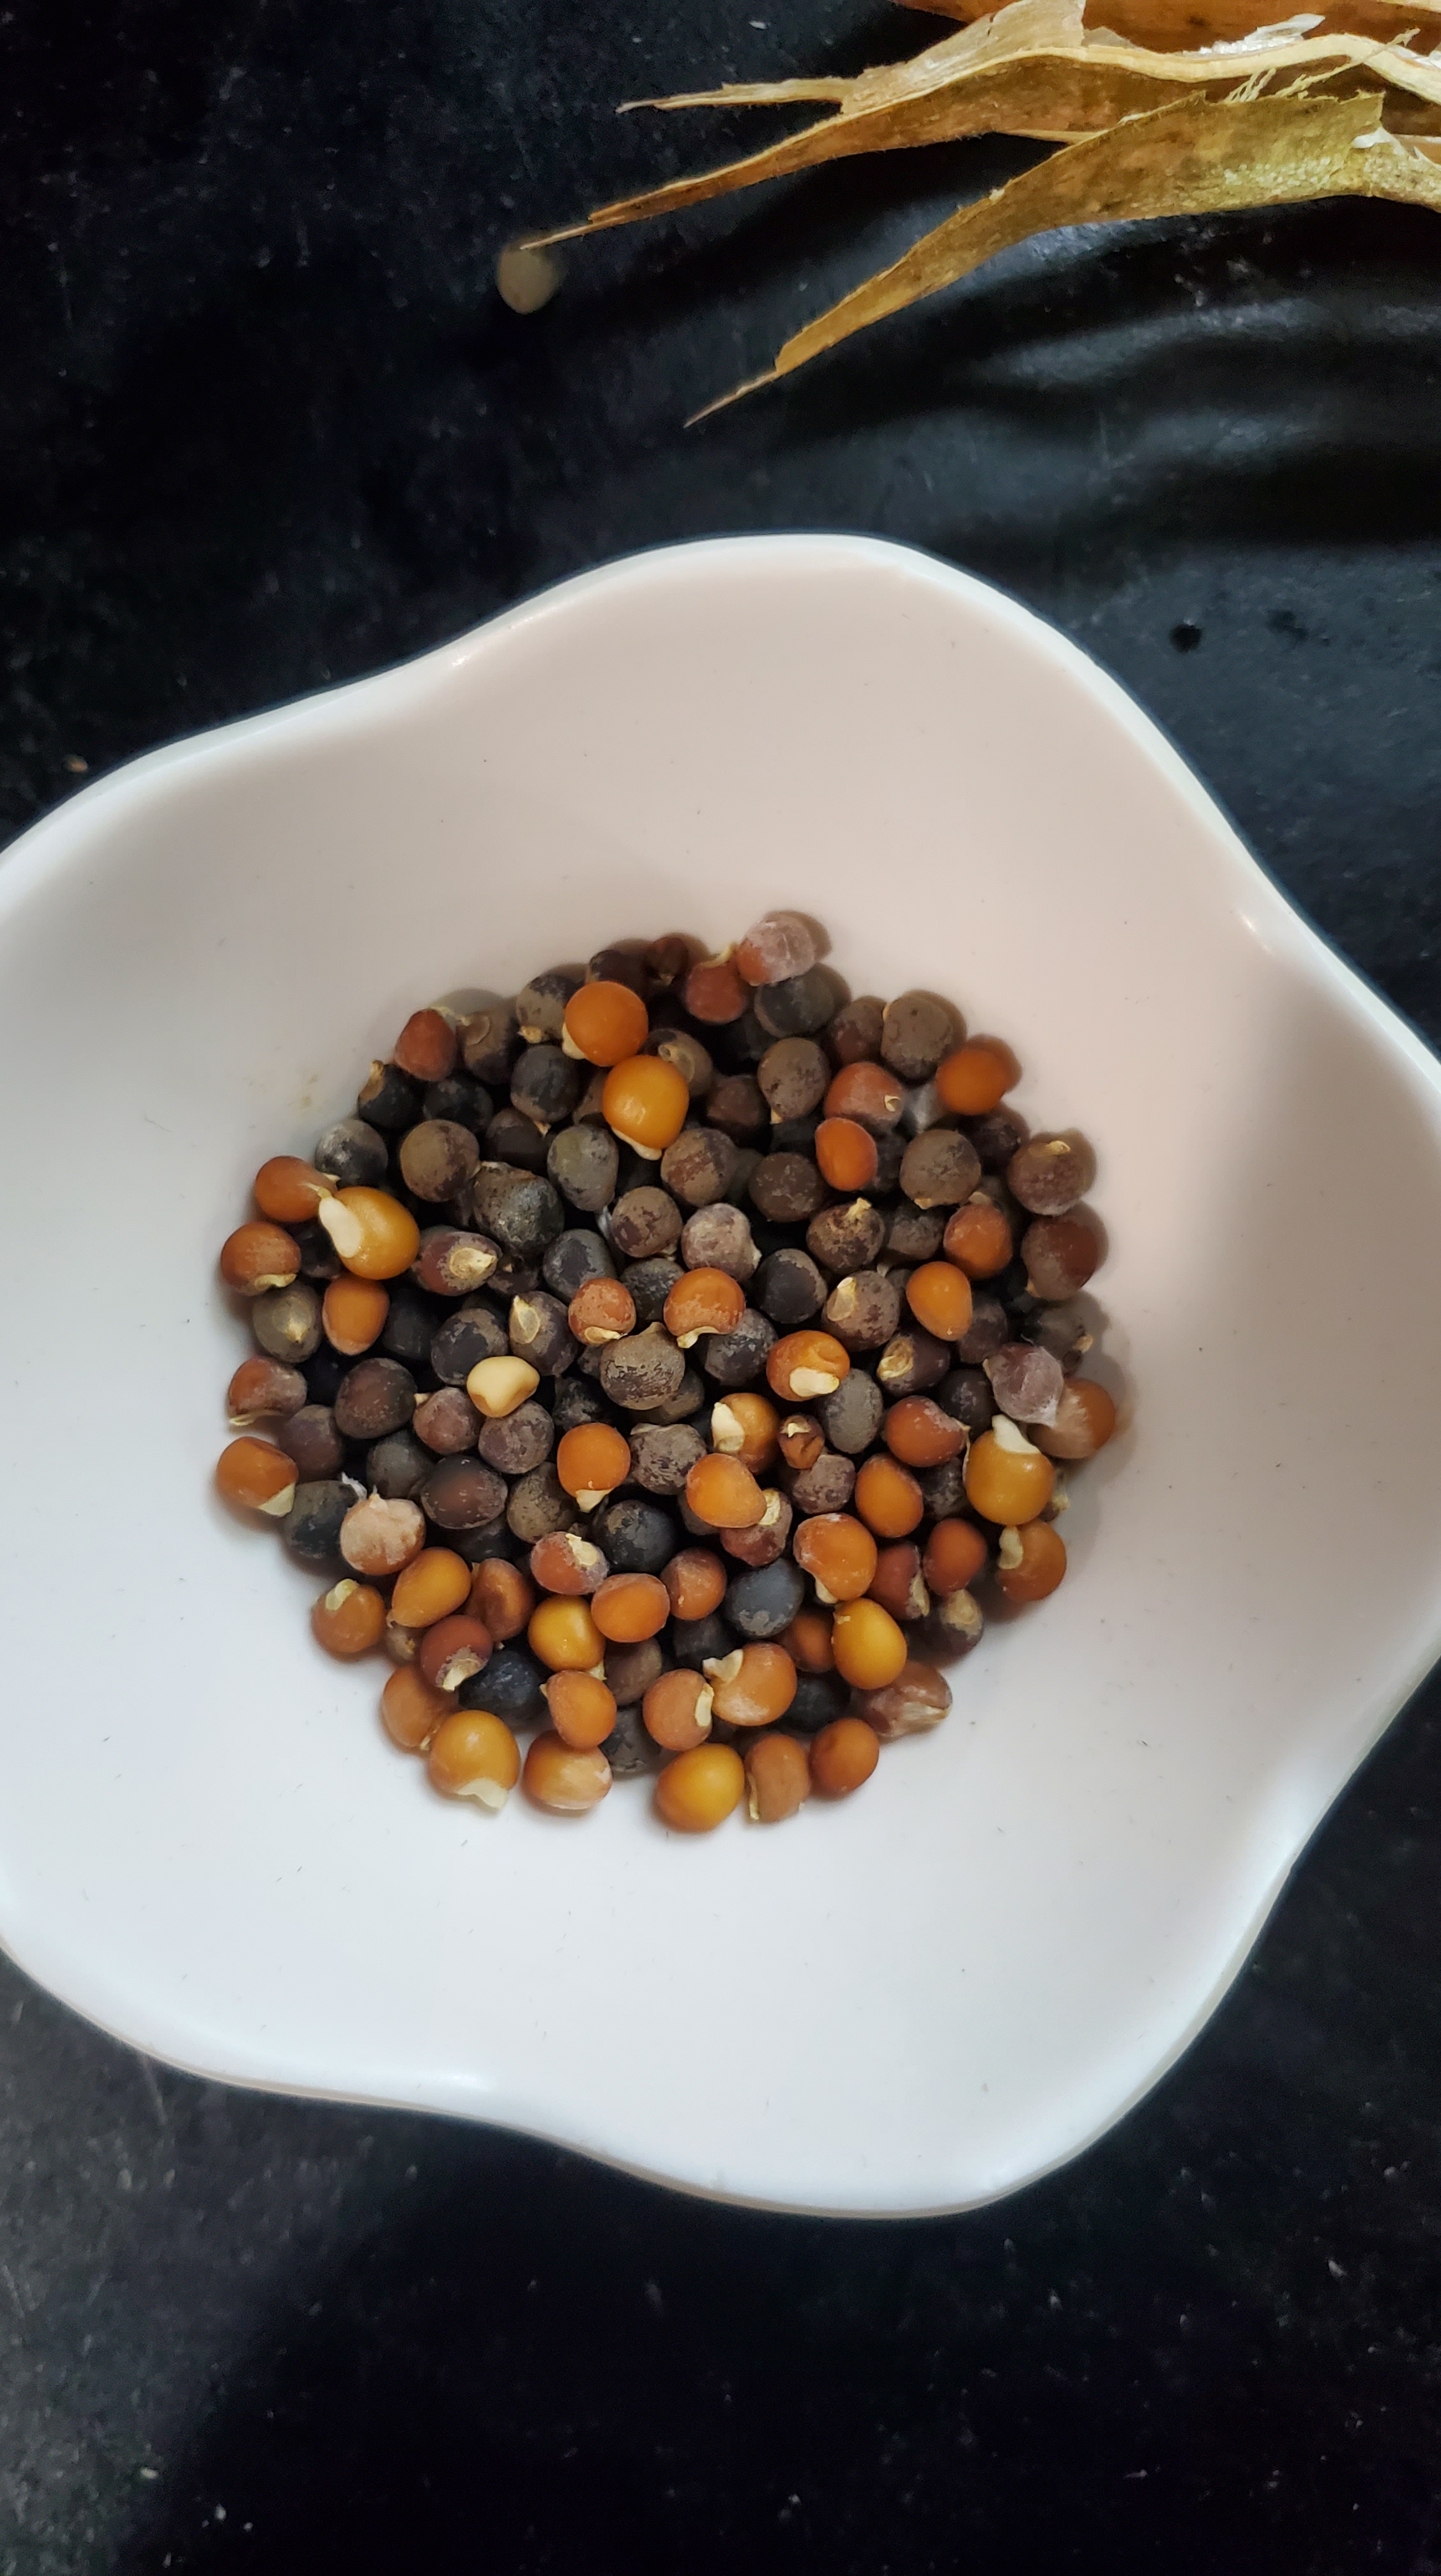
Okay, here’s a few quick tips for seed saving okra (spoiler: it couldn’t be easier).
Let the husks get extremely dry. They should be starting to crack or split.
Select a few from the plants you deemed the best producers.
Gently break them open with a bowl nearby.
That’s it. Seriously. Perfect for a beginning attempt at seed saving.
As I’ve gotten a little older, I have grown to love Fall more and more. Of course from a gardening perspective, it represents things slowing down a bit and being able to enjoy the hard work and bounty of the harvest. On a personal level, I also see it as a time to take stock of all the good things in my life. Things get going so fast a lot of the time that it’s easy to always be on to the next thing. I’d like to think that after my year of enough I’m better at appreciating where I am and what I have, but reminders are always helpful too.
Have you ever heard that the best way to have a good tomorrow is to get good night’s sleep tonight? The same principle applies to your garden. As colder weather sets in and the hours of daylight fade, time spent in the garden for me is more about wandering, noticing, and pondering. Where do I want to move that? What would grow better here? I’m sure you can see where this is going… my 2021 garden lessons and successes post will be coming soon.
Getting back to the concept of rest and replenishing, this is the perfect time to tuck in your garden beds for their winter respite. This involves putting back a lot of what has been taken out throughout the Spring, Summer and Fall. When you think about how much nutrition and mass leaves the soil throughout the growing season, it only makes sense to refill the tank so to speak. Like a bank account, if you’re only making withdrawals you’ll soon be in the negative.
Here’s How to Layer your Beds for Winter
A layer of aged manure
A layer of compost
A layer of shredded leaves
Put something on top, like cardboard or a tarp, to keep everything in place so that it gets all warm and cozy for the winter.
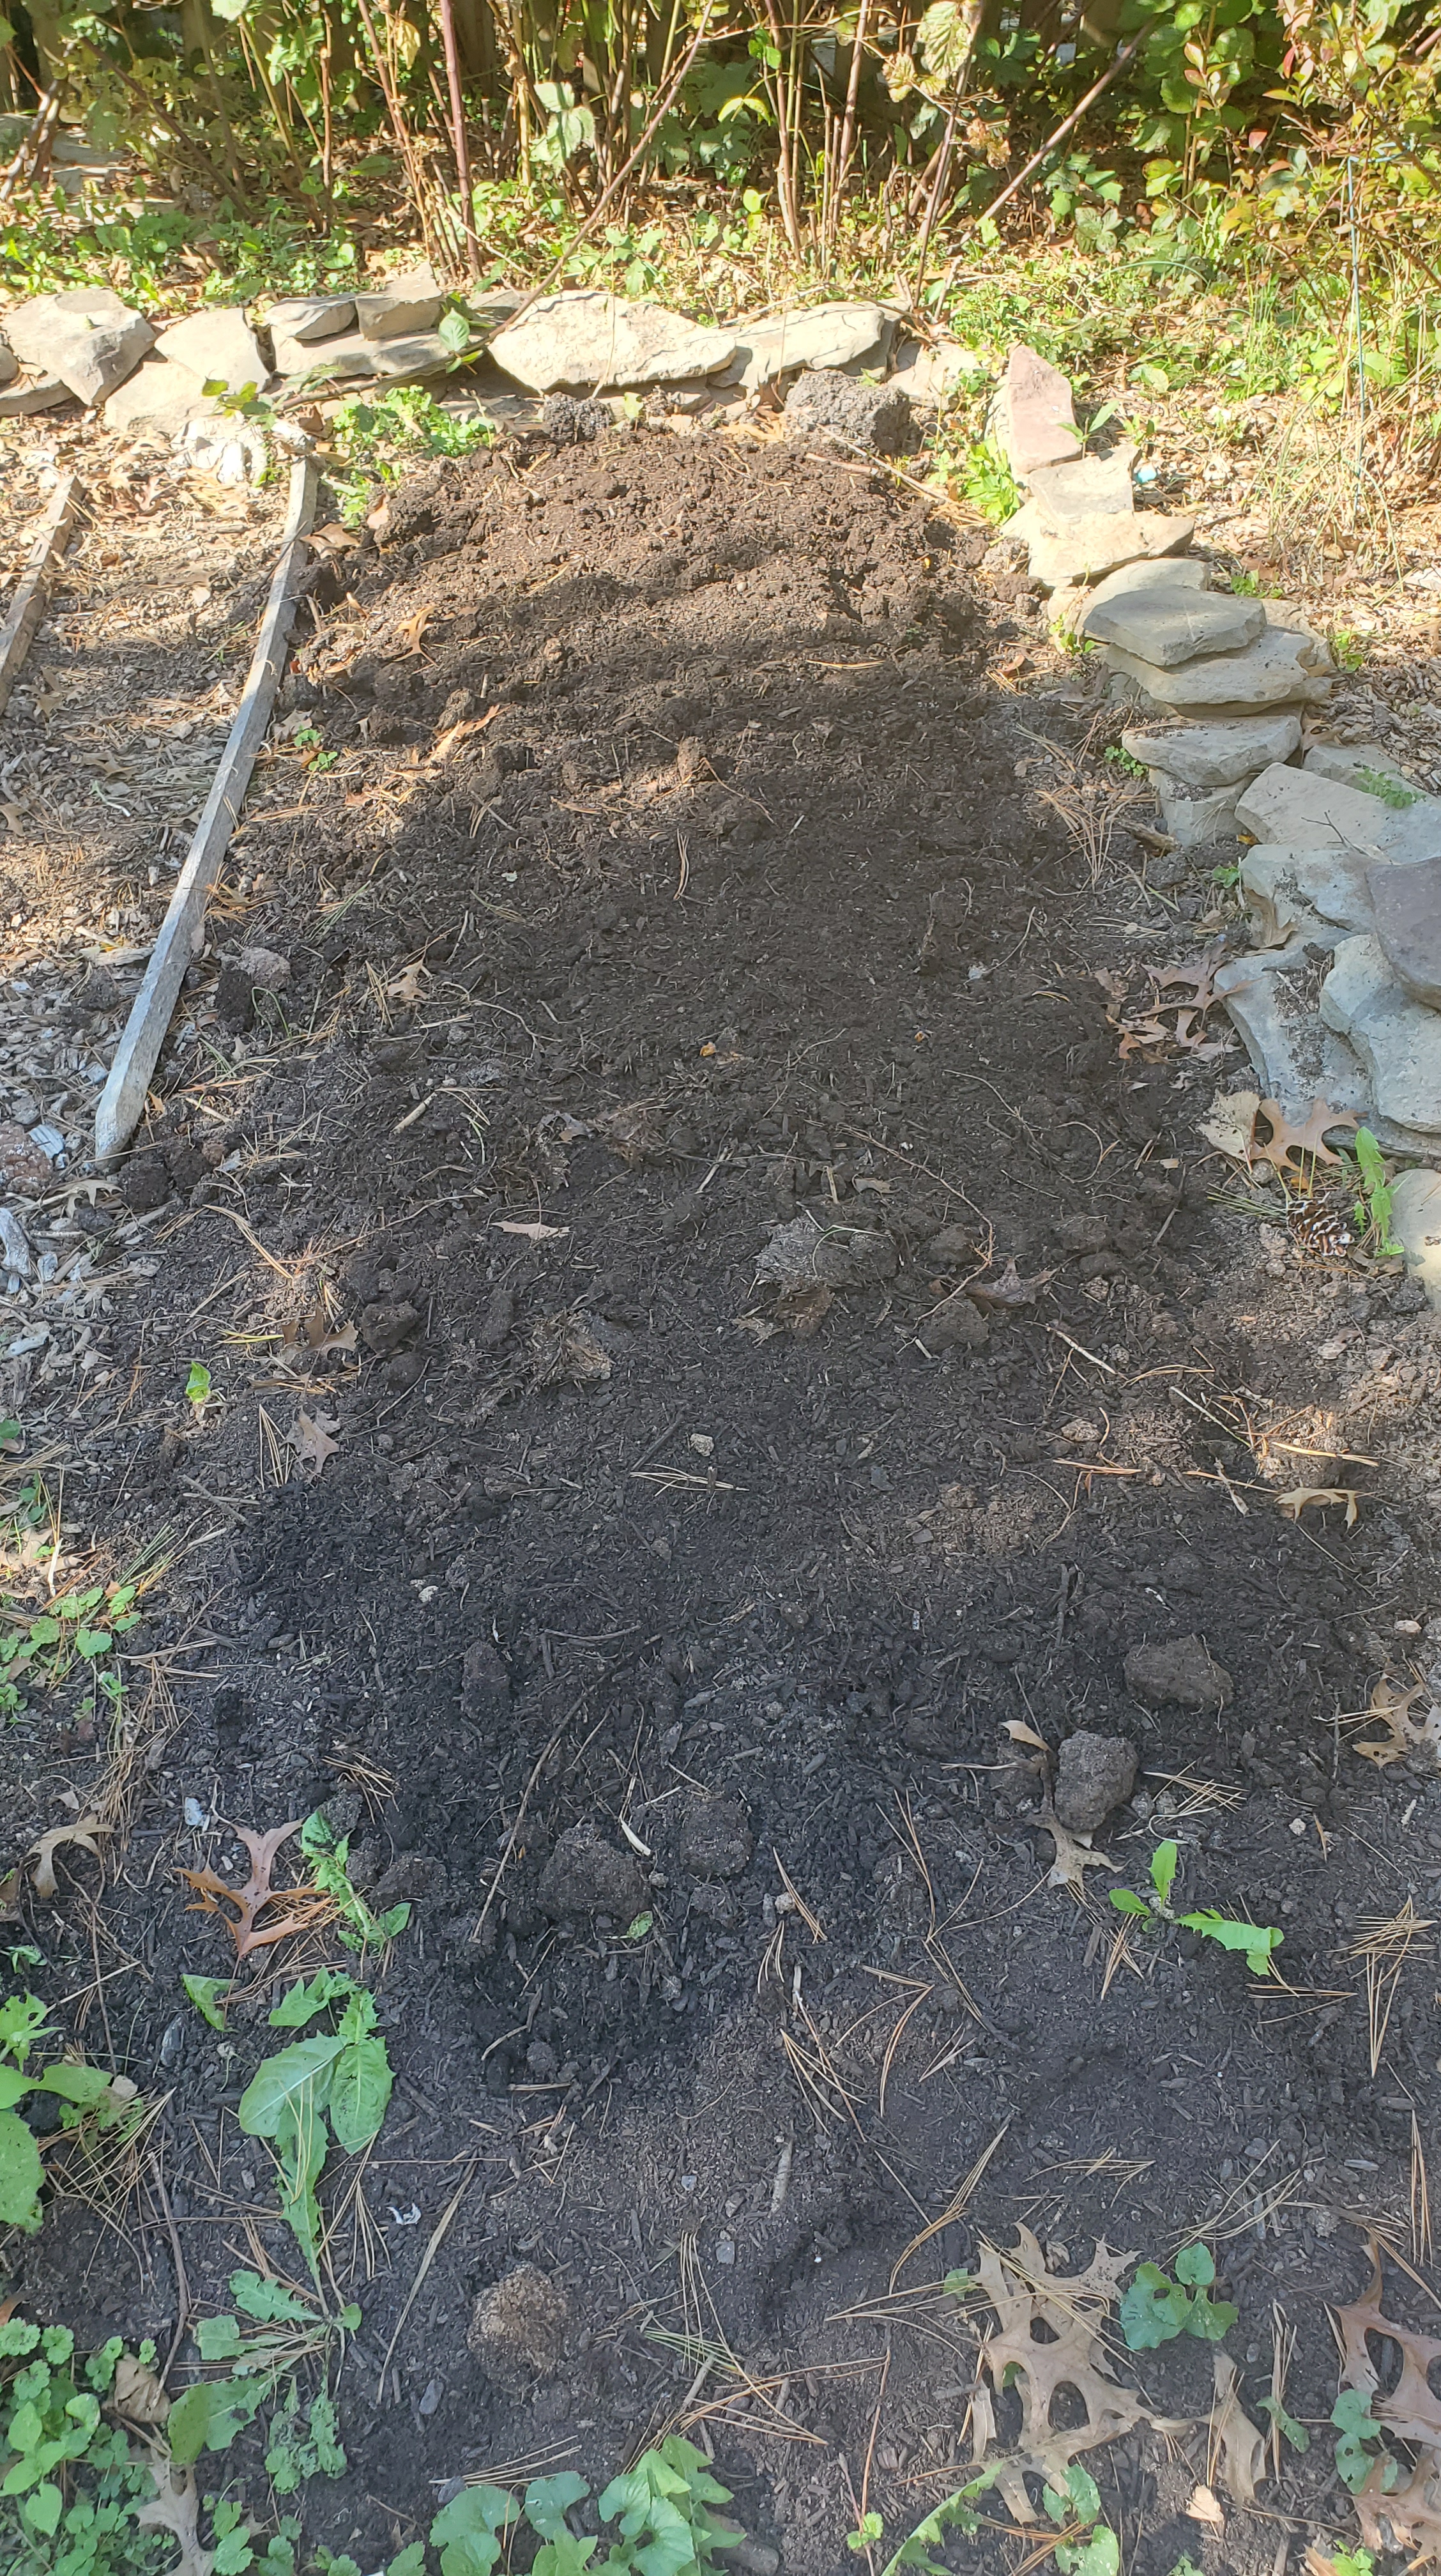
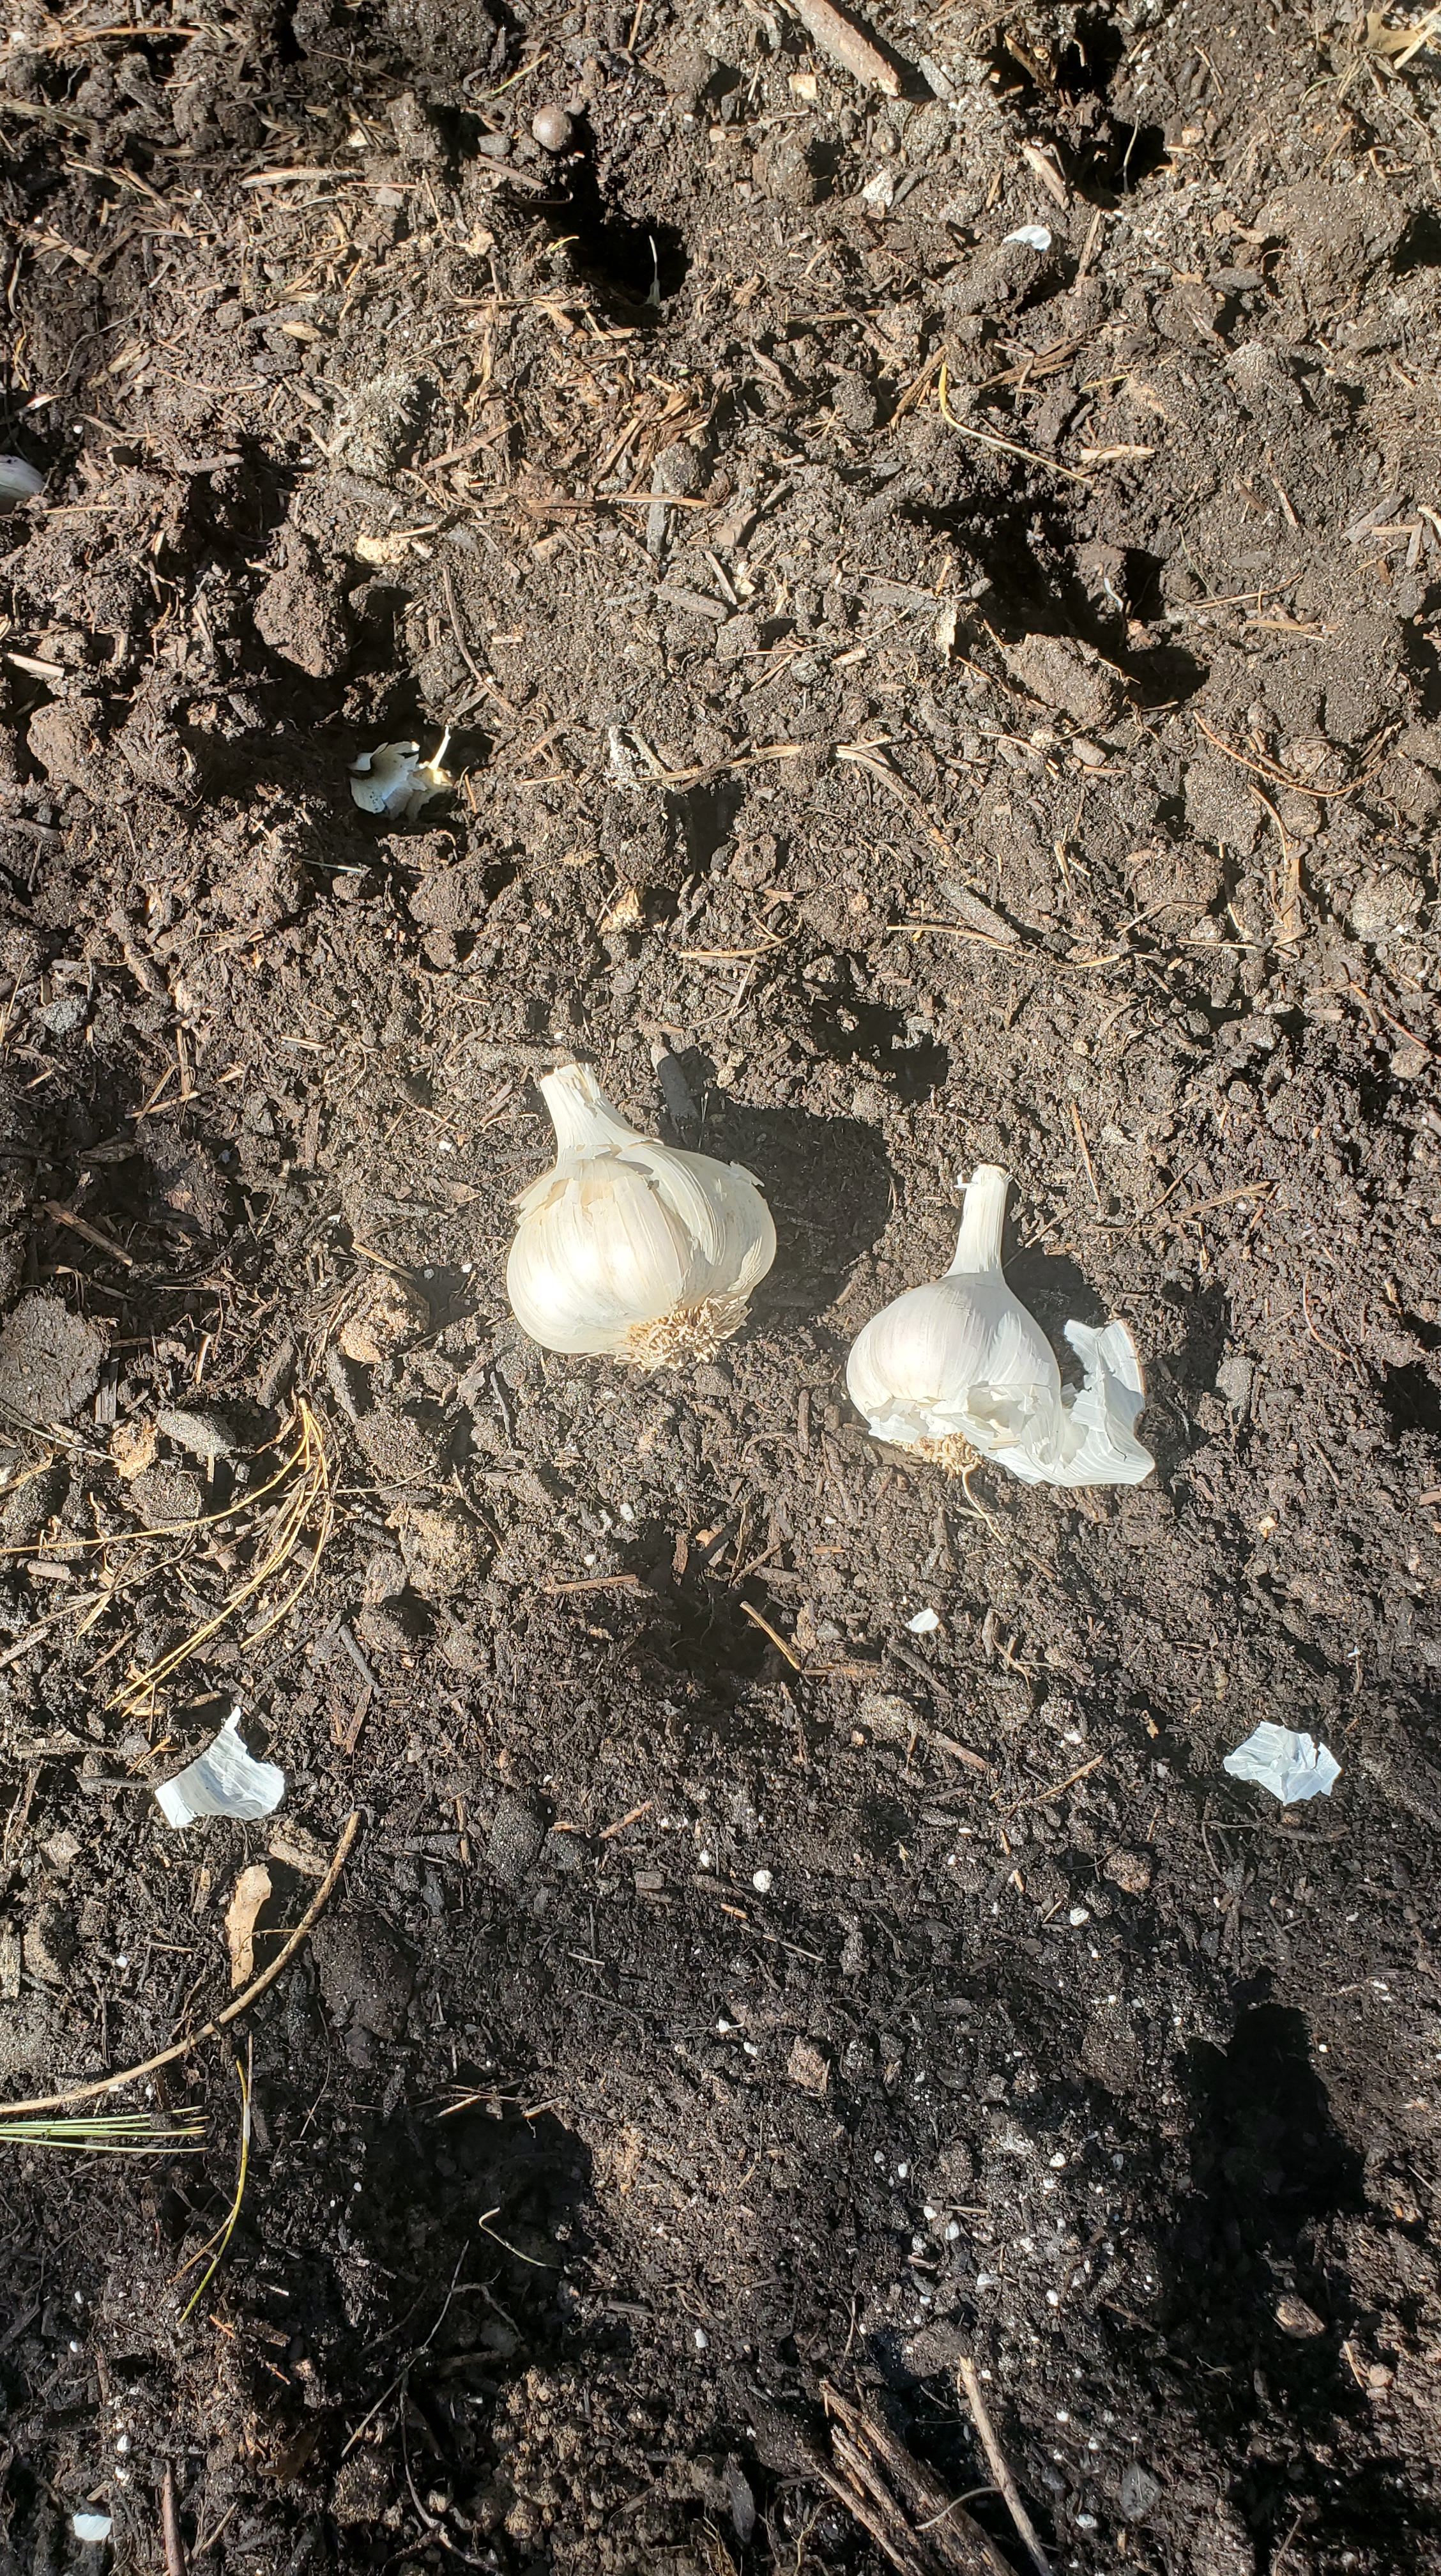
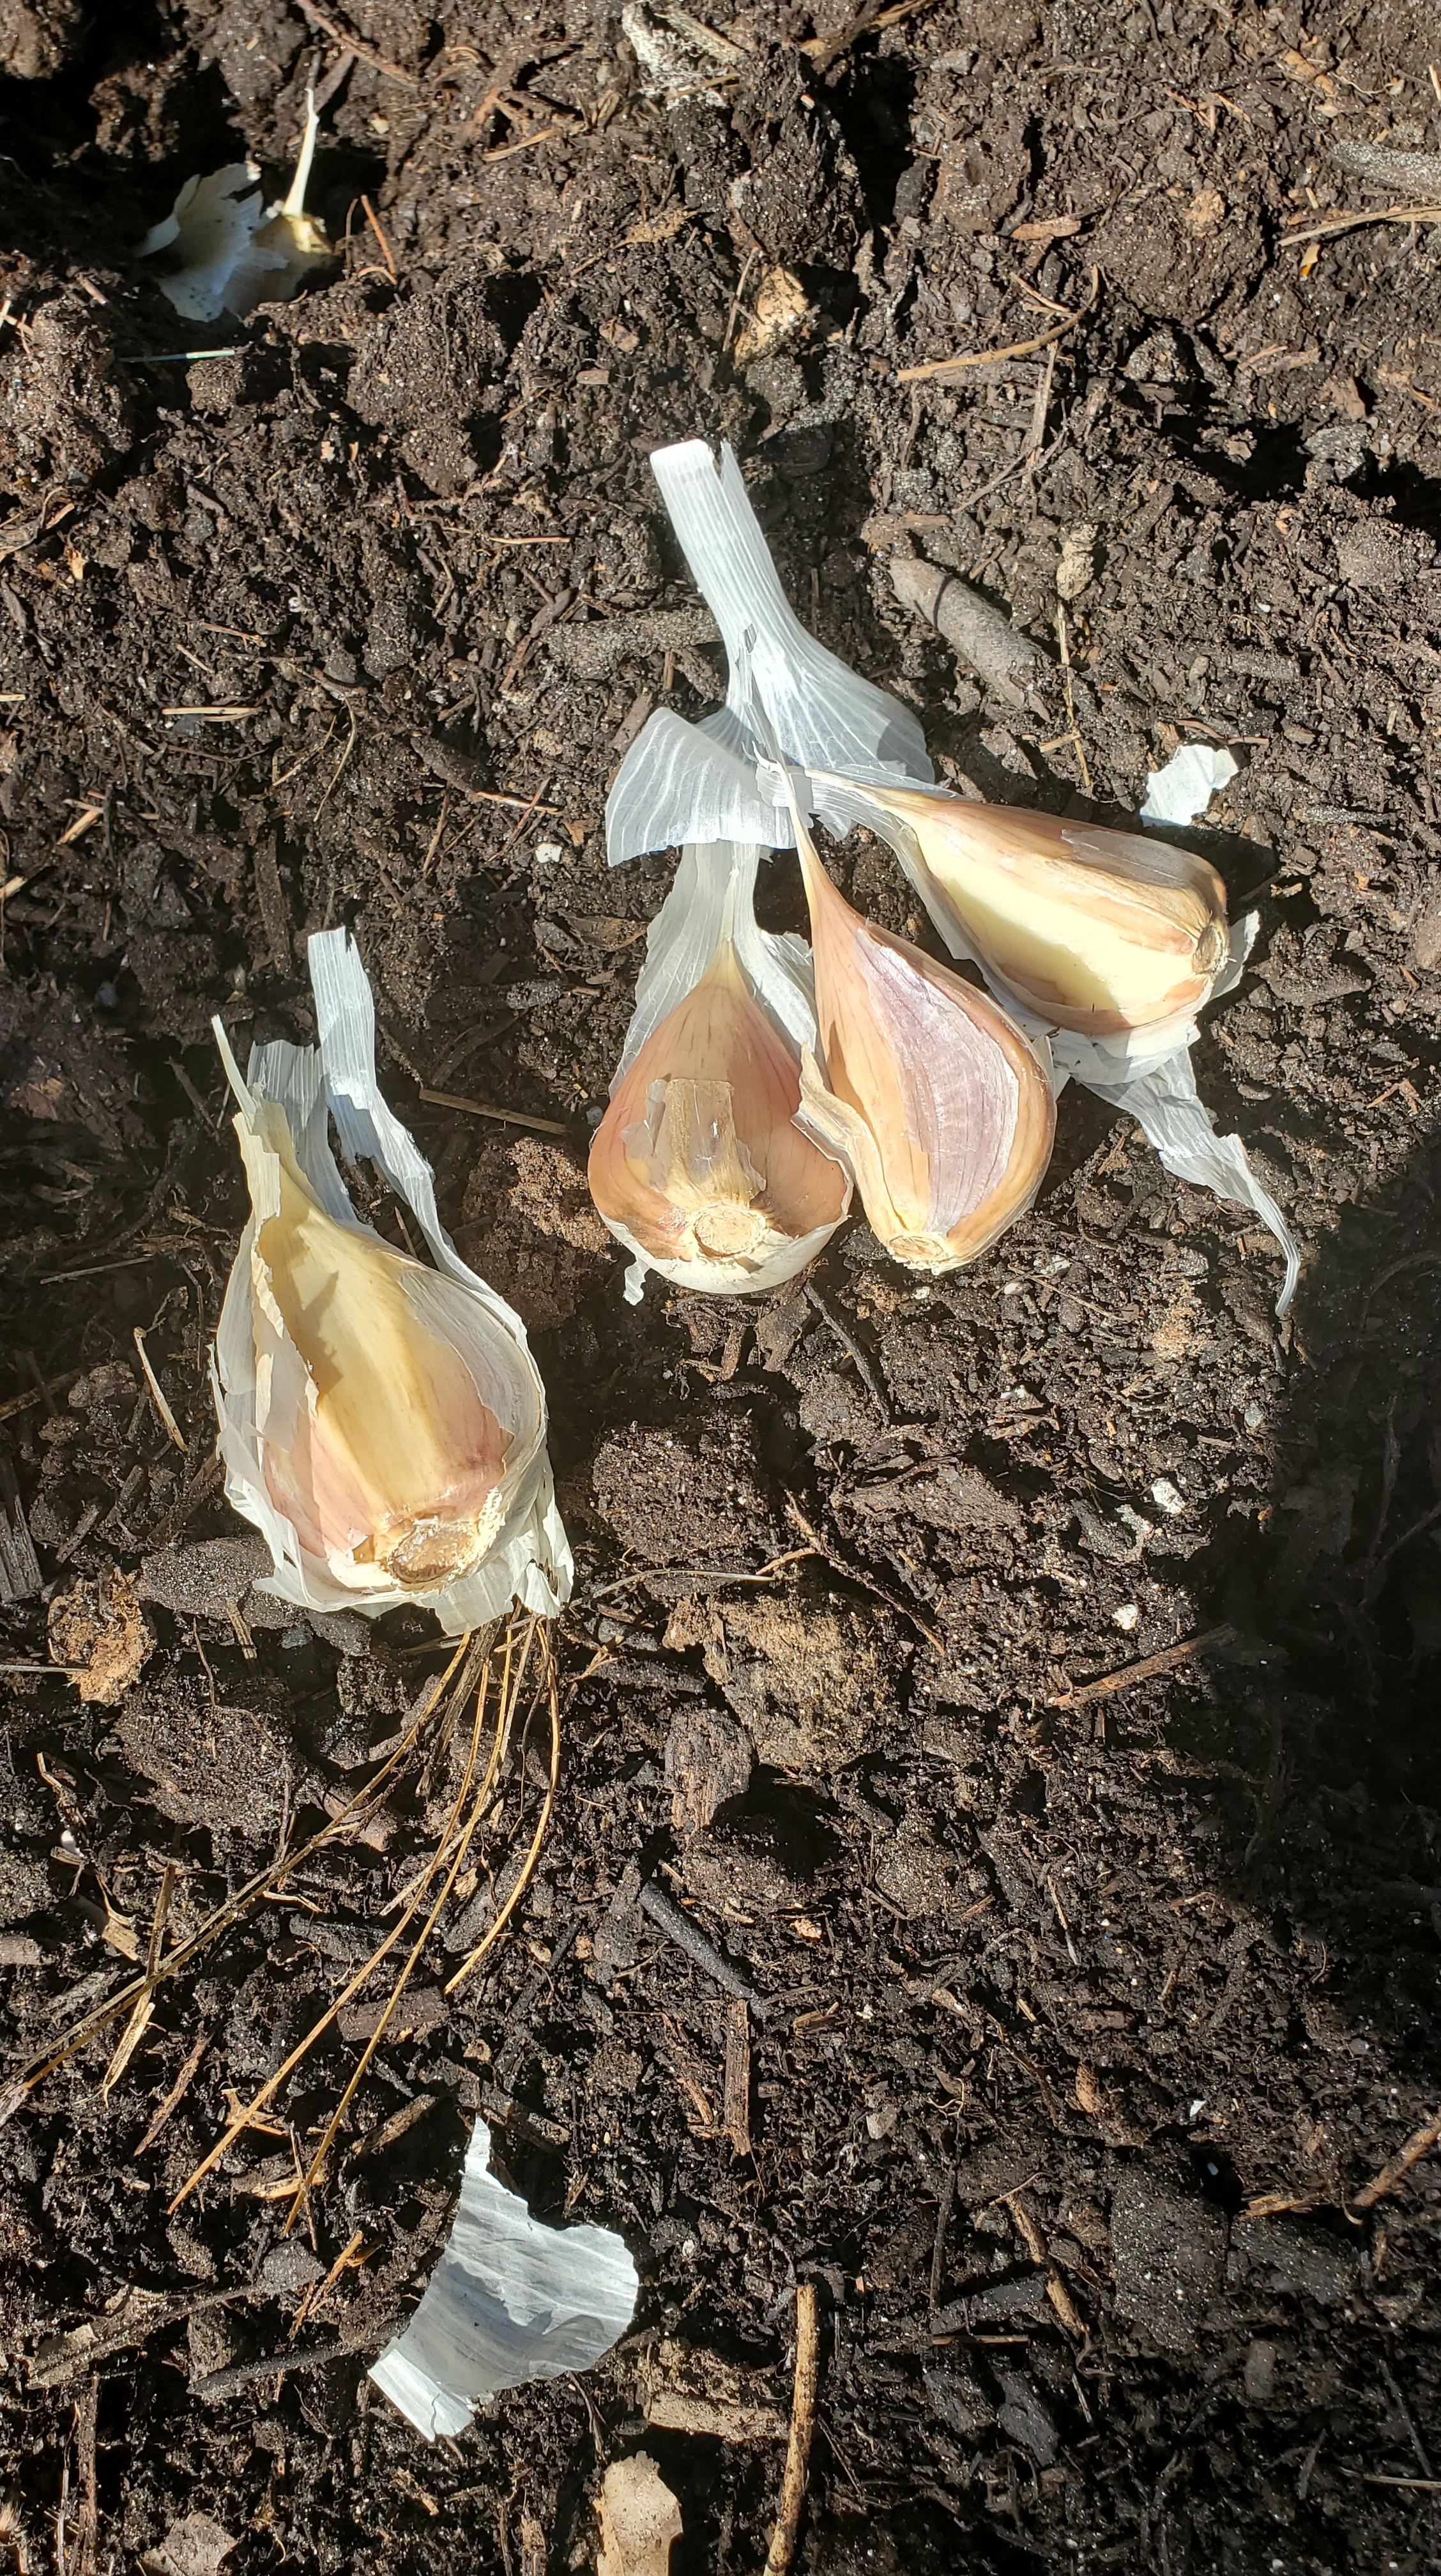
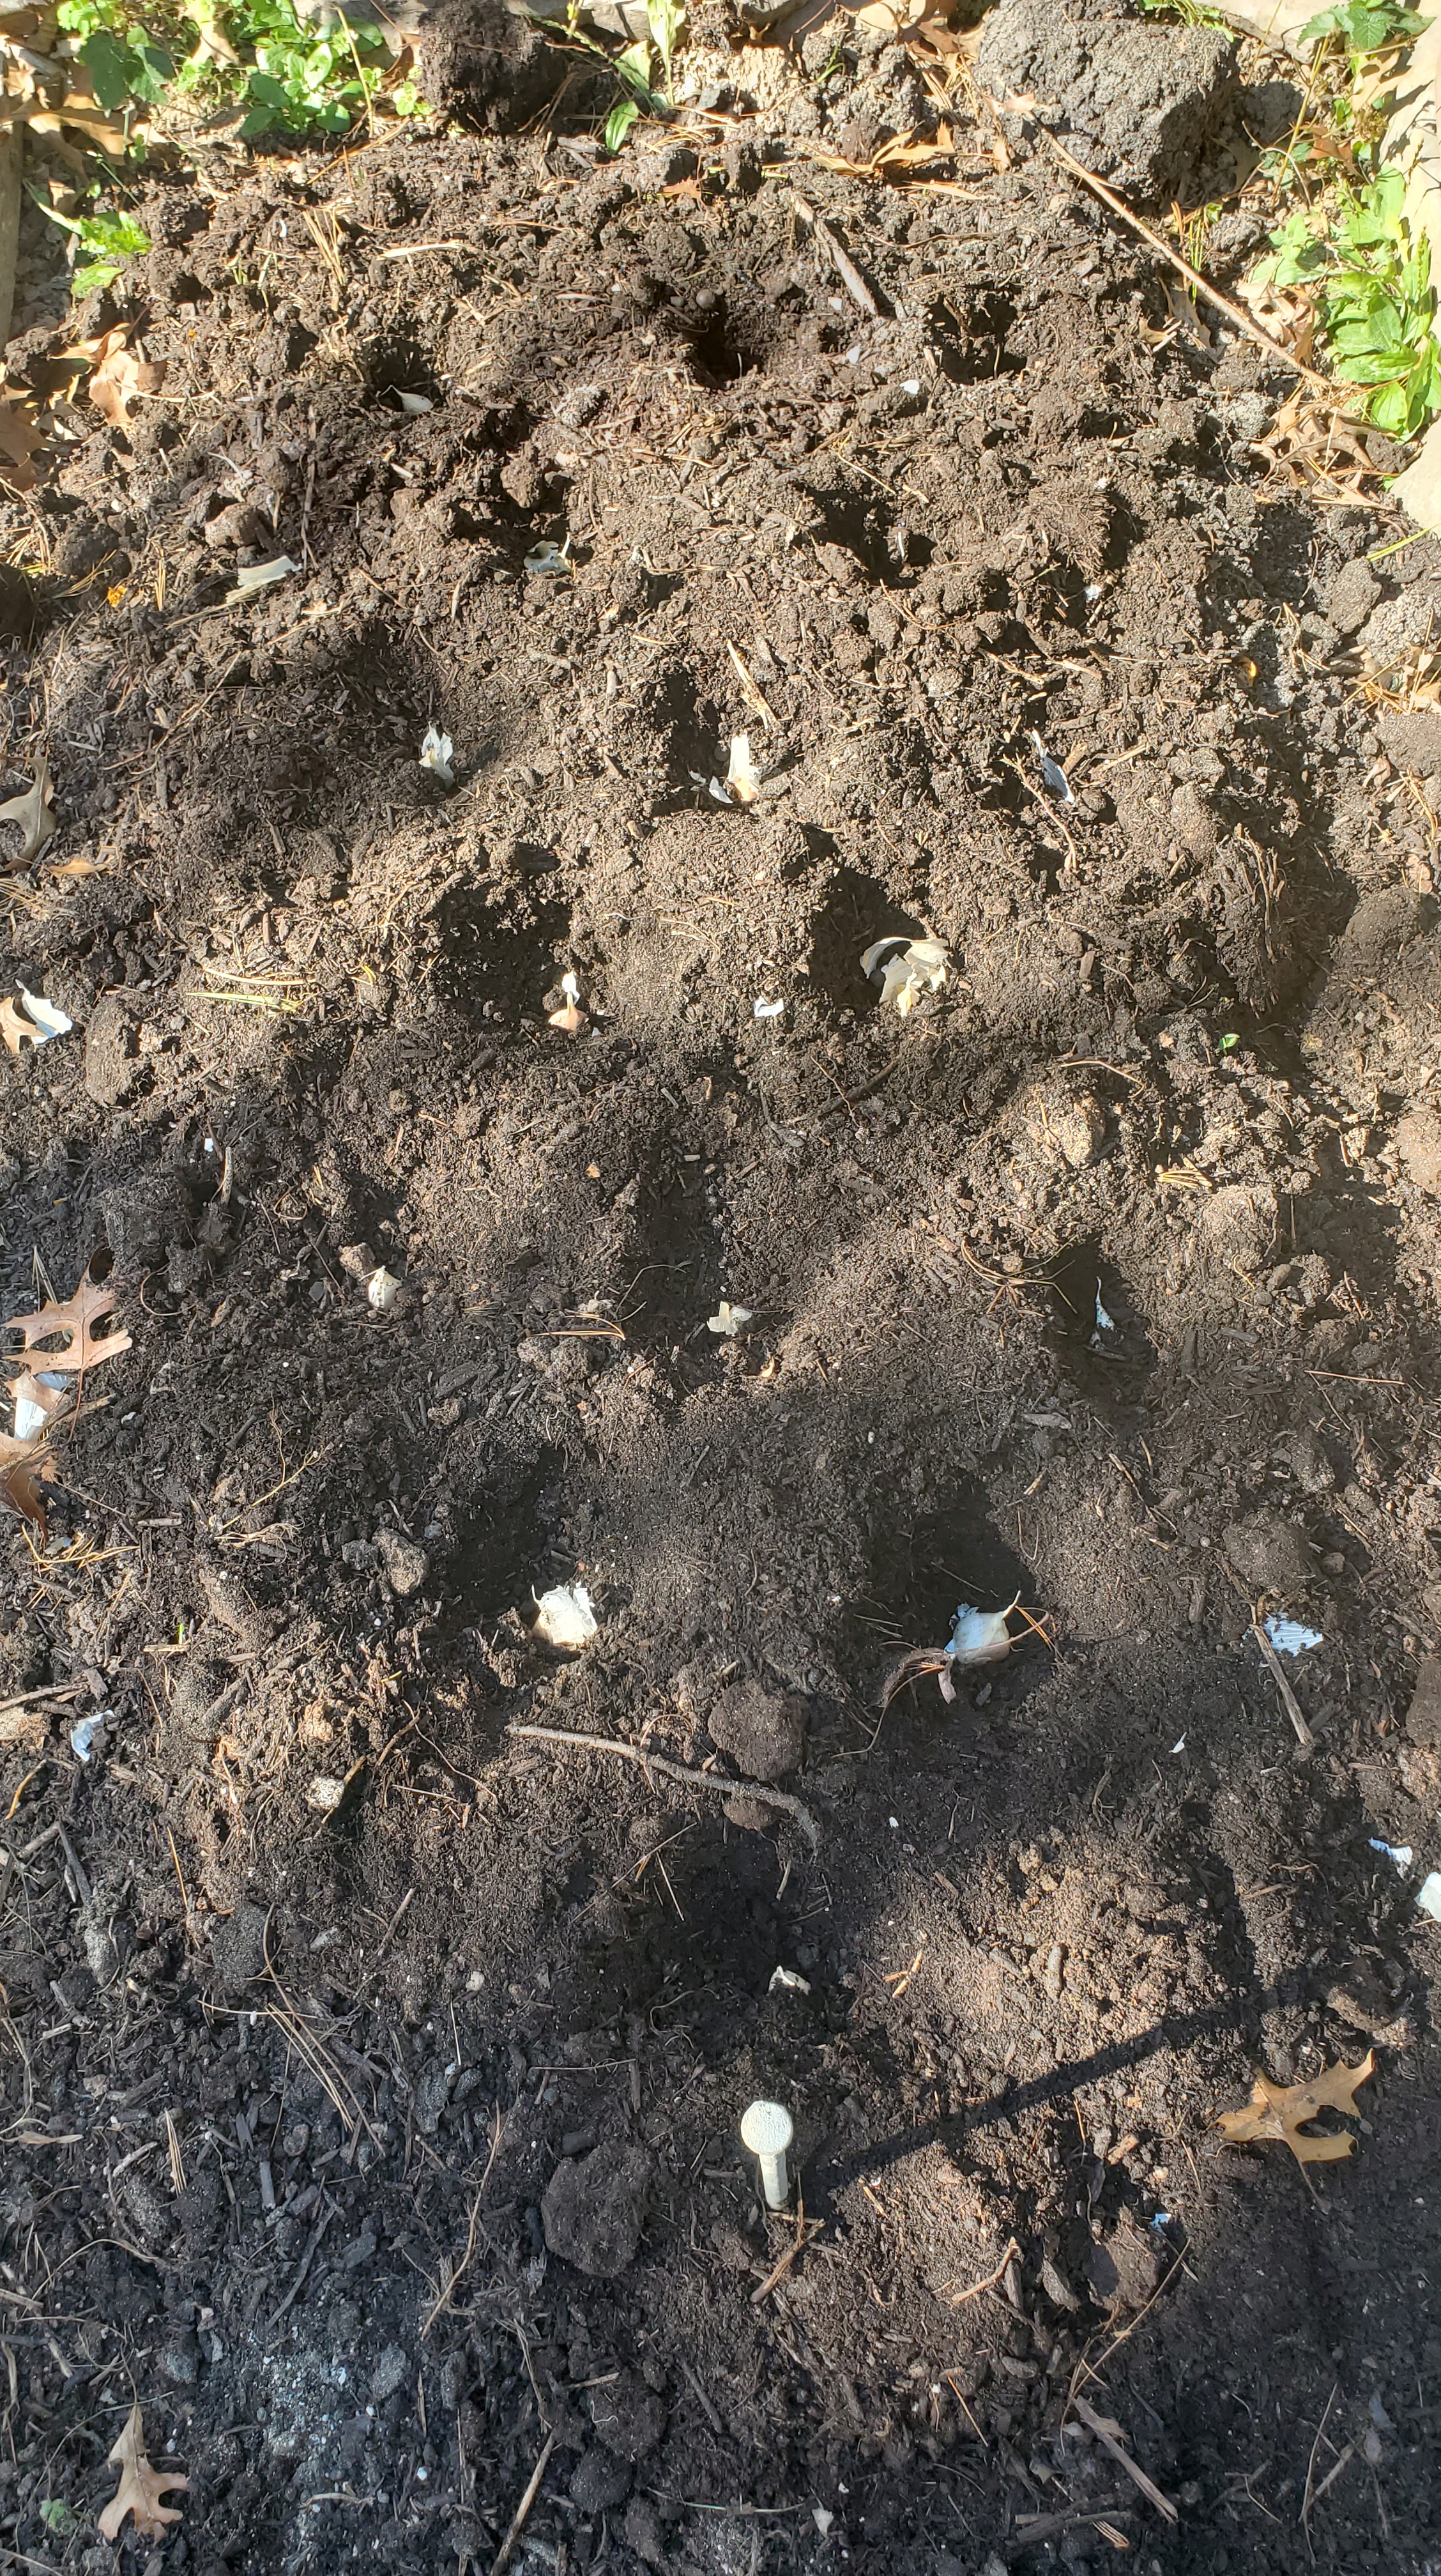
Note: End of October/early November is also the perfect time to plant your garlic for next year. Identify whichever bed or section you want to plant it in, remembering that you won’t harvest it until mid to late June so factor that in to your placement. Then depending on how much space you can dedicate, each clove needs to be planted 2-3” deep and 4-5” apart, buy as many organic heads of garlic as will fit in your space. I bought 3 heads of garlic and planted between 27-30 cloves (plant the biggest ones) into the compost and manure I had just put down, and then covered with shredded leaves and a few cardboard boxes.
Alright, alright, alright. Did you read that with a Matthew McConaughey Texas twang? I recently listened to his book Green Lights while gardening so he is fresh in my mind. Most of us should be making our way towards lifting our heads and coming up for air. The crazy harvest season is likely winding down for many. I am personally ready for a slower pace.
Maybe I took on too much this season, and that was mostly intentional. I knew I’d be home every day due to the pandemic and wanted to push myself. Without my 2+ hour commute three days each week, I gained back all the time I need for gardening. I’ll be doing a lessons learned post soon and can’t wait to hear from others what your big successes were and what you’ll do differently next year.
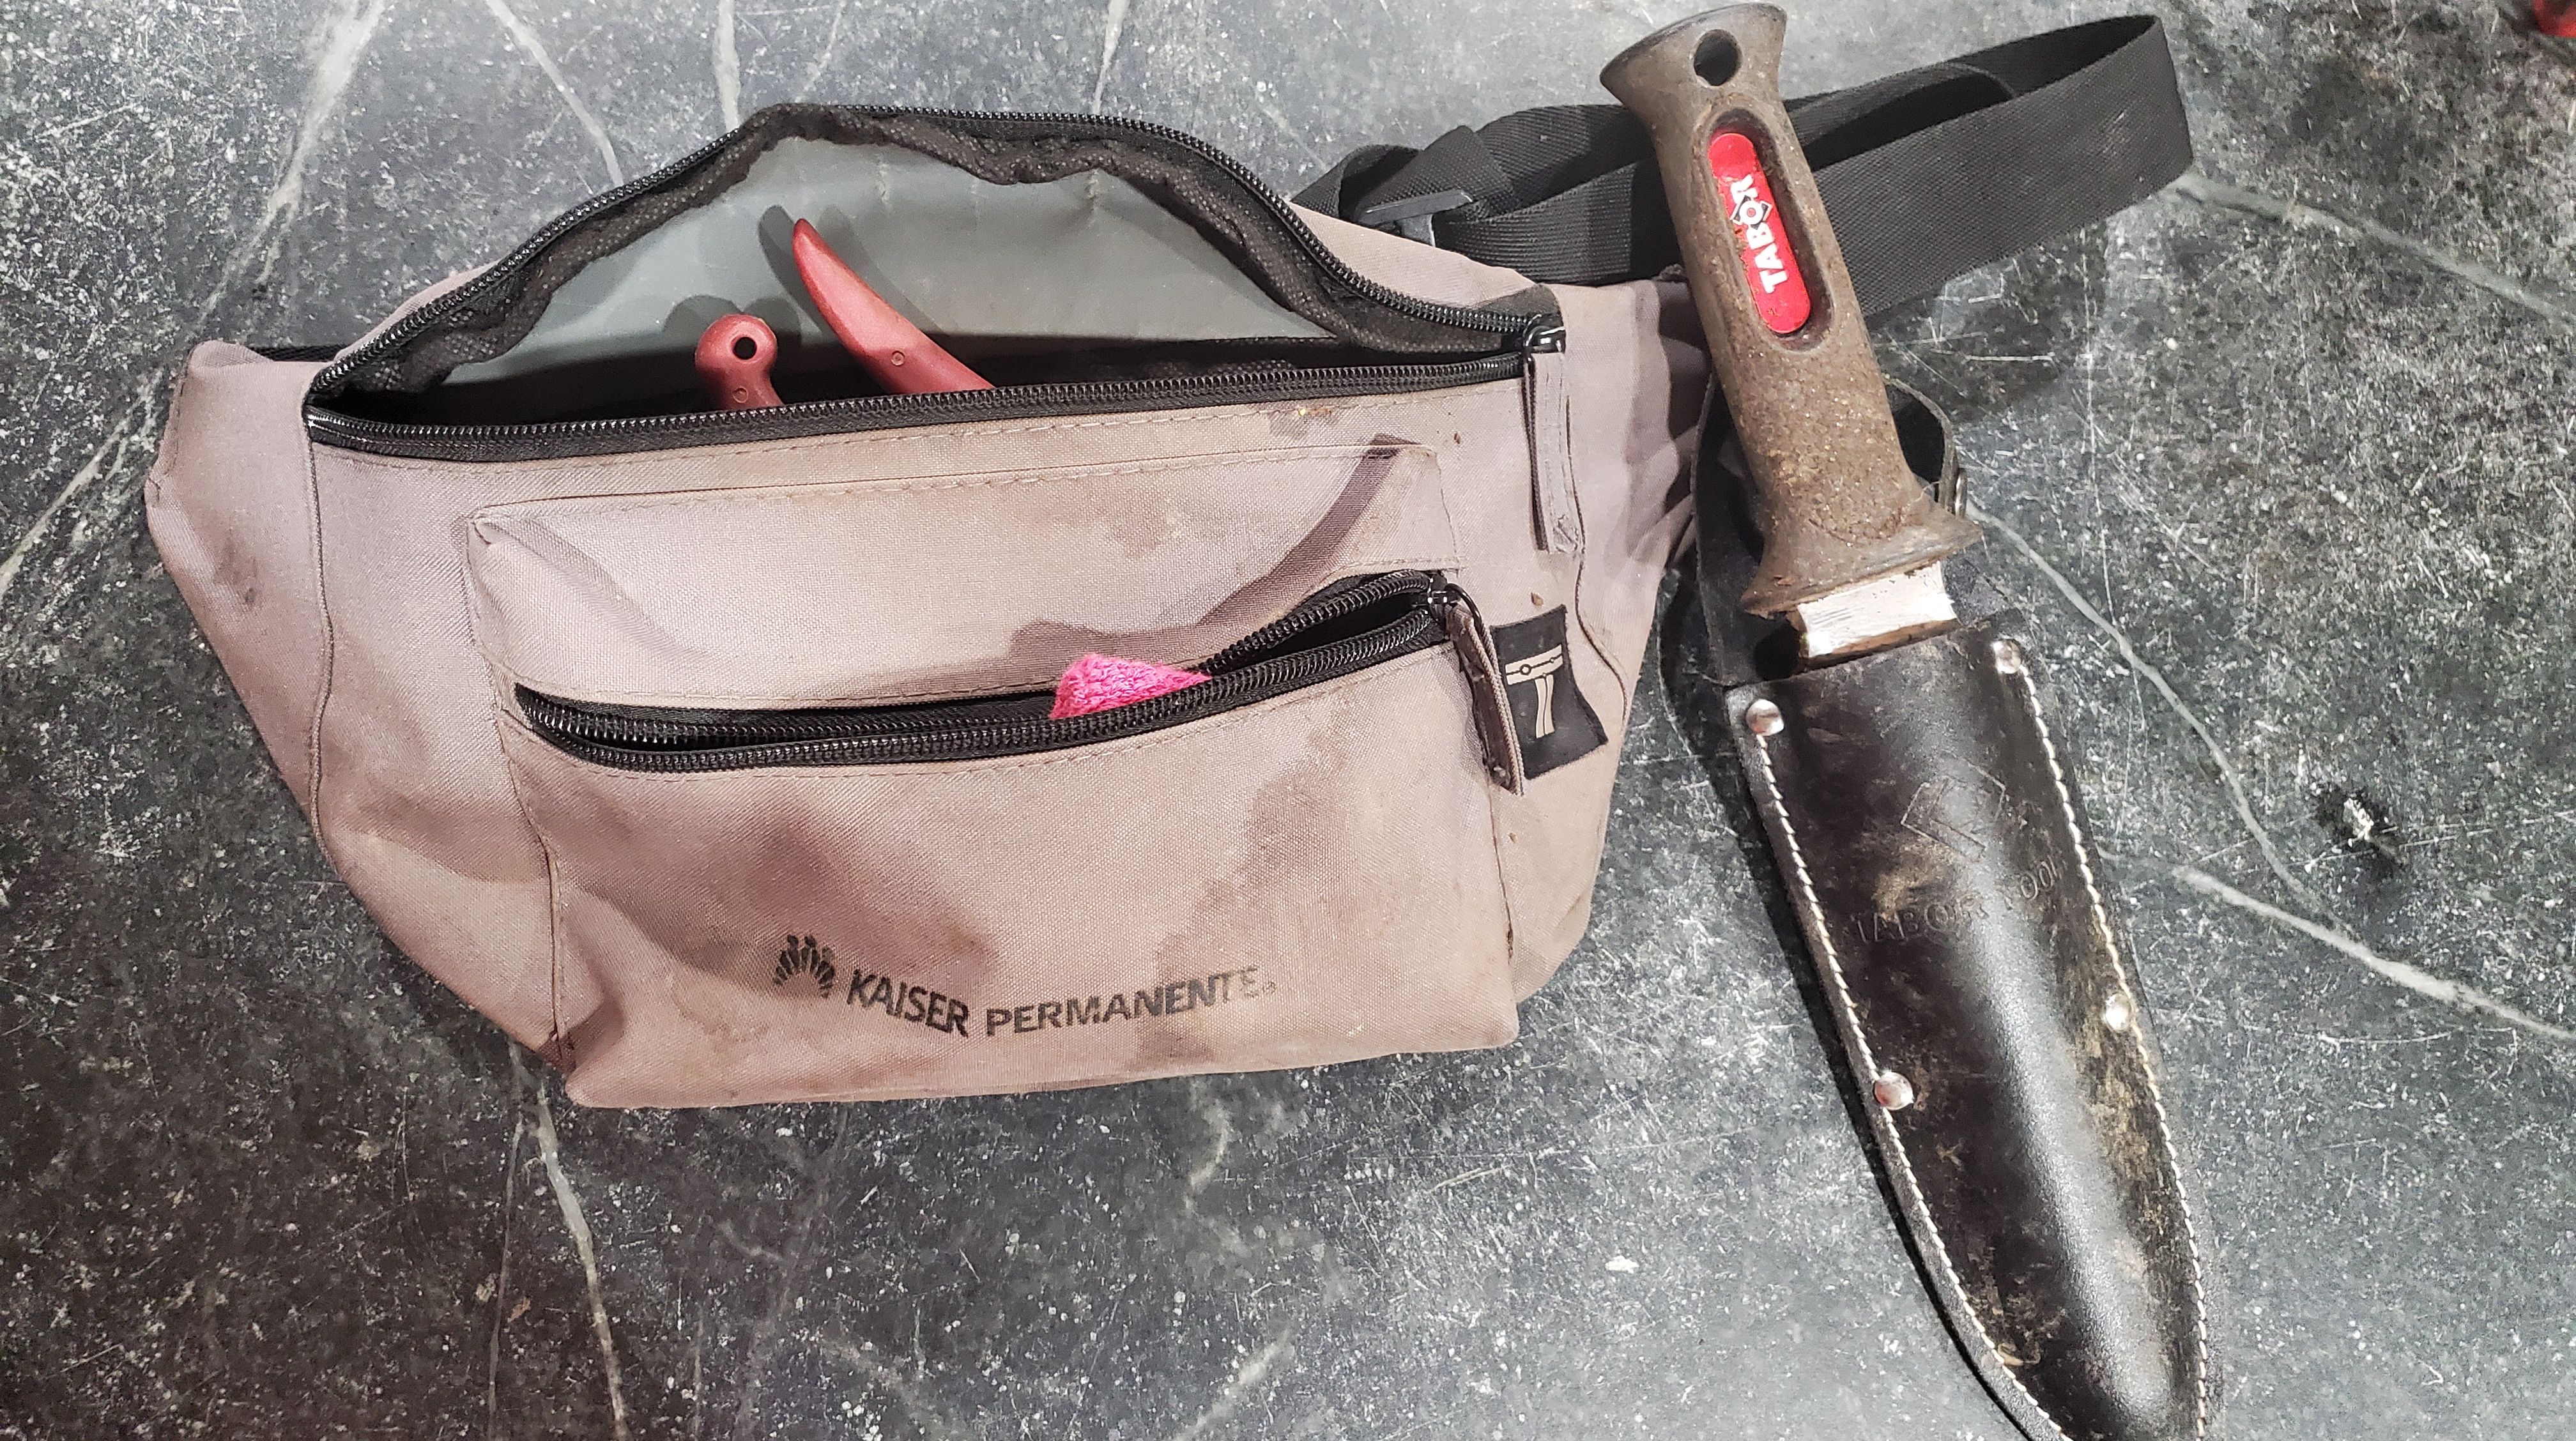
In the meantime, I wanted to shout out a tool that I pretty much can’t live without. Have you heard of a hori hori knife? I hadn’t either until one afternoon when I was volunteering at the local farm where I learn oh so much from everyone I talk to. Now it’s on my gardening belt and I don’t walk out the door without it. So what is it? Sounds kind of scary, right?
From what I’ve read it comes from Japanese culture and is a multi-purpose gardening tool. Initially it just looked like a big knife to me but then I started to really appreciate its versatility.
Digging. It’s fantastic for digging in to remove deeply rooted unwanted weeds like Doc that pop up a lot in my garden and yard.
Cutting. Similarly you can use the sharp edge to cut back a plant that has overgrown.
Planting. I really like it as my go to for either creating a little trench to sprinkle seeds in, like I just did for radishes, or making individual spots for my starts such as broccoli or cabbage. It essentially replaces the need for a hand trowel. And it has marks for measuring depth if you are aiming to be precise.
Cactus tells me I look like Indiana Jones or Crocodile Dundee with it on my belt. But who cares – I love it!
I don’t know about you but the weather this summer is no joke. For me, it’s either blazing hot or pouring rain. My plants seem like they don’t know what to do and every day I’m just trying to decide whether it will rain that evening or not and if I need to water plants.
Depending on your growing zone, you may have already started your fall crops indoors. I’m in the Mid-Atlantic in 7a so end of July/early August is that time for me. Last year I bought starts from the nursery for brussels sprouts and broccoli so this year I am attempting to grow them from seed myself and will start them indoors along with my *wildcard* crop cabbage. It’s a wildcard because I’m just going to experiment with about four of them and see how my luck goes. My hope is to make sauerkraut for some good probiotics during the winter. Everything else – beets, collards, kale, radish and spinach – I’ll direct sow in early September.
As you may have surmised, here’s where timing and space get a bit tricky. All my main summer crops – beans, peppers, squash and tomatoes – are in full swing thus there isn’t much available space. I do have two small open beds where my onions and garlic failed and where I’ve already harvested all my carrots. However, I want to put down a cover crop in one of them to help build up the soil. Sort of feels like a game of Tetris sometimes. Anybody else feel that way? I’d love to know how you all inter-plant different crops as the seasons are changing.
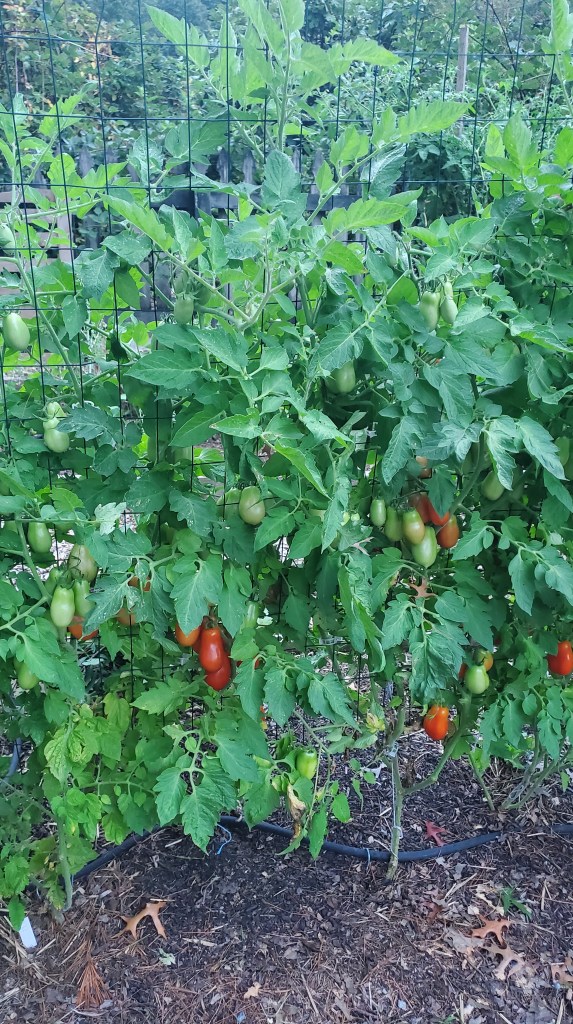
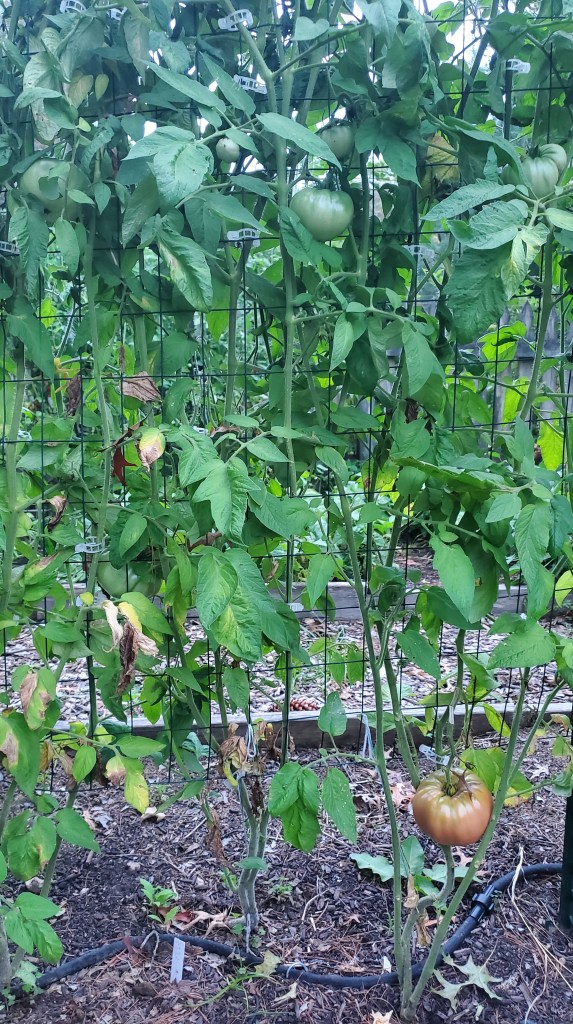
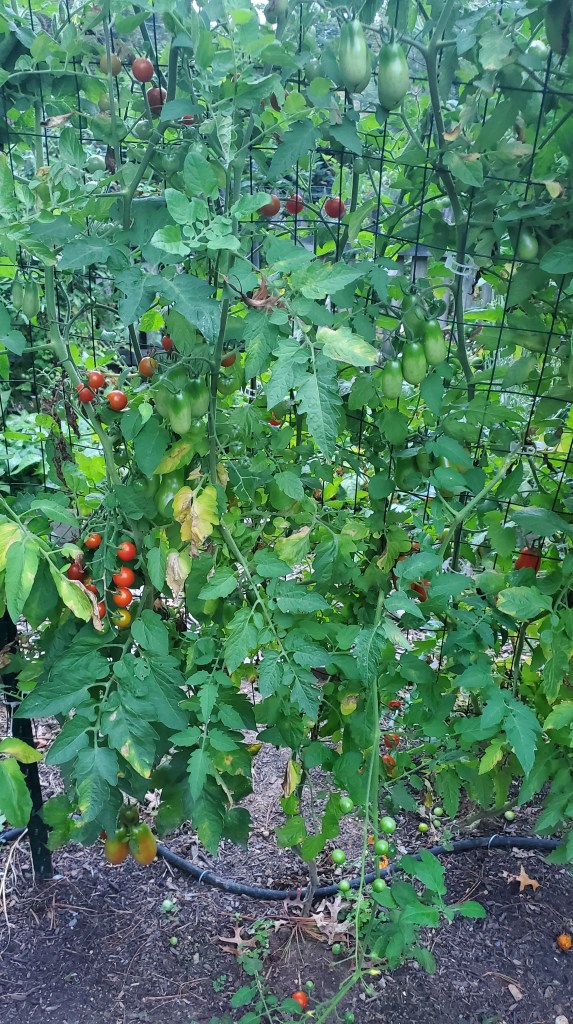
Update: I did want to re-visit the ‘tomato wall’ that I newly established this year to give you an update. The last two years all my tomato plants became an unmanageable jungle: year one was tomato cages and year two was an A-frame support structure. Neither of which worked well once there were big fruits that needed substantial support. I didn’t want another year of disappointing results which is why I tried fencing and T-posts and tomato clips. Sooooo <drum roll please> the tomato wall is going extremely well and I’m really happy with the results so far! I planted my paste tomatoes together, my German pinks for canning all together, and then my little cherry tomatoes for salads and snacking together. Check them out!
Phew, it’s about the halfway mark of the summer growing season. How are you feeling? Eager? Overwhelmed? Excited? Disappointed? Surprised? Probably a mixture of many emotions on any given day. I’m out in the garden about an hour every morning and I love it. Can’t think of a better way to start my day with whatever coolness the day offers, the birds singing, and all my plants looking fresh and supple. But there are some days I just want to lie in bed.
I think it’s like a lot of things in life that take time and dedication, the midpoint can sometimes feel like a lull. The finish line still a ways away. So I’m trying to absorb the experience. Soak up the process. Take lots of notes, ponder what’s going well and what I might want to do differently next year. I’m learning that no matter how much I plan, no matter how much I read or how many videos I watch, and no matter what I do – nature makes the rules. And Momma Nature can change the rules at any time.
Just like everything else in life – training for a sports competition, preparing a presentation, catching the curveballs of parenting, and driving to the store – there will always be elements out of my control. I’m a planner and an organizer but all of my efforts still stop short of guaranteeing an outcome. If I’m only focused on the numbers or pounds of each crop harvested, I’m missing the point. The garden is wise. No matter what is happening, there is something to learn. And that’s why I’ve chosen this hobby. I’m always learning, and mostly about myself. There’s something to be said for quiet time in nature and appreciating its beautiful complexity.
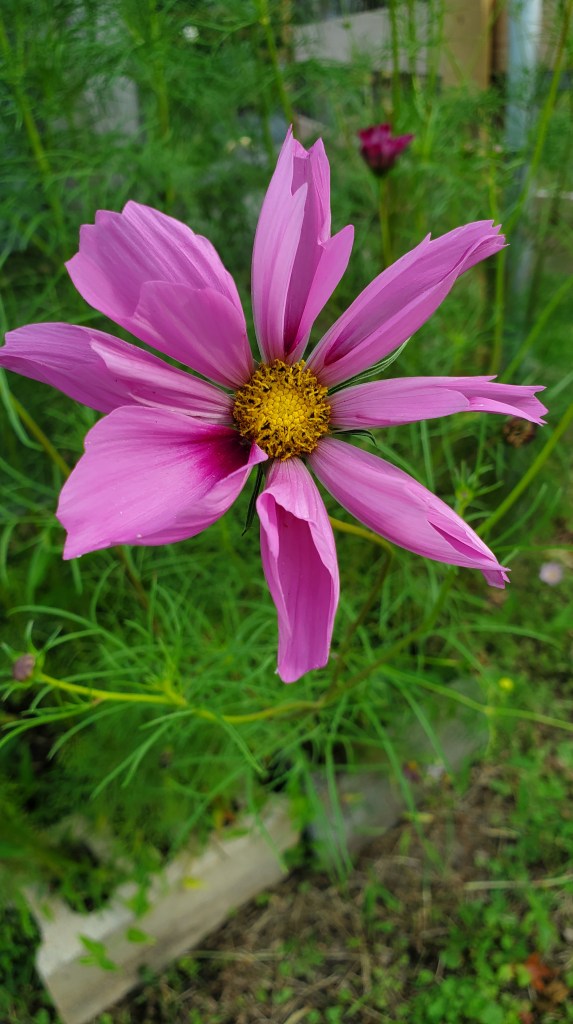
I made a point of planting flowers this year, mostly perennials, as a visual and physical reminder to stop and smell the daisies, susans, and cosmos (not a rose kind of girl). There’s always work to be done. And in equal measure there is time to simply be. And if I can’t remember that, seeing my dog relaxing in the grass is as good a reminder as any.
I hope your gardens are flourishing and I hope you are remembering to lie in the grass and watch the clouds float by.
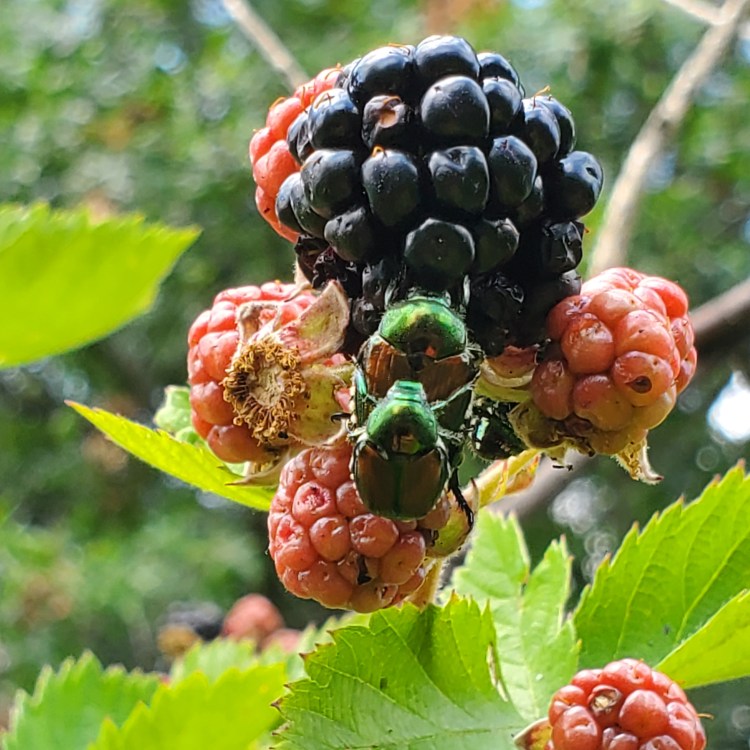
Do you know who is in your garden right now? I mean, do you really know? The only way to know is by visiting your garden at different times throughout the day. Yes, I know that takes a little more time and planning but you can be smart about it. For example, do your weeding in the morning on Mondays and Wednesdays, and do your watering in the evenings on Tuesday, Thursdays and Saturdays. Midday is hottest and I’d venture to guess you’ll see the least action but hang out for 5-10 minutes and just browse your beds slowly. Usually we’re so focused on completing a task that sometimes we don’t stop to just observe and you’ll be surprised to learn who is creeping around. There’s a black snake that sleeps under the bin where I store stuff and there are two crows who dart in and out of my berries.
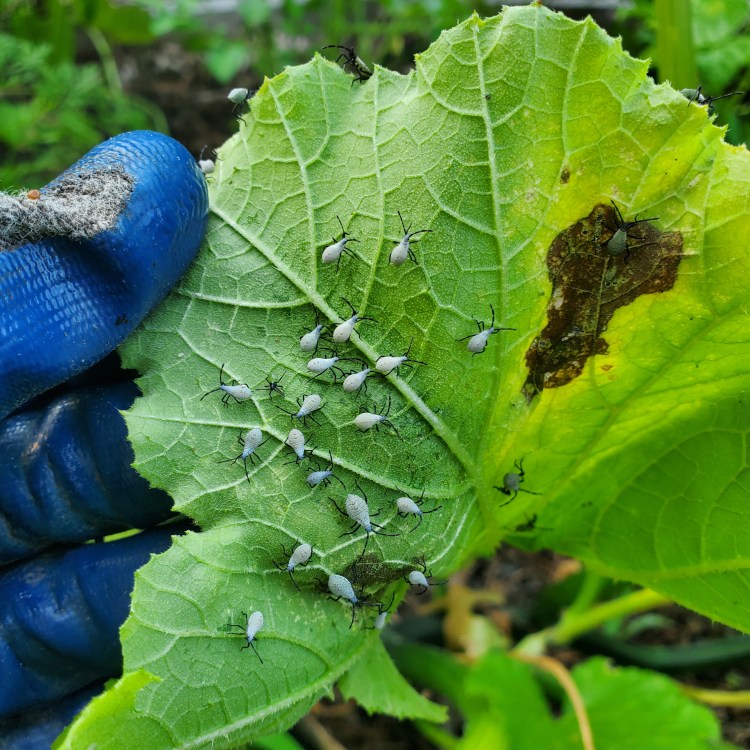
In the mid-Atlantic my two garden frenemies are squash bugs and Japanese beetles. Last year the squash bugs decimated my zucchini and cucumbers. The year before that the Japanese beetles feasted on my beans. It’s so frustrating to put in all the work, see everything start to blossom, and then from one week to the next, game over.
I prefer not to use any pesticides in my garden, so this year I’ve been focused on two strategies – prevention or distraction.
Prevention: I go out to my garden nearly every morning and inspect my squash plants. I turn over the leaves and I examine the stems of the plants. You’d be amazed at all the critters you find hanging out, to which I say, “Grrr, nobody invited you to this party!” I typically just smoosh them with my hand and if I see eggs on the leaves, I scrape them off with my finger nail. I’m also experimenting with a spray I made myself (#MIM) of 1 tsp peppermint oil and 1 tsp tea tree oil in 1 cup of water. After I’ve cleaned away the critters, I’m spraying the underside of the leaves and it seems to be working. The other prevention strategy is to keep your squash plants covered with fabric. I will likely experiment with this next year.
Distraction: You may want to consider various options for companion planting, nasturtium is highly recommended and I planted it near my beans, peas and asparagus and to be honest I don’t see a lot of bug action in those areas so it seems to be working. The other approach I’m using is planting a few of the crops I really want to ensure succeed in different locations, for example a big container near my front porch. I know the bugs can still find them but I’m hoping they leave these ones alone. Along these same lines is to stagger your planting. Such as putting out 3-4 squash plants in June, and then 3-4 more in July if your growing zone accommodates this. I guess it’s technically more sacrificial than distracting but it’s working so far.
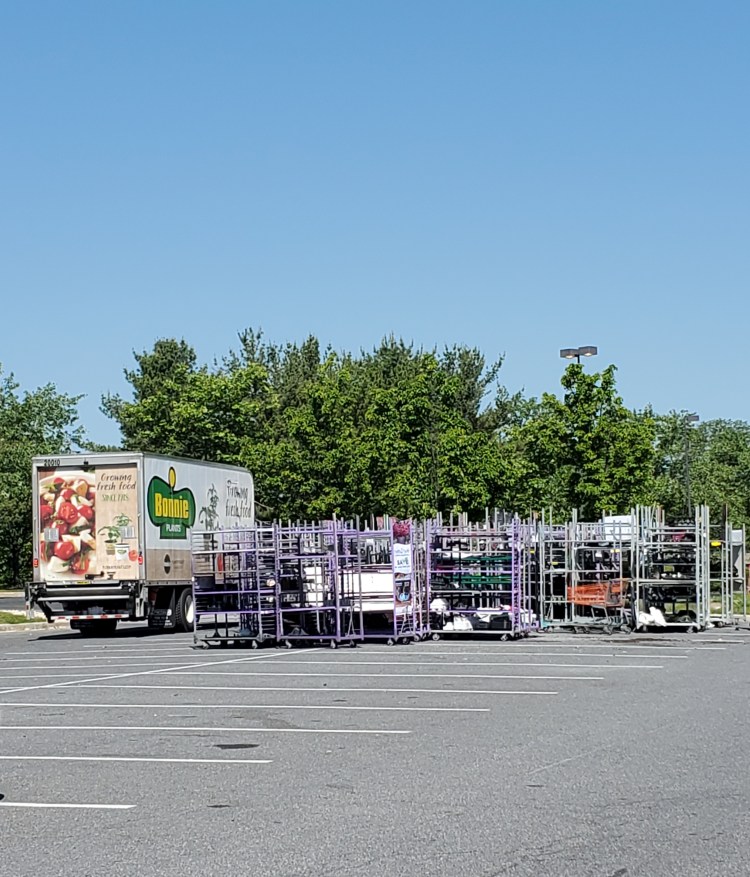
You are not going to believe this, but scoring free plants is totally a thing. A neighbor told me she gets bulbs and other plants when stores are changing over between seasons. I just sort of smiled and nodded like, “Yeah, I’m not sure that’s true but thanks for telling me.” I didn’t really put much weight or thought into the idea. But lo and behold I am a believer.
I was driving by the local Ome-hay Epot-day (don’t want to implicate anyone here) and happened to see all these rolling shelf carts at the end of the parking lot. They were not organized and at first glance appeared to be empty. But my little eagle eye said to go give this situation a closer look. Before I say more, there are two things I would say you need to know about me.
I’m a rule follower. I like order and I like predictability. However, if there isn’t a sign explicitly saying not to do something, then it’s up to me to use my brain and decide what is reasonable and sensible. There was no sign saying “Don’t take these plants.”
I love recycling! If I can save something from the trash and find a new use for it, nothing makes me happier. It’s a two-fer. Someone else enjoyed this item and now I get to enjoy it as well. And in this situation, nobody else even got to love on these plants yet. They were just wishing and hoping to have the chance to live their best lives. It was my duty to save them 😊
On that note, let’s talk about going through trash for a second. I’m not going to jump in a dumpster necessarily, but if I see perfectly usable things in the trash that I can salvage, you bet I’m gonna do it. Look, we live in a very disposable society, with short attention spans, and marketing and advertising constantly telling us we need something else to be happy. I don’t buy it! (see what I did there?) That’s why I did the whole year of enough. Stuff doesn’t make us happy. Relationships and feeling connected to family and friends, doing meaningful work, and helping others makes us happy. If someone is concerned about the appearances of resuscitating an item from the trash, look no further than the proverb one man’s trash is another man’s treasure.
So I walked on over to the rolling shelf carts and there were hundreds of plants jammed on top of each other. Yes they were dried up and on their last leg but let me tell you their time was not up. I spent about 10 minutes sorting through and grabbed no less than 30 plants – some flowers, six peppers, maybe eight tomatoes, a few mints, a couple cilantros, two basils and sages. There was even some okra and cucumbers! I pretty much won the lottery.
Food wasted is something that I’ve been learning more and more about and this was a light bulb moment for me. All these plants represent food and self-sufficiency. Maybe we all don’t have a huge yard to grow food but we could all have 2-5 plants on our windowsills, door steps or balconies. And then we have some ownership over what we eat, which leads to taking better care of our health, and then we are unstoppable.
Besides hanging out by the trash, here are some other ways to score free plants:
Pay attention to the change of seasons (April, July, October) and when certain items are going to be pulled from the shelves.
Ask the staff at your local hardware store if there are plants they are going to toss.
Volunteer at a local farm or greenhouse – there will be plants that don’t sell.
Trade with a neighbor. Take note of which neighbors have gardens and offer your extra seedlings in exchange for some of theirs.
In addition to starting another garden row, I wanted to experiment with growing more crops vertically this year. I bought a GreenStalk planter and decided to use it for my strawberries. Two years ago the bunnies had quite the buffet at my expense so I thought growing them in this planter might offer more protection. And strawberry plants are perennials in the sense that they send runners out that will create new plants which means more harvest and less work *hopefully*. Though the first year is not meant to be a huge production but moreso about the plants getting established. I bought half June-bearing and the other half everbearing plants. My thinking on this was the everbearing will give us berries all summer long and the June-bearing will provide a good harvest all at once that I can use for jam and jelly. And this is a fun little set up for kids to be involved with because they can walk by and grab a berry.
The end of May is also when I wanted to get all my tomato plants in the ground. I had quite a lot of anxiety about this because I grew all my plants from seed this year so getting them in the ground was pretty close to giving birth with regard to the anticipation and nerves. I’ve been hardening them off gradually the last two weeks, taking them outside for 2 hours in the morning, then 3, then 4, then 5 and working my way up to 8 hours total.
Coincidentally, where I planned to plant the tomatoes was the same space I had planted all my cauliflower and broccoli in. But these brassicas have been maturing so slowly that I’ve been delaying and delaying getting the tomatoes in the ground. Over the last week I just decided I would harvest the heads of cauliflower and forget the rest. I had been told by a few people that doing brassicas in the spring was quite challenging (due to the shortened growing time as the weather typically goes from cool to hot with little transition) and better to try in the fall. But I had to see for myself and they were right 😉
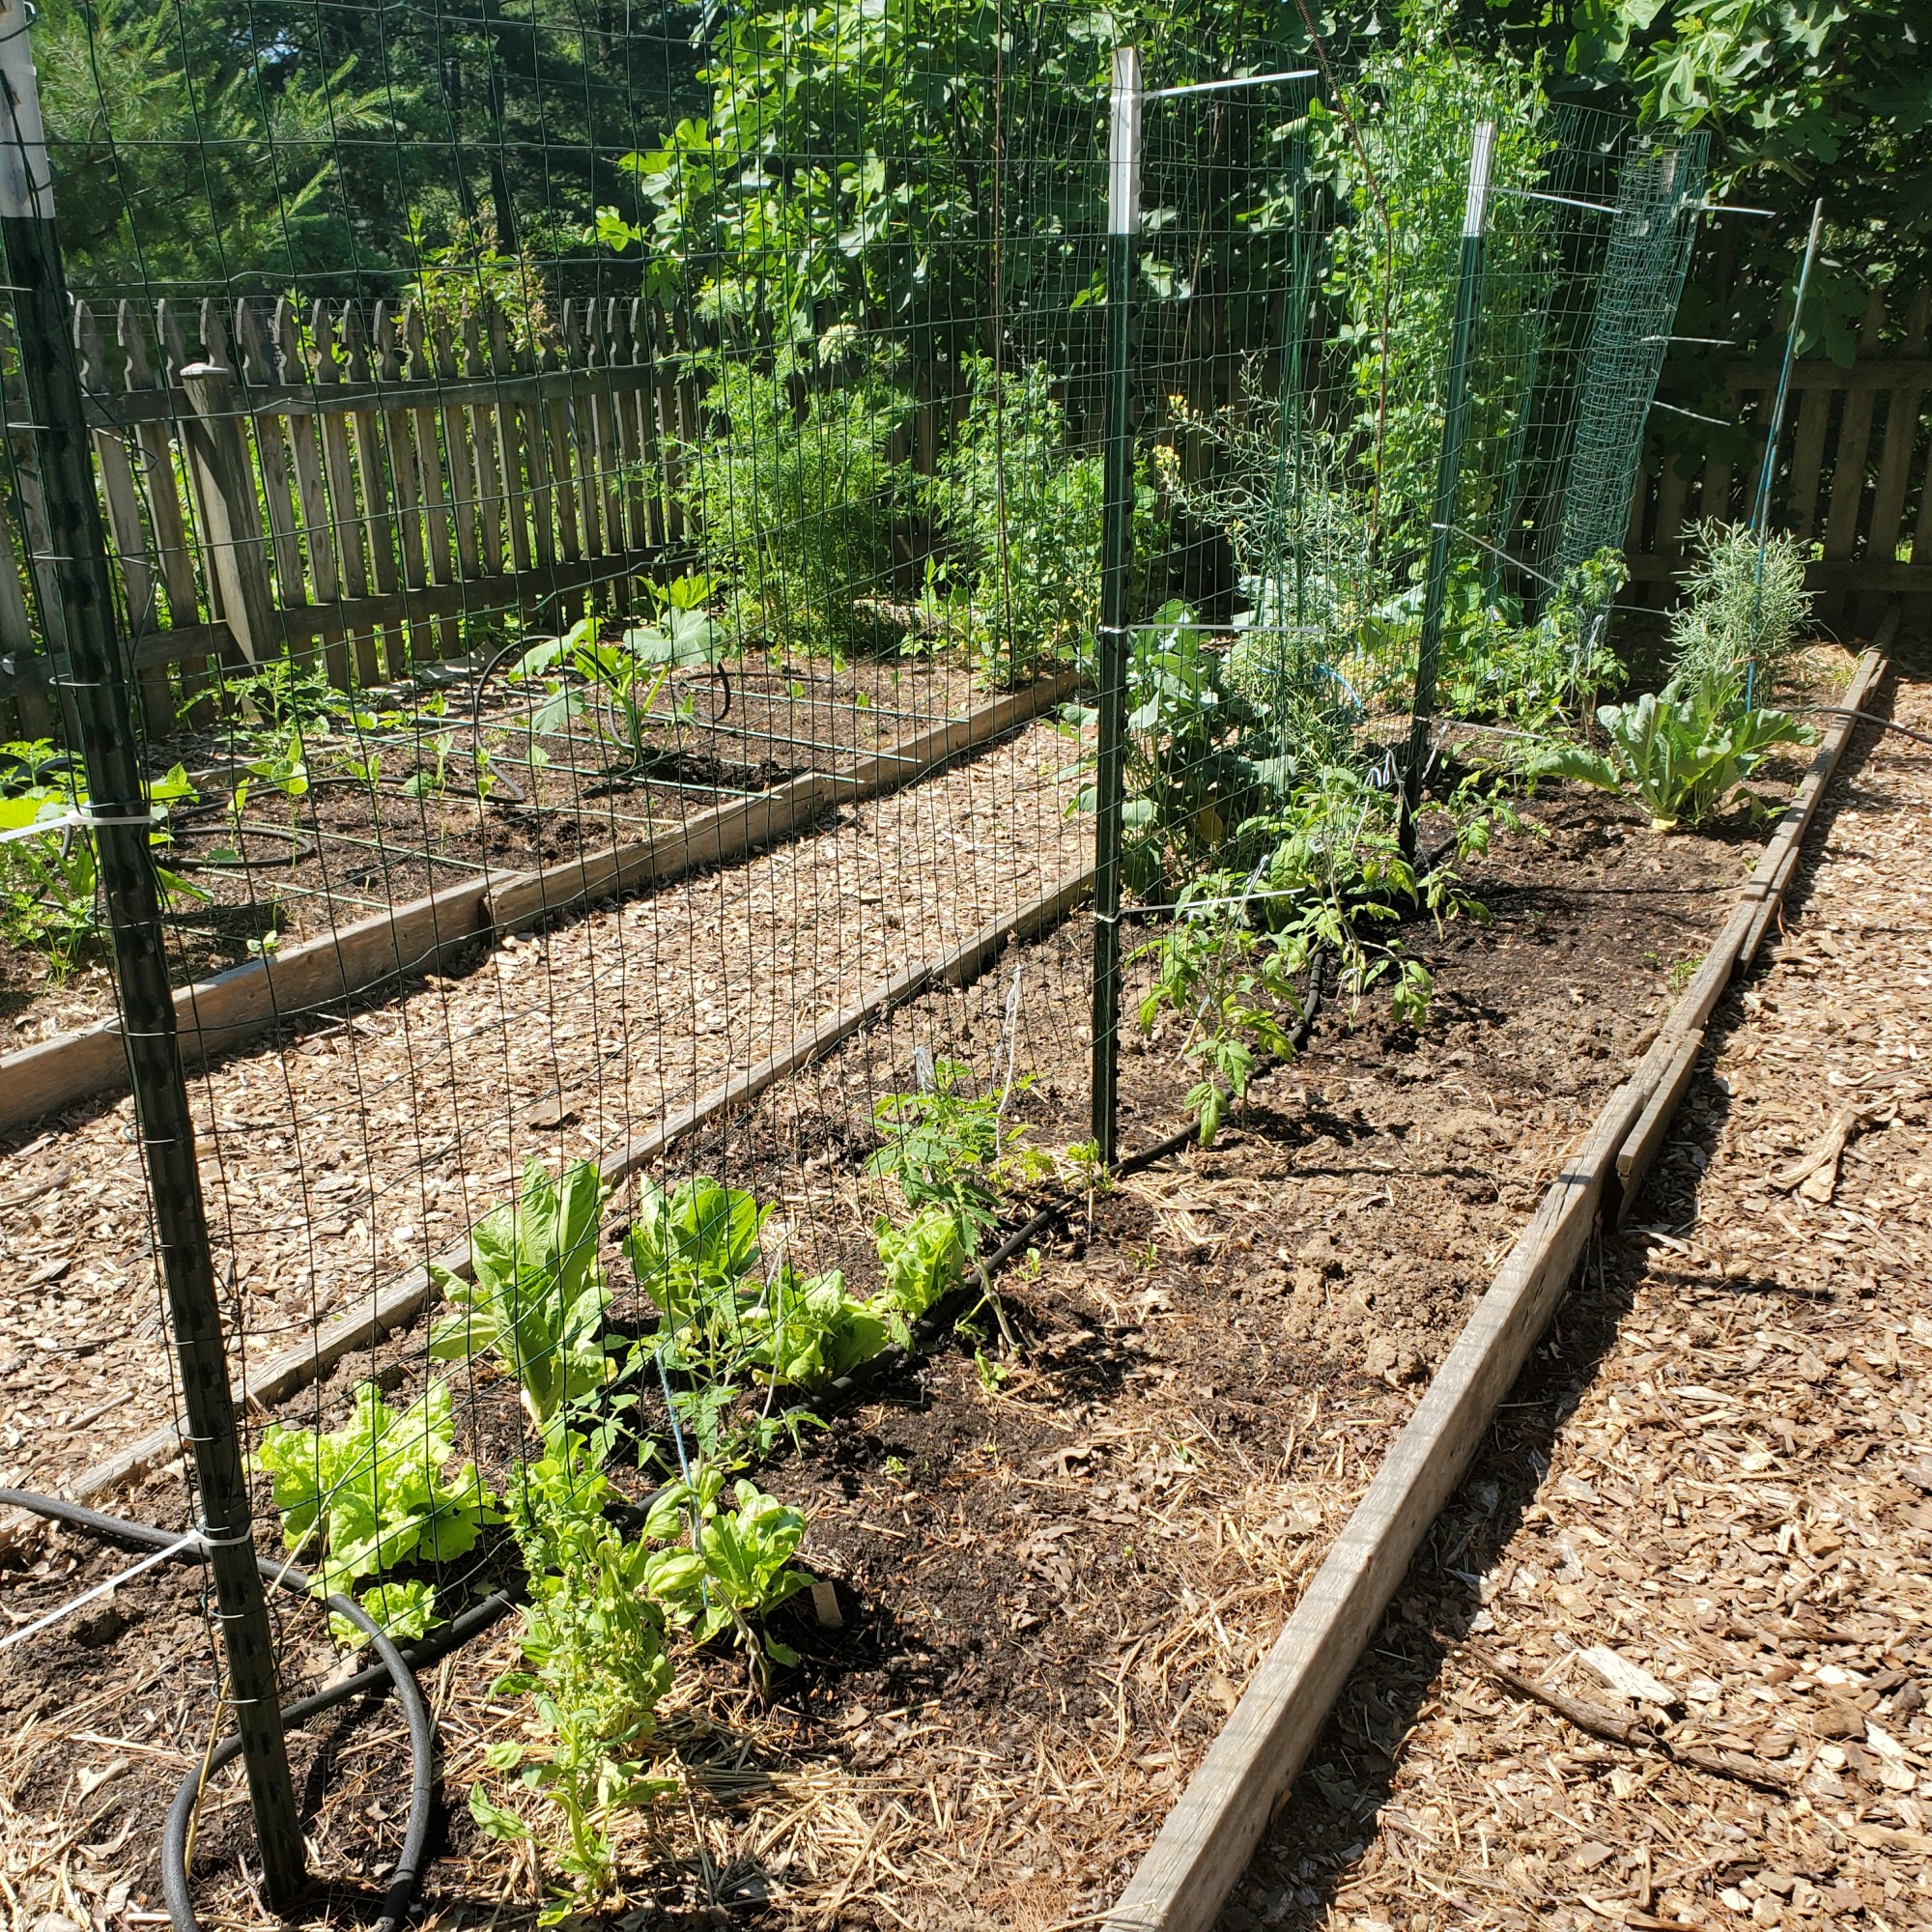
My plan was to create a better supported and more vertical setup for the tomatoes this year. (FYI – the A-frame you see in lots of posts did not work for me last year.) At the farm where I volunteer, they used a setup I really liked and had the supplies for, essentially T-posts and fencing.
Set your tomatoes up for success – here’s what I did:
I spaced my T-posts 5 feet apart and secured the fencing with 3 zip ties to each post.
I dug approximately 12-inch-deep holes in an offset pattern along the fencing, making a zig zag pattern. On one side of the fence they are 24 inches apart, but the nearest plant is 12 inches away on the opposite side of the fence. (I am hoping this doesn’t come back to haunt me.)
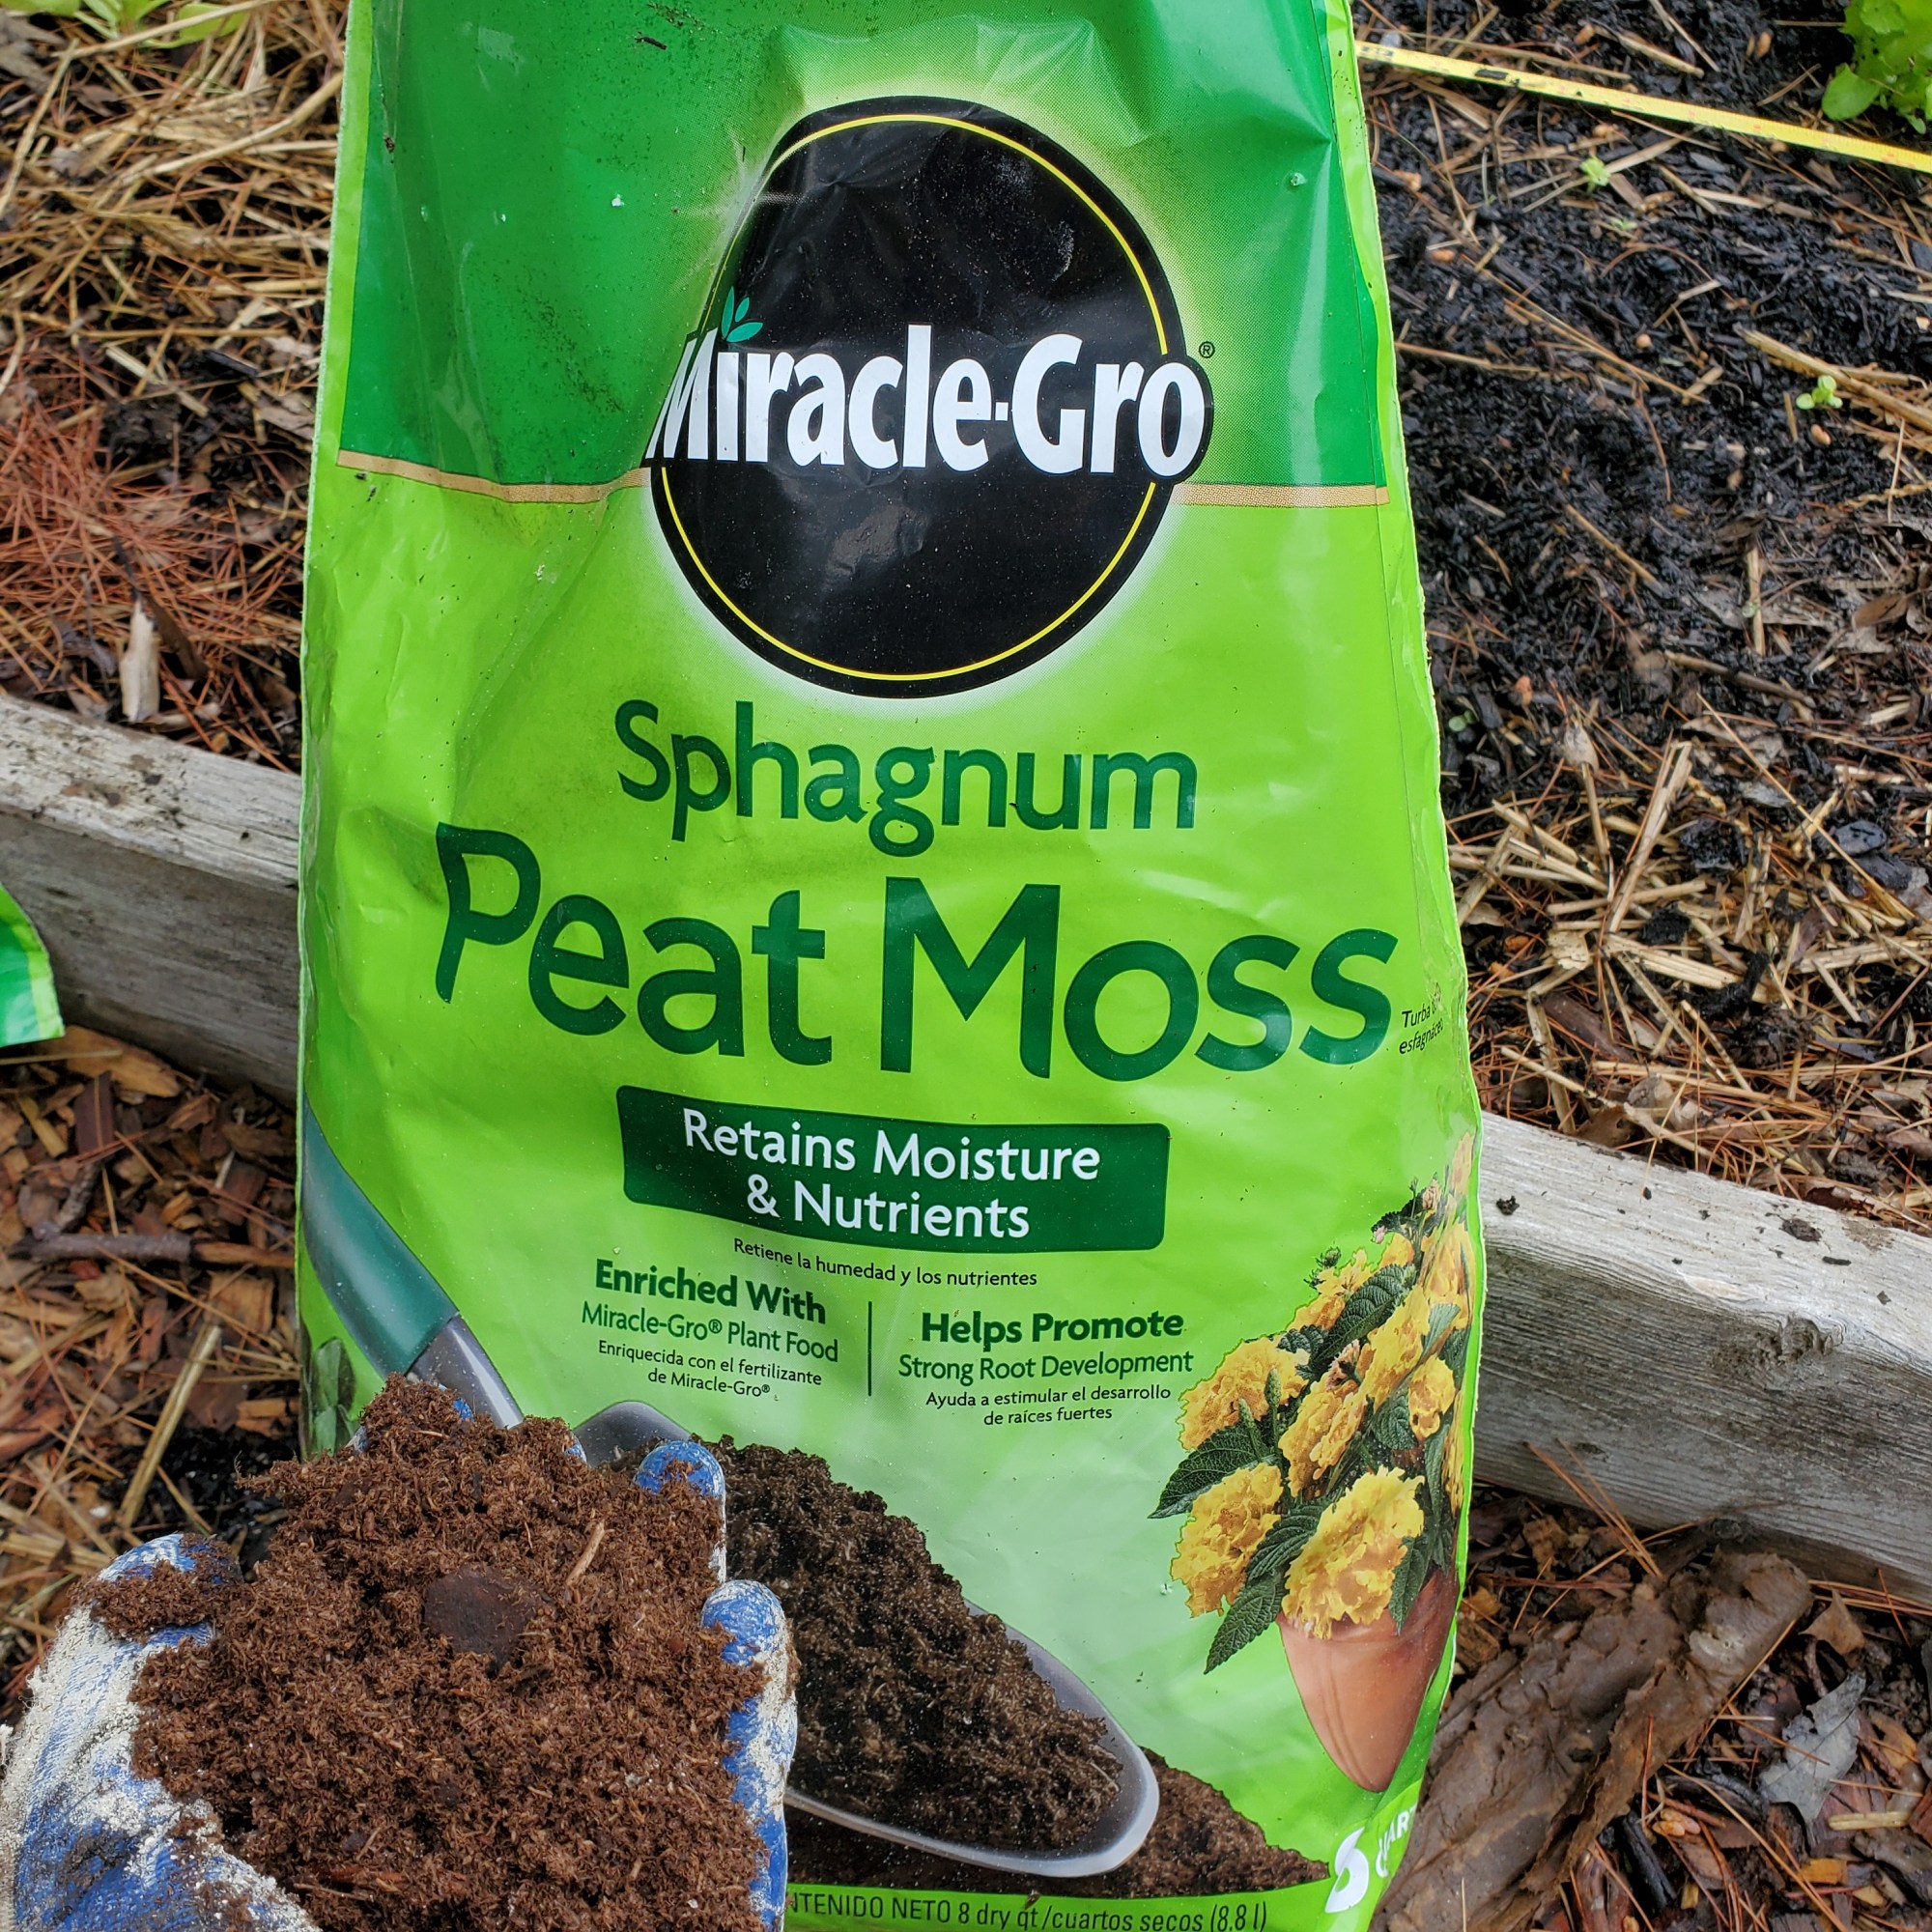
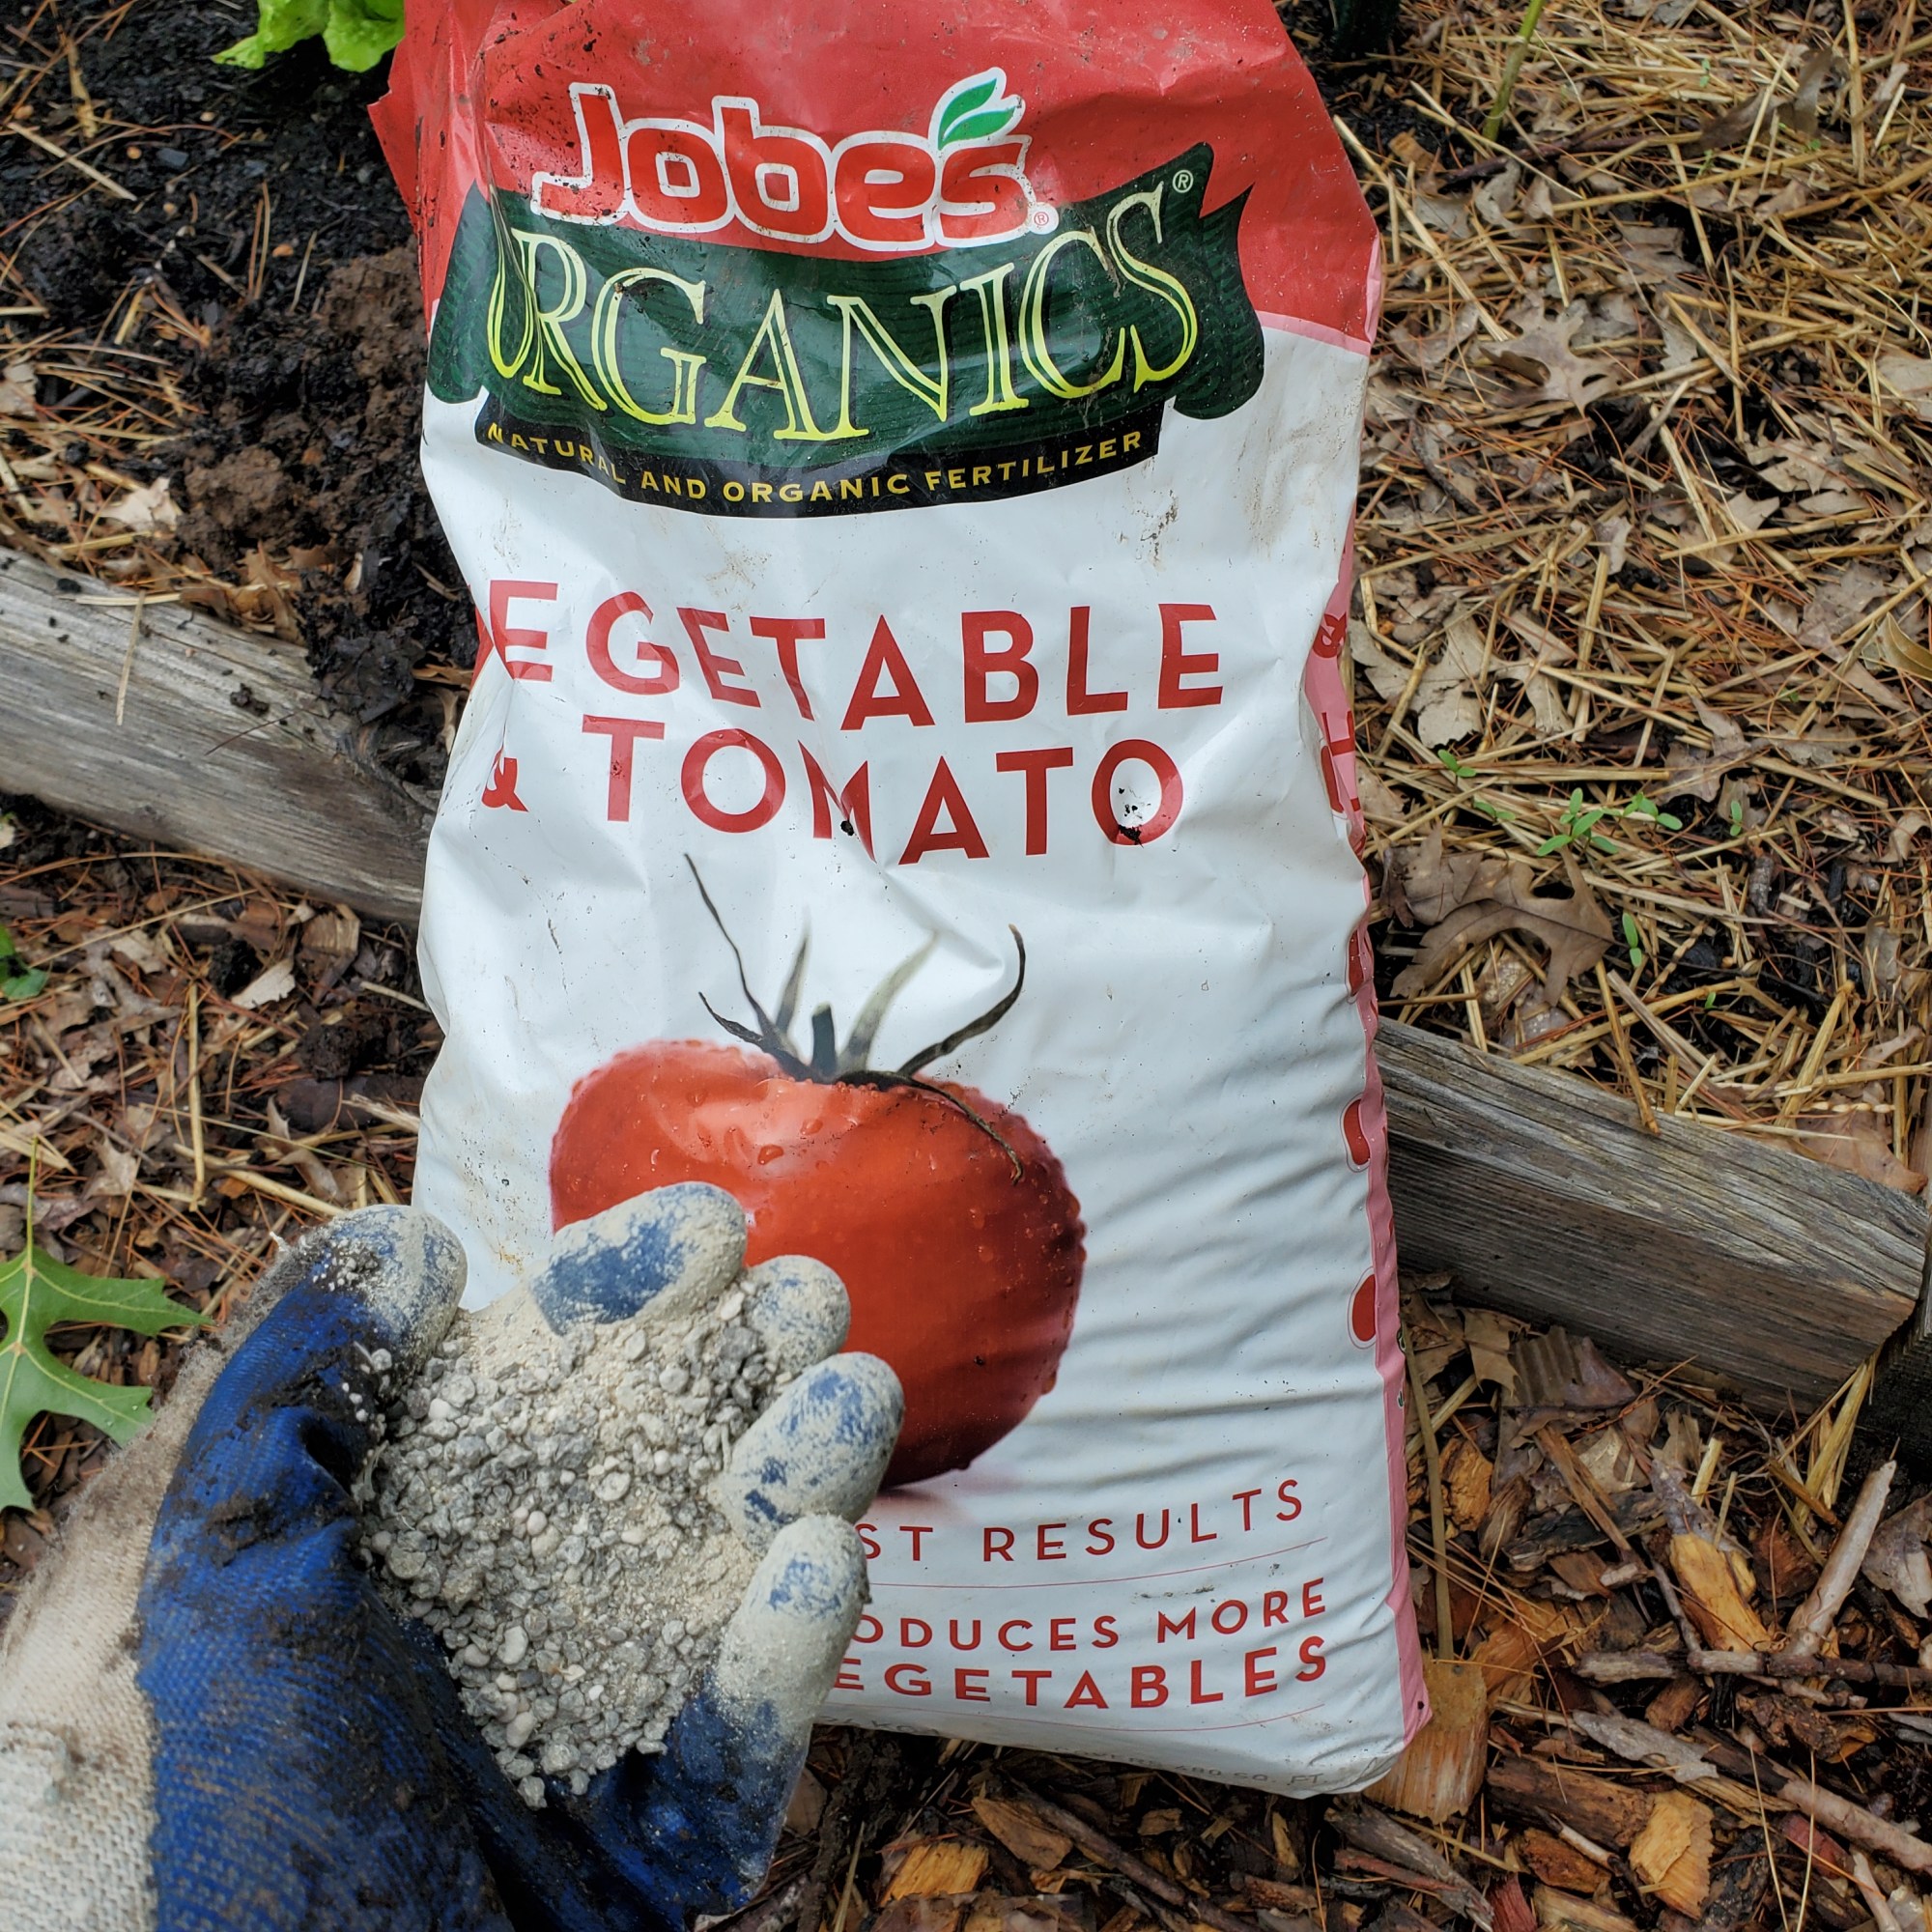
I put a handful of peat moss, and about 2 tablespoons each of fertilizer and crushed egg shells in every hole, mixed it up with compost and soil and then placed my seedlings in. Tomatoes need to be pretty deep down to help establish strong root systems and the peat moss should help with that as well. I think coco coir is a more environmentally friendly option but I couldn’t find any at the local hardware store. The egg shells provide calcium and along with the peat moss help to make the dense, clay soil we have here a little more light and aerated.
Not all of them are tall enough to reach the fence just yet, but for those that are I am clipping them with these handy tomato clips.
All in all, it took me about 2 hours with the help of Cactus installing the T-posts, to plant my 15 tomato plants. These are my babies and I am so excited to see how they grow.
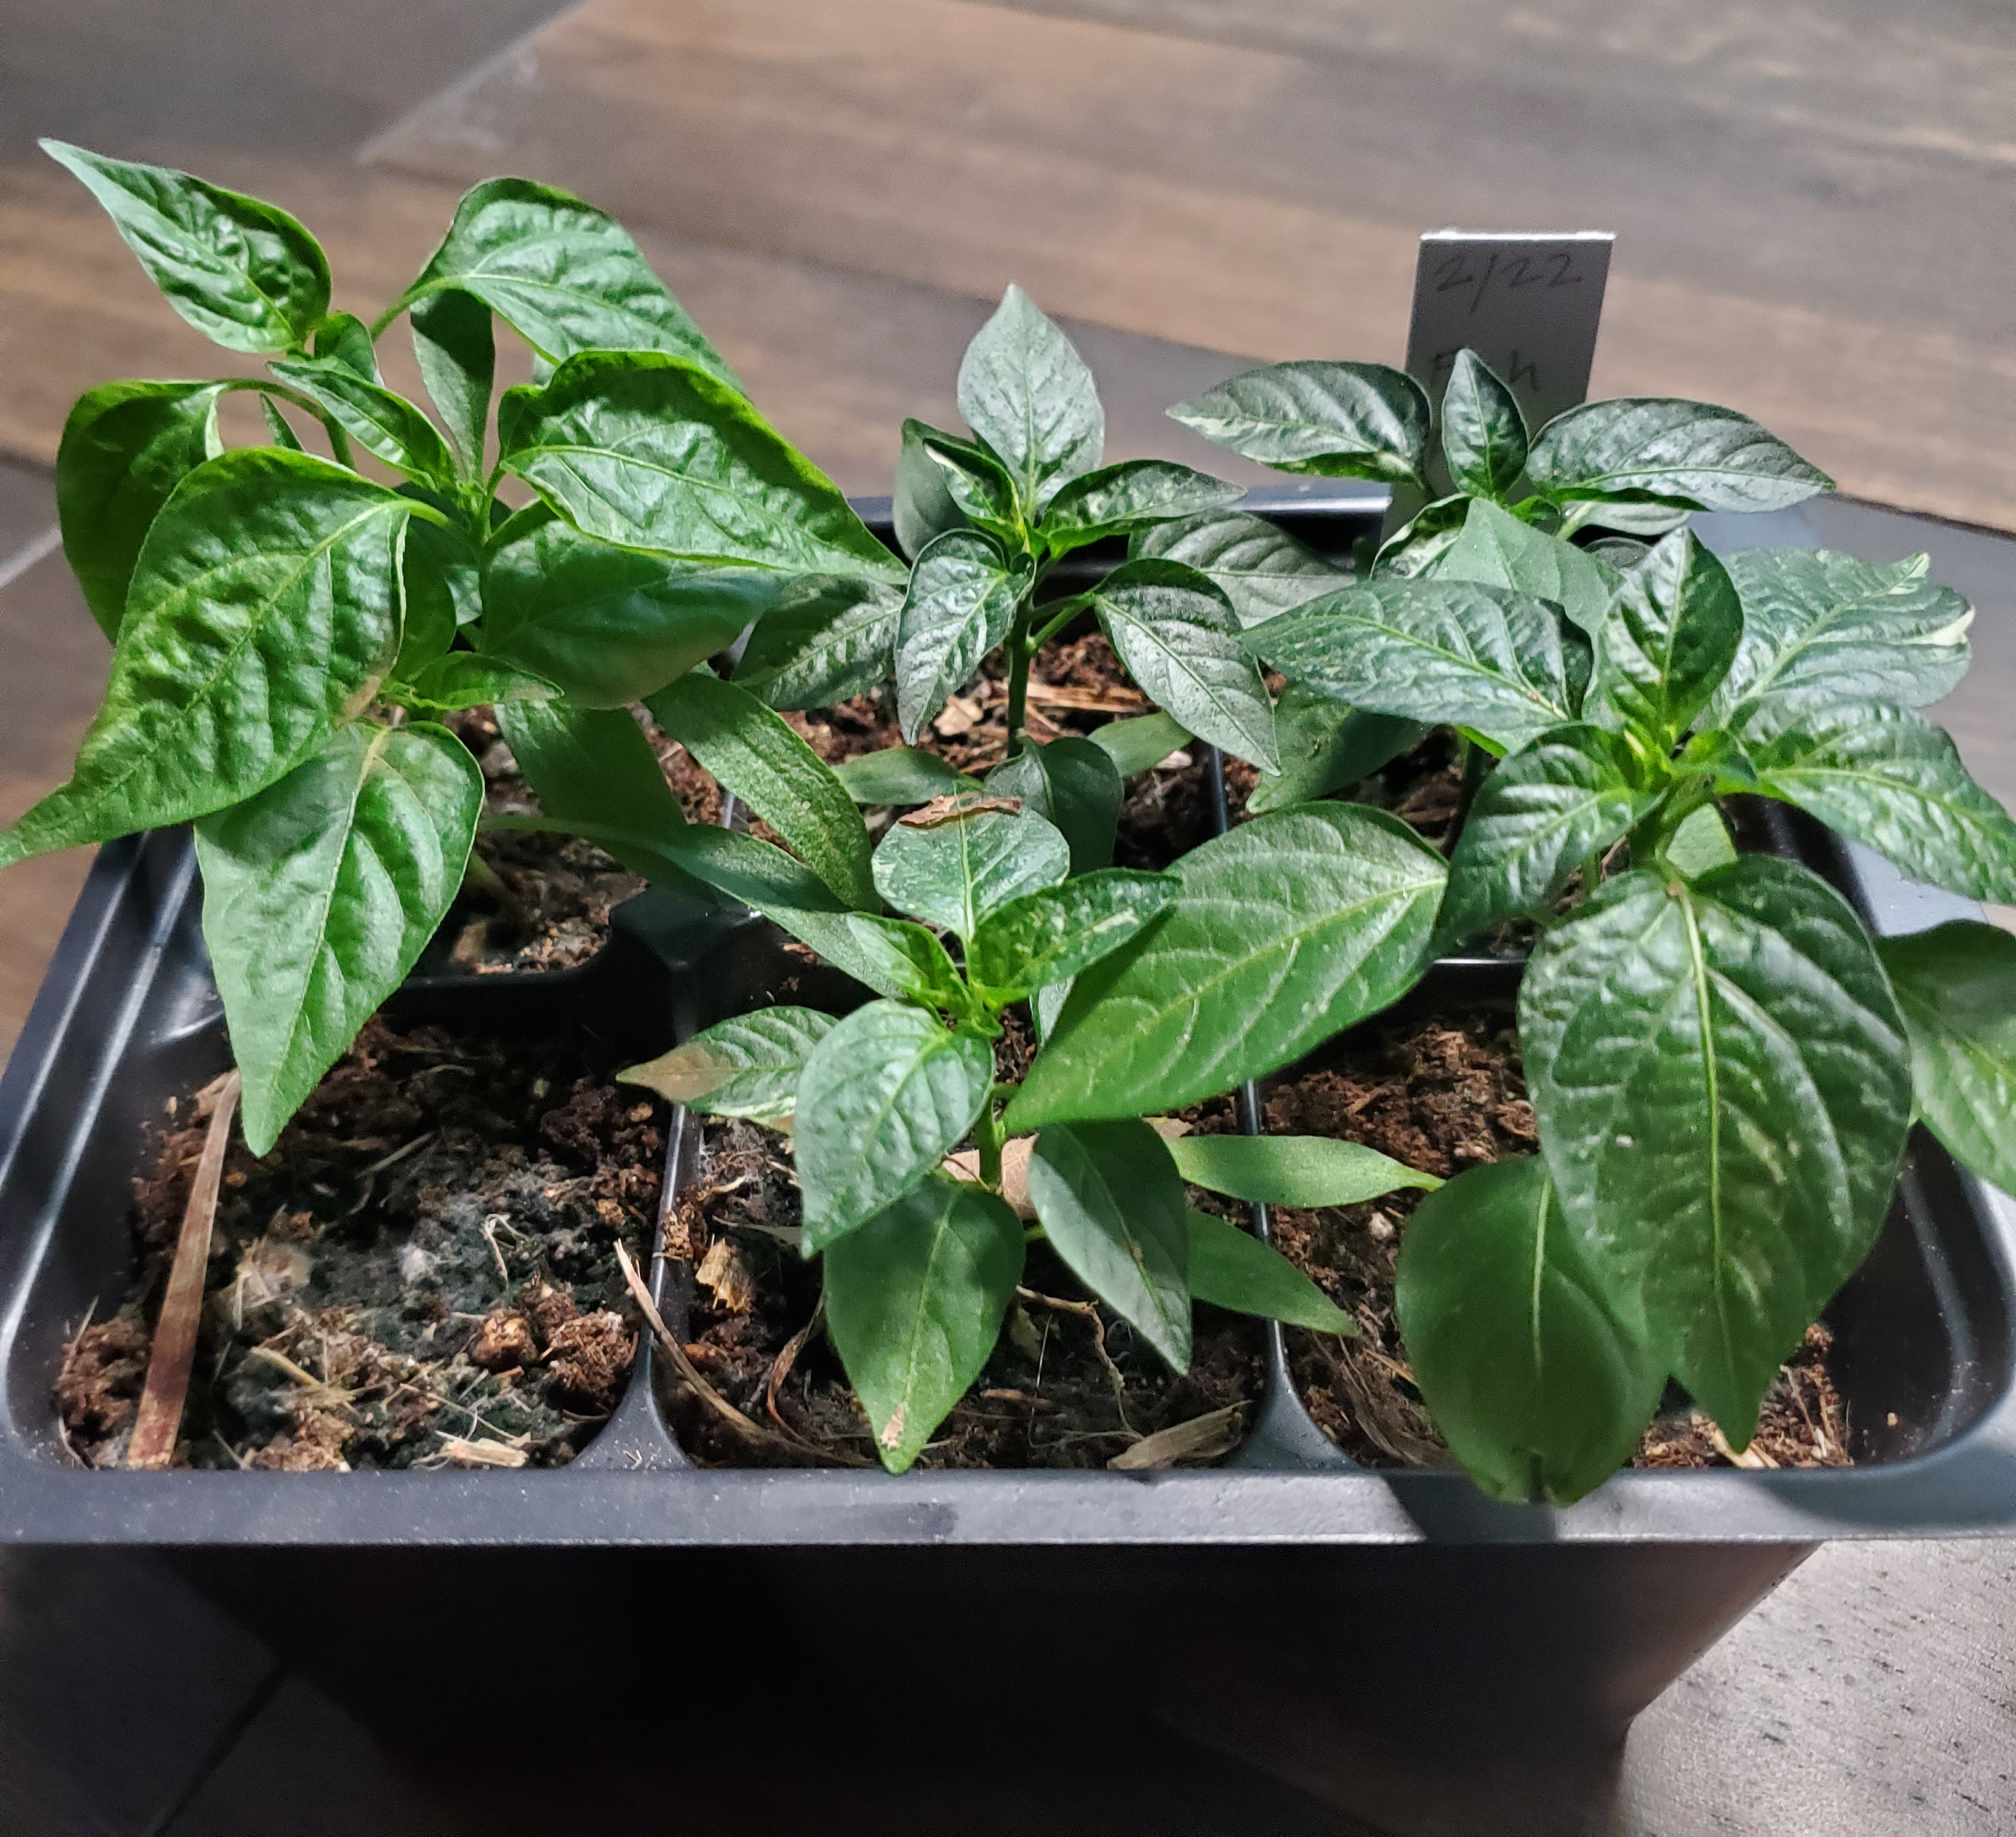
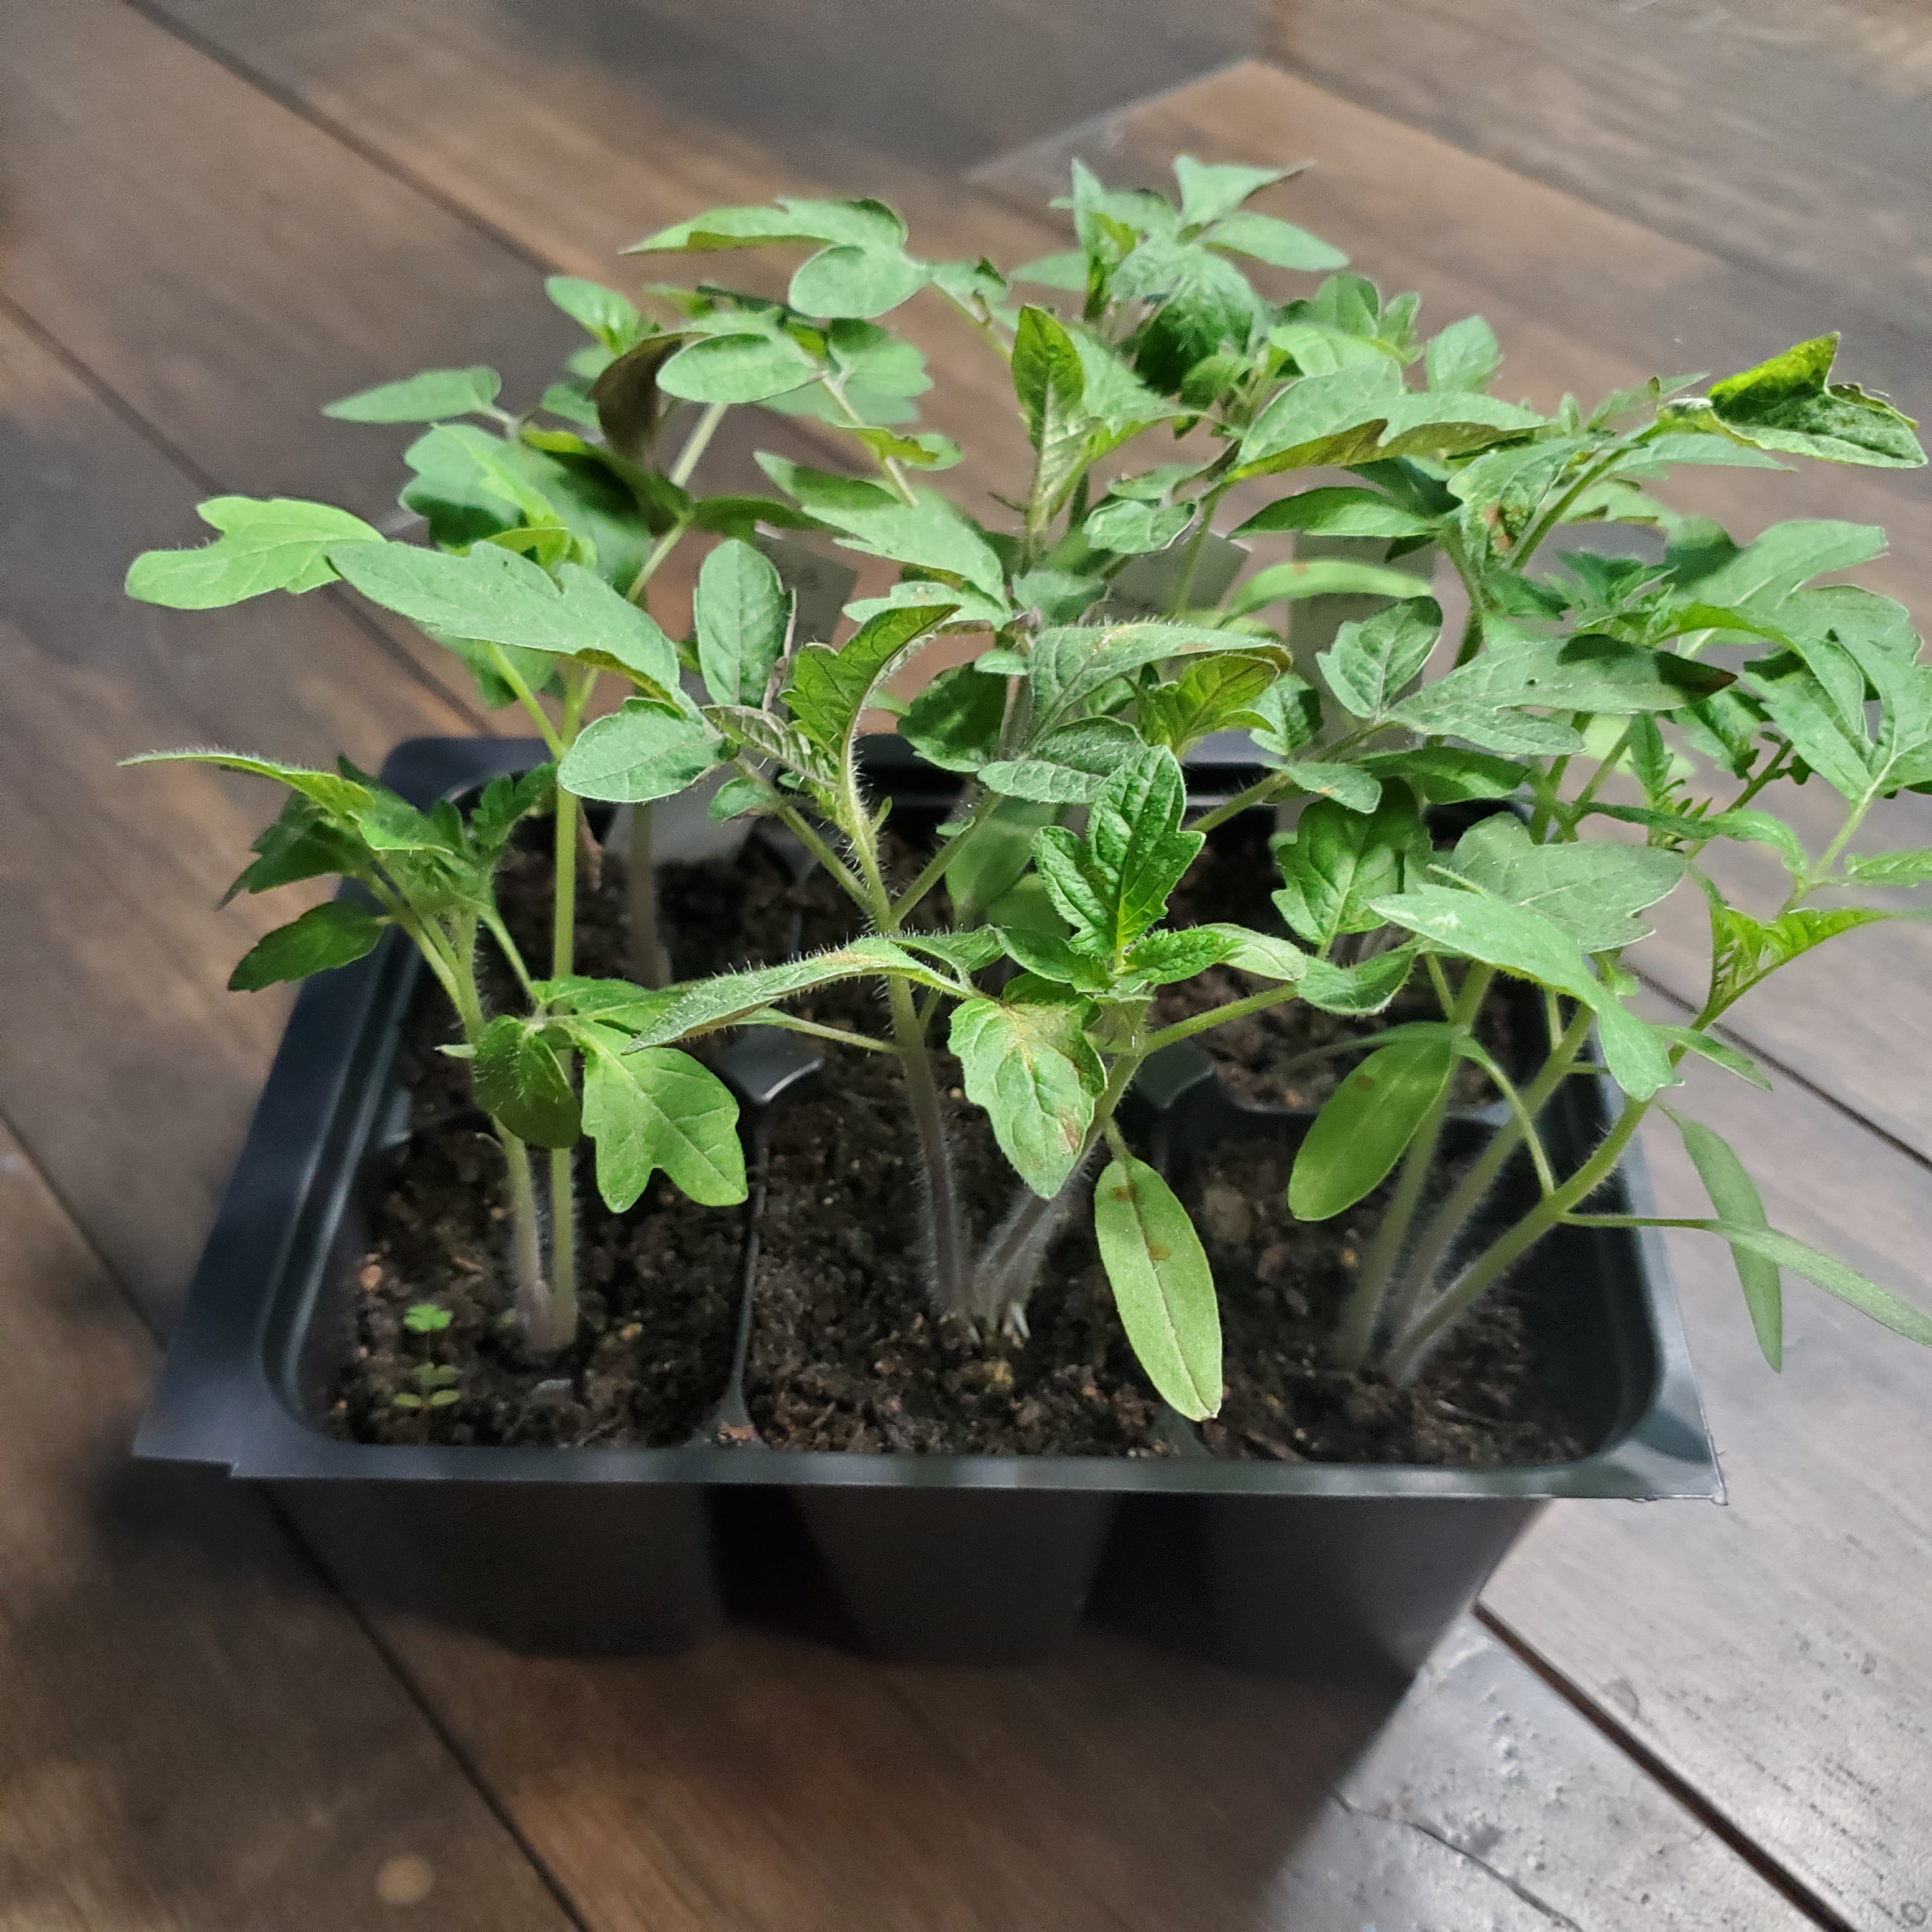
It’s finally here! The time we’ve all been waiting for (I feel like Anna in Frozen). The time to start your peppers and tomatoes. Not exactly sure why there is so much excitement around tomatoes and peppers (I’m personally more of a green bean and squash kind of girl) but I’m guessing because we are all so ready to be outside in our gardens and this is a tell-tale sign that we are getting closer to Spring. Yipppeeee!
I’m not going to walk you through how to start seedlings – there are a gajillion videos you can watch that detail every step (here’s a good one from The Rusted Garden). What I am going to share are a few of the tips and tricks I wish I had known my first two years.
Supplies:
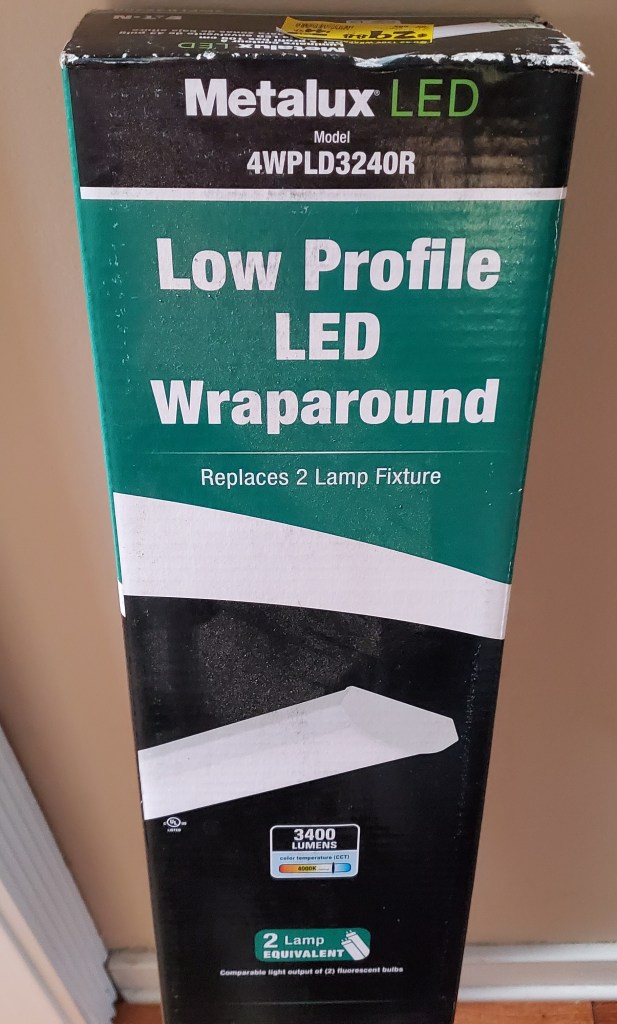
Grow lights – 3000-5000 Lumens and you want them to be ‘daylight’ (These should cost you no more than $20-40 and will last many, many years. You can see the sale sticker on mine from home depot.)
Growing medium –
Cells or containers – recycle something if you can, e.g. clamshells, egg trays, plastic cups.
Labels – popsicle sticks, toothpicks with a post it, paint stirrers
Timing: Don’t be like me and start everything in February (depending on your growing zone) and then lose steam by early April so that you end up having to buy starts at your local nursery. Slow and steady wins this race. And by staggering your start you give yourself time to work out any kinks in your setup – like lighting, watering, feeding, etc.
Hot peppers need to be started 10-12 weeks before your last frost date.
Sweet peppers need to be started 8-10 weeks before your last frost date.
Tomatoes can be started 6-8 weeks before your last frost date.
Start:
Get a growing mix that is a mix of peat moss, perlite and vermiculite. This means there is no organic material in it and you must use a fertilizer within a few weeks. (I did not do this in the past and after about 4-5 weeks I never understood why mine became leggy and withered. Shocker!)
Moisten and pack the mix into your containers or cells.
Put 2-3 seeds in each cell or container.
Label what you planted with the date.
Leave the containers in a warm spot for Days 1-3.
Germinate:
Days 4-7: give them 24 hours of light
Days 8-14 (week 2): give them 16 hours of daylight. Most if not all should have sprouted by the end of the second week.
Maintain:
Week 3 and beyond: give them 12 hours of daylight.
Water weekly when you notice the growing medium has become a very light brown and is dry to the touch.
Feed weekly at a very diluted ratio, as close to 1:1:1 (N-P-K) as you can get.
Watering and feeding are not the same, but you may do them simultaneously. Do NOT overwater and have constantly soaking wet soil. You are going to get mold. Water from the bottom so the roots can soak up. Similarly do not overfeed thinking you’ll get super human plants. Too much of a good thing is not good 😊
Have a fan in the room to create some air flow to avoid the above mentioned mold issue and to help your starts get stronger.
That’s all folks. It’s not rocket science but you do need a few essentials to get started and then Va-Va-Voila! Vegetables in your backyard.