onions on my mind

I don’t know about you but February is fierce. Maybe it’s the length of time we’ve been living in isolation plus the combination of cold/snowy/icy/gray weather that we keep getting, but I’m getting restless. I can feel that we are on the brink of a new season and rhythm and the anticipation is making me excited. But the lesson I am always trying to learn in life is to enjoy what’s in front of me. Not try to rush to the next chapter.

For this reason, February feels like the perfect month to hibernate. It’s only four weeks. It may be the last chance to justifiably stay inside all weekend before longer days and nicer weather arrive. So, in that vein I’ve been working on my garden plan, getting more detailed with when I’m going to seed start and sow each crop, when I’ll harvest, and what I’ll plant next. As mentioned in the cool/warm post, I’m trying to get the most out of my space by rotating through three cycles: Spring (cool) –> Summer (warm) –> Fall (cool). This isn’t something I’ve done before and probably would have been overwhelmed by last year but I’m stepping up my game due to the increased ‘at home’ time the pandemic has afforded. When life gives you lemons… right.

The first thing I needed to seed start is onions. Last year I used onion sets so this is an experiment. I will likely do onion sets in March also but figured why not get my shelves and lights set up in February so I am ready to go when I need to start tomatoes and peppers in March.

Here’s what I did nice and simple –

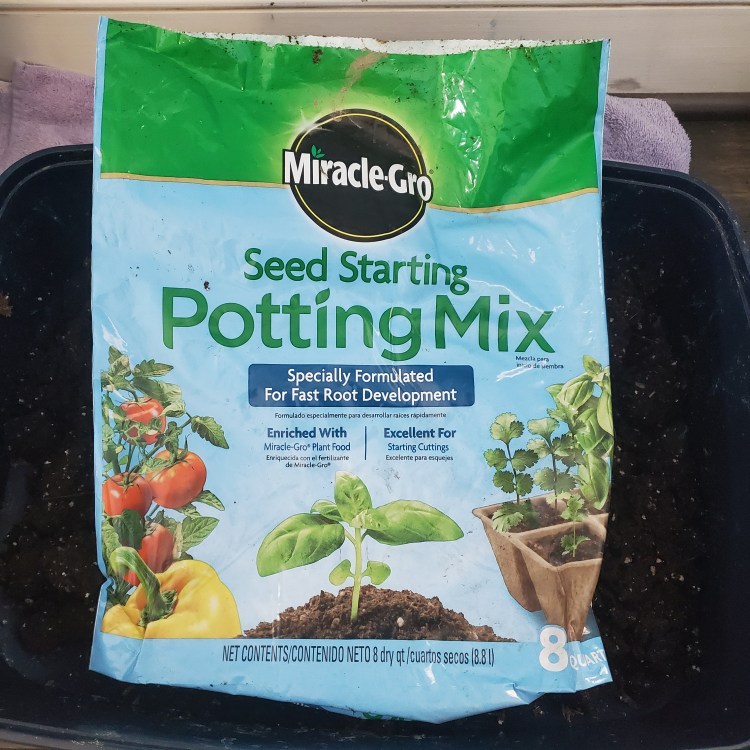
  1. I bought two 8-quart bags of MiracleGro seed starting mix for $4.99 each (egads! Sacreligious, I know but let me explain). I’m going to use this for half of my seed starts and a regular mix from Fox Farms to see what the difference is. Since I want my garden to be 100% non-GMO and pesticide free, this shouldn’t matter because seed starting mix should be devoid of organisms anyway.
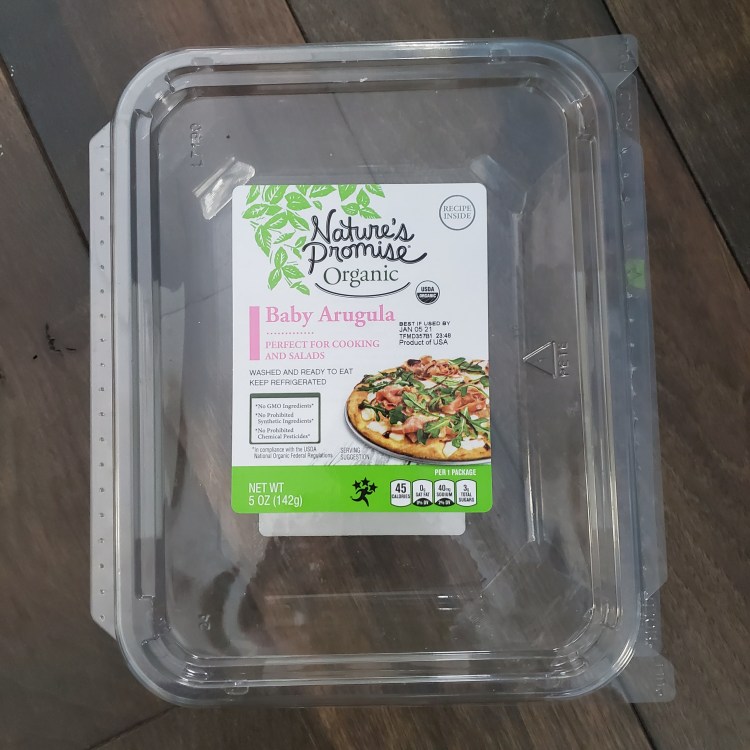
  2. Filled my 5 oz arugula clamshell with about 2 inches of potting mix.
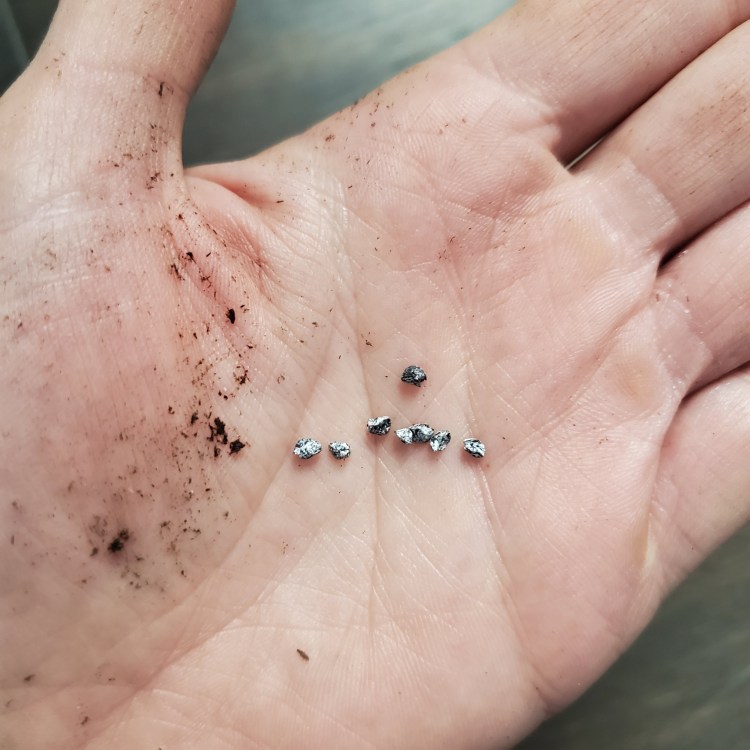
  3. Spaced about 25 Gladstone onion seeds on top of the potting mix.
  4. Sprinkled aboutanother cup of potting mix on top of the seeds.
  5. I misted the potting mix with a little sprayer and then closed the lid so it would stay warm and become like a greenhouse inside.

The seeds should germinate in 7-10 days but I’ve also read to just leave them alone and keep the soil moist and they’ll germinate when the time is right.

What are you seed starting in February? Next on my list are hot peppers and cauliflower.

Let’s get the Seed Party Started

I don’t know about you, but the cold temps of January make me nostalgic for warmer weather. I love experiencing all the seasons and I think that’s the point – there are things I love about each season and things that make me say “I can’t wait for this to be over.” Like right now I am bundling up in four shirts, two pairs of socks, a two layer coat, hat and gloves and I’m still frozen in about three minutes outside.

Being the planner that I am, I get really excited brainstorming about what I’m going to grow and try in my garden. I’ve been reading books (loved this one) and blogs for ideas, watching youTube channels (check out this guy) and reviewing our local Extension Office resources for different tips.

There are some different strategies I’m going to use this year that I’ll share soon, but one of the first things I did differently as I was starting to look through seed catalogues was categorizing each item as cool or warm weather in terms of when I’ll be harvesting. I realize this doesn’t pertain to all growing zones, but it helped me in ensuring I’m not going to overwhelm myself each season. Thinking about it this way, also helps me see how I will succession plant.

Try this-

  1. To start, make a list of all the veggies you/your family likes to eat. Why grow something you don’t like to eat?
  2. Next, refer to your local extension office website for recommended sowing dates. I love this chart but it is specific to my zone 7a. From this chart, I then put each veggie in the appropriate column.  Check this out –
CoolWarm
ArugulaBeans (bush and pole)
AsparagusCucumbers
BeetsOkra
BroccoliPepper
Brussels (fall only)Summer Squash
Carrots (spring only)Tomatoes
CauliflowerWinter Squash
Collards 
Kale 
Lettuce (plant in the shade during warmer months)
Onions 
Peas 
Spinach 
  • Then I got out my calendar and started figuring out the seed start and direct sow dates. I’ve made about four spreadsheets and tables so I think I’ve gone too far but I am confident I’ll land upon one chart that works for me to just slightly tweak each year.

I know this sounds like a lot of work but START SMALL. Just two years ago I started with only about five crops – tomatoes, peppers, lettuce, kale and beets.  Last year I added a few more, and this year a few more. Each season you’ll get better at a few things and feel confident dabbling in some other areas. The worst that can happen is you have to go to the store and buy it instead of eat it from your own garden. 

If you haven’t picked out and ordered seeds yet, I would do that ASAP (see my post about the companies I’ve ordered from and like). With COVID-19 continuing to impact our lives for an unforeseen amount of time, many more people are gardening which is great. But due to shortages, travel restrictions, and other impacts of coronavirus, not all seeds are being stocked as abundantly. Don’t freak out – that is not my point.  And if you are looking for just a one size fits all option, check out the coolest gift my brother gave me for Christmas.

Cock-A-Doodle-Doo To You

If I asked you to close your eyes and picture a smart, regal, gentlemanly, and protective farm animal, what comes to mind? A horse. A duck. A cat. All of those answers could be correct, but it’s not the one I’m thinking about.

Last November I started looking online for a new canine member to join our family. As you may recall, that is how we came to have Molly (aka Ms. Mess – she is the messiest and most bizarre eater I have ever come across but that is a story for another day). As I was searching, I regularly checked our county’s animal control and adoption center. I kept seeing a rooster in their listings and told myself if he was still available for adoption at the end of the year, I would go see him. Well, you’ll never guess what happened…

I had the week off between Christmas and New Year’s so on December 30 I made an appointment to go meet him with my girls. I told them they would decide if we applied to adopt him based on what they thought of his personality and temperament. I wanted them to have a vote in the process and to be sure they would still feel comfortable going in the chicken coop (with supervision, of course). I had to like him too.

The staff who took us to his kennel said we were the first people to visit him and he had been there since October. So sad! He was being kept in the most isolated kennel so that dogs weren’t right next to him. This meant he was in the far back corner with three out of four walls made of concrete, a chain link fence entrance, and fluorescent lighting. No natural light whatsoever. And I don’t mean this in any way to denigrate the conditions – it was clean, he had a perch, and food. My point is this was far from an ideal chicken habitat and I immediately felt sorry for him.

The woman walked in the kennel and picked him right up like he was a bunny. I was so amazed. She said he was friendly and easy to be around and hadn’t been aggressive at all. The girls petted his neck feathers and quickly lost interest, then went to check out other dogs in nearby kennels. I asked the staff member some questions about his demeanor and other things she knew about rooster behavior. Honestly, I didn’t have much beyond “Is he an a-hole?” because I’ve dealt with the man fighters and didn’t want that again. She didn’t seem to think this was his personality but of course you can’t be sure until he’s in a flock and his territorial instincts kick in.

I filled out an application and they said we might hear back as soon as the next day, December 31 but more likely Monday, January 4. I was kind of like, “Umm, he’s had no visitors in three months… what do you need to verify?” but it was totally fine. They wanted to confirm that my other pets are licensed and vaccinated as proof that I’m not a horrible pet owner. I get it.

Over the weekend I watched a bunch of rooster taming videos and got an idea of how I would approach being the alpha rooster. On Monday we got the call that we were approved to adopt him and I went to go get him. We kept him isolated from the flockers for five days and each day I spent time picking him up and carrying him around so that we could bond. It was grand! I’m being 100% serious. It was a really good confidence builder for me and I think made him realize I’m in charge. Ha!

I’m not in complete agreement with how he has his way with the ladies, but he lets them eat first and seems to put himself between the flock and the cats when they wander into the coop so I think he’s doing a good job.

Meet Roger!

Goodbye, Farewell, Auf Wiedersehen, Adieu

Alexa, skip to 2021… That’s a joke. Why would I say that now? Saying it back in June or July would have meant something but who cares now. It’s been a tough year, not gonna gloss over that. It seems the trendy thing to say now is always how #grateful and #blessed we all are. That’s great because wallowing can be a dangerous place, but we shouldn’t bypass the difficult and hard-to-even-identify emotions we’ve all wrangled with at some point these last nine months.

I am not a Susie Sunshine kind of person who can always find the positive. BUT I do firmly believe that what we focus on gets bigger (thanks Oprah for that life lesson). When I focus on the work meeting that went totally awry and never found common ground for how to move forward on the project, everything about my day looks frustrating. Instead, when I say, “Yeah, that didn’t go as planned. I’m going to reach out to each person individually and get their input” somehow I feel more empowered to get things on track.

Similarly, there were a lot of things that went down in 2020 that could make it seem like we are on a less than sunny trajectory. OR I can choose to see how 2020 brought into focus the things I want to spend my energy on. I love a podcast called The One You Feed based off this parable, and one of the recent guests who was so intense I was cracking up throughout, Wim Hof, said a lot of times the bad wolf shows us the good wolf in our lives. So like I was saying before, 2020 showed us the bad wolf. That’s good! Otherwise we would have continued thinking we were so great and had all our sh*t together.

2020 Tails                                                                 

  • Racial unrest
  • COVID-19 pandemic
  • Mom diagnosed with stage 4 brain cancer
  • Staying at home for 9 months, no vacation or fun travel
  • Lots of political controversy

2021 Heads

  • Efforts to achieve racial justice and greater diversity represented in at all levels of society
  • A stronger focus on working toward health equity
  • Prioritizing family time and feeling the love of all my friends who supported me
  • Extra time in the garden and with my chickens; allowed the pace of my life to slow down and make sure the way I spend my time reflects what I value as important
  • New administration and congress that will *hopefully* be forced to compromise

Farewell 2020. No one knew what you had in store for us and thank God for that!

Seven hens pecking displaying their tail feathers

Cheers to 2021!!!

MIM: Chicken Broth

I am a tad embarrassed to admit that I’ve never made any of my own broths. Is that bad? Pathetic? Up to this point it just wasn’t on my radar as something I could or should do myself. I’m not sure what I thought it involved and figured it was likely difficult and time consuming. And we are lucky enough to live during a time when so many foods are just as convenient to buy at the store and often it’s faster and sometimes cheaper than making it myself.

Recently though I was reading the label on a box of organic chicken stock I bought at the store (don’t recall why, but it was an exciting read) and was like, “Wait a minute. Chicken, water, carrot, celery, onion, salt, pepper, and bay leaves. This is all stuff I have!” Challenge accepted!

As I referenced, 2021 is going to be a year of MIM (make it myself). My hope is to identify a handful of items I use regularly and learn how to make them. Chicken broth seemed like the perfect first foray. I searched for a few different recipes and used a bit of a combination approach.

Here’s what I did:

I saved vegetable scraps and chicken bones for about two weeks in a gallon ziplock bag in the freezer. Whenever I was chopping carrots, onions or celery for another meal, I saved the (washed) ends, nubs and skin. Ordinarily I would have tossed them in the compost so this wasn’t any extra work or cost. Once I had the whole bag filled, I figured I had enough.

I put the chicken bones (and a few feet) in my crock pot and added 2 T of apple cider vinegar.

Then I added the vegetables – celery, carrots, onion.

Onions, celery and carrots pieces in black crock pot

I covered everything with 16 cups of water, basically filling my crock pot to the brim. I added 2 teaspoons of salt and ¼ tsp of pepper.

Crockpot full of chicken bones and veggie chunks and water

Set the crockpot to low for about 16 hours. I turned it on around 9pm and went to bed (with mild nightmares of a This is Us situation happening) and then turned it off around 12pm the next day.

Strained out the veggie and chicken remnants, and filled my mason jars.

SPOILER: I didn’t love the flavor of this first attempt. I was kind of bummed and I think this is how people get discouraged doing things themselves and just opt to buy them. It’s disappointing to do extra work and not be happy with the result but I am going to give this a few more tries because a) it was very little effort and b) there are many ways of tweaking the flavor. I am going to pay attention to the ratio of vegetables because I think I had too much onion and not enough carrot. I can also try using bone-in chicken thighs and wings. And add different spices like garlic, thyme, rosemary, or parsley. I also want to try plain vegetable broth.

One of my underlying goals was to put food scraps to use and I did that. The flavor was fine, just not amazing. I used it to make butternut squash soup, copy cat Olive Garden Zuppa Toscana, and a few other things, all of which came out very tasty.

Let me know what things you’ve made yourself that you were intimidated to try but now can’t imagine buying at the store.

‘Tis the Season

Season’s Greetings, Ho Ho Ho, and all that jazz. If there were ever a year that we could all use a little more cheer, this would be it. I’ve always liked giving holiday goodies to my co-workers. My “go to” items are poppy seed bread and chex mix – sweet and savory. And throwing in a $1 or $2 lottery scratcher makes everyone smile. Since I’ve been working from home since March 16th (not that we’re counting) and I knew I wasn’t going to have the chance to give goodies in person, this year I decided to spread elf-like joy to my neighbors.

We’ve lived here two years and Cactus (as ironic as it may be for the prickly one) has made a much bigger effort to get to know our neighbors. He has all their phone numbers saved in his cell whereas I have none. But I do know their names whereas he defaults to the same three or four standard American male names he knows (Scott, Chris, Tom, Matt) whether or not it is the person’s actual name.

I used ten of these cute little baskets from Jo-Anns and included the following items. In case you’re wondering, this is a prequel to my 2021 theme of “make it myself” (MIM is totally going to replace DIY, I can feel it) that you will assuredly hear more about:

And yes, I forgot to take a picture of these. Gee whiz! We delivered these all on the weekend (wearing masks, of course) and it was so much fun! Just chatting on people’s door steps, hearing how they are doing, and reiterating how happy we are to be their neighbors.  It honestly warmed my heart more than I could have imagined and was completely worth it.

If you don’t know your neighbors, and regardless of what religion they observe, I would encourage everyone to deliver some cookies, a sweet bread, or bottle of wine this time of year. I promise nobody will be offended and it will brighten their day as much as yours. Then, not to be self-serving, but next time you need a cup of milk or sugar, you won’t have to make an awkward introduction to ask for it.

If you already do deliver reindeer droppings, please share your favorites in the comments.

Poppy Seed Bread Recipe (Servings: makes one 9” loaf or three mini loaves)

Ingredients:

2.5 c flour

1 c sugar

¼ c poppy seeds

3 ½ tsp baking powder

1 tsp salt

1 ¼ c milk

1/3 c vegetable oil

1 egg

1 tsp vanilla

½ tsp almond extract (technically optional but recommend to include)

Steps:

  1. Heat oven to 350. Grease bottom of loaf pan(s).
  2. Sift all dry ingredients together.  Add wet ingredients and beat with mixer for 30 seconds.
  3. Pour into pan(s).
  4. Bake 45-50 mins for a single large loaf (25-30 for smaller loaves) until toothpick comes out clean.
  5. Let cool for 5 mins, remove from pan. Place on wire rack to cool completely.
  6. Eat entire loaf in one sitting 😊

Meet Molly, our new Farm Dog

Molly sitting in the grass at sunset

There have been lots of things to mourn this year – celebrations canceled, milestones missed, family members lost. But if we’re choosing to look at the bright side (and we are), pet adoptions have been one of the silver linings of 2020. And Farm Charm is no exception.

We lost our beloved schnauzer Shume Strudel Schumacher back in August to lymphoma. He was the most loyal, sweet, family dog and so very good looking as schnauzers go. His eyebrows and mustache gave him the look of a mean dog, but he was the furthest thing from menacing (aside from killing two chickens as you may recall). He was Cactus’ spirit animal in every way and he was his first pet, so this was especially tough for him.

For those who have been through this, it can take a while to feel ready to open your heart again. We didn’t want to do it too soon because that feels like a slap in the face to our last dog, like we forgot him immediately (which we haven’t – we still talk about him nearly every day). But we didn’t want to wait too long because our shih-tzu Ozzy truly needs a buddy (he has become so clingy without Shume). And then there was the question about which breed to get – another schnauzer? No, there will never be another Shume. But I have allergies so we have fewer options to pick from among hypoallergenic breeds.

We were looking at PetFinder once or twice a week and kept the filters pretty tight. Then we saw this girl who was right down the road at an adoption center. Her name was Maggie, she was listed as being between 15-17 years old, and good with dogs, cats and kids – check, check, and check. She is super sweet and absolutely made of gold, but so, so skinny. I’ve been taking her on long walks and she does great so I’m a little skeptical of the age estimate.

I have a feeling she was given up as a result of COVID but that’s just my conjecture. And we changed her name to Molly. Regardless, lucky us and we hope she likes it here.

Meet the Flockers

And now, without further ado, [drum roll please <<dddrrrrdddrrrdddrrrddd>>], it gives me great pleasure to introduce my new flock of eight Bovan Brown Beauties. There’s been more chicken tragedies at Farm Charm in our first two years than I’d like to admit, but I am determined to turn things around.  I don’t take it lightly at all and truly felt horrible after my beloved Leghorns and Wyandottes met their fate in the form of a fox that I didn’t protect them from #stillbitter. 

But we all know 2020 has tested us in ways we could have never imagined and I decided I needed some new life and a clean slate to be excited about.  Enter, The Flockers.

A few months back I had seen a sign at a local feed store for a fall pullet sale. That intrigued me because my last two flocks began as chicks and that has two main challenges in my opinion: 1) babies are a lot more work from the start, and 2) there’s no real guarantee for how many pullets versus cockerels you’ll end up with. Buying them as pullets solved both of those challenges so sign me up!

I got them on Halloween and was told they were between 16—18 weeks old.  It’s been just about two weeks so hopefully I’ll be collecting some beautiful brown eggs in just a couple weeks. I’ve been spending time with them every day, talking to them, giving them treats, and letting them out to peck and scratch in the run.  They seemed completely clueless to begin with, not even perching, but are figuring things out now. And I’ve created a few safety checks and balances so that I NEVER forget to lock the coop at night again.

How to Make a Low Tunnel

A few weeks back in discussing my fall garden, I referenced that I would be pilot-testing a low tunnel on one of my garden rows. I want to see how/if I can keep my broccoli and cauliflower growing as our temps begin to drop below freezing on a nightly basis. I wasn’t going at this from a particularly evidence-based or scientific approach and largely wanted to use materials I had on hand. One of my favorite sayings is, “when in doubt, recycle!” Ha, that’s not a saying but it should be. We have been very lucky in that the previous owners of this property left lots of tools and supplies, in addition to the fact that Cactus loves picking up “the best trash” from people’s driveways on trash day. And over the last two years I keep having creative spurts for projects that can utilize something I saw in our shed, workshop or barn.

Here is the SUPER simple approach I took:

  1. Identify the location I wanted for the low tunnel.
  2. Determine the size of the low tunnel – how long did I want it to be? I suggest starting small.
  3. What did I want to use for my support structure?  The sky (or shed or wallet) is the limit here, friends. You can be really creative (and frugal) and pretty much use anything – PVC, mesh fence, bamboo, tomato cages, etc.
  4. Figure out how many supports I need. I wanted my supports to be pretty close together so that the cover doesn’t sink in as we get more moisture.
  5. How did I need to anchor my supports? Can they go right in the ground or do they need to be fastened to something? Cactus bought me these thinking we would nail them to the boards that divide my garden rows.
  6. What do I want to cover it with? There are (you guessed it!) lots of options on this front too, but I went with the material I had on hand.
  7. How do I want to fasten/attach the covering to the supports? There are probably 517 ways you can attach the thermal covering but I would recommend keeping in mind that you will likely want to remove and re-attach the covering depending on the weather. You will also want to consider what sort of weather it will need to endure – wind, rain, snow, sleet, etc.

Supplies I used:

  • Eight 1/2” ten foot long PVC tubes
  • PVC clamps
  • Plastic sheeting
  • Two sets of hands
  • One brain (being generous 😉)

Steps I followed:

  1. Gather supplies and bring them to my garden.
  2. Ask Cactus to hold opposite end of each PVC line. 
  3. At this point, as we were about to attach each end of the PVC to the row border with the above clips, Cactus suggested why not just push them into the ground and see if they will be secure enough.
  4. Ta-da, we saved ourselves the work of screwing and measuring and aligning, and were done in about 5 minutes.
  5. We aligned the PVC pipes to make ‘X’s’ thinking that would be stronger support than individual hoops. 
  6. Overlay the plastic sheeting on top of the PVC tunnel.
  7. Secure with your choice of tomato clips, bricks, 2x4s. I laid 3 bricks down each side.

I’ll keep you posted on how effective this little tunnel is. I’m pretty sure the plastic sheeting is not the right material, but I’m recycling an item I have before buying something new.

Fall garden update

With only about a month to go before the first frost, here’s how my fall garden is coming along.  Now remember, I did not plant anything at the right time (i.e. late July to mid-August).  I didn’t have the space in my garden due to tomatoes, peppers, lettuce, green beans, and squash being all over the place, so I waited for a few things to peter out before I uprooted them.  Hence, I planted my fall crops at the end of August and beginning of September. 

AND, I had the challenge of bunnies and/or mice coming in and eating seeds the day after I put them in the ground so I had to come up with a solution.  Not sure how you pronounce it (klotch? cloach? whatevs), but I went the route of water bottle cloches and that seems to have worked.  To outsmart these little garden critters, I cut the bottoms off of some plastic water bottles (not mine of course, cuz plastic water bottles are so six years ago) and twisted them in to the soil and then dropped some seeds in and then sprinkled a little more dirt on top.  Worked like a charm! 

So here is how things are looking towards the end of October, maybe 45ish days in. I’ll be honest, I’m concerned there isn’t enough time to see a harvest before it gets really cold so I may be constructing a quick low tunnel (cliff hanger…)

Peas and sugar snap peas (far right)
Golden and ruby beets (bottom middle)
Broccoli and cauliflower (top middle)
Russian and regular kale (not pictured)

And my test run of brussels sprouts (left above).  I bought six seedlings to start and three plants were devoured by cabbage worms.  It was so sad. I came out every morning to squish the worms I could see and spray the plants with soapy, cayenne pepper water for about ten days and I still lost the battle.  But I’m dumbfounded why only three of the plants were attacked.  Anyone?

I did a little cover crop section of buckwheat that is so pretty in pink but I need to chop down. You may have also noticed that there are wood chips everywhere. I signed up for chip drop and we have tons of wood chips to use in the garden, flower beds, around trees, and in the chicken coop. So exciting!

four rows of ruby buckwheat planted for a cover crop