Getting the Garden in the Ground
It feels like a lot has happened in the last two weeks. COVID-19 appears to be slightly loosening its grip on our daily lives and that’s hopeful. I know that isn’t the case everywhere and I’m certainly not supporting any premature relaxing of restrictions – the digital signage on the highway where I live still says “safer at home.” I personally think this virus will play a starring role on the global stage for at least another year. But I’ve been trying to focus on the things within my control and what I can influence to stay healthy. Ups and downs though, like everything. Rarely is anything in my life a linear and even paced arrow toward a target.
I got all my plants in the ground between May 14 and May 19. This gave a very generous three-week window after the last average frost date of April 21. I have read that giving a little extra time can be the difference between success and a lot of disappointment. With the weather here in the mid-Atlantic so wet and much cooler than normal I was in no rush. I think it was the right call.
Here’s what I got done –
- Peppers – my seedlings were not as strong as I would have hoped but I just had to plant them and see if they hang on. If not, I’ll have to buy a few starts from the nursery.
- Tomatoes – my seedlings never really advanced beyond the spindly, thin stage. After the second set of leaves came in, that was sort of it. In hindsight, I don’t think I had enough nutrition in my growing medium. I opted to go by six heirloom plants from the nursery. I’m disappointed about this but it was a good learning for next year.
- Beans – I’ve got three varieties of bush beans and one pole bean. I learned last year to sprout them first, which only means wrapping them in a moist cloth (you can use a wash cloth, paper towel, cut up t-shirt, etc.) and leave them in a produce bag on the windowsill for a 2-3 days. Then gently remove them and plant them right away.
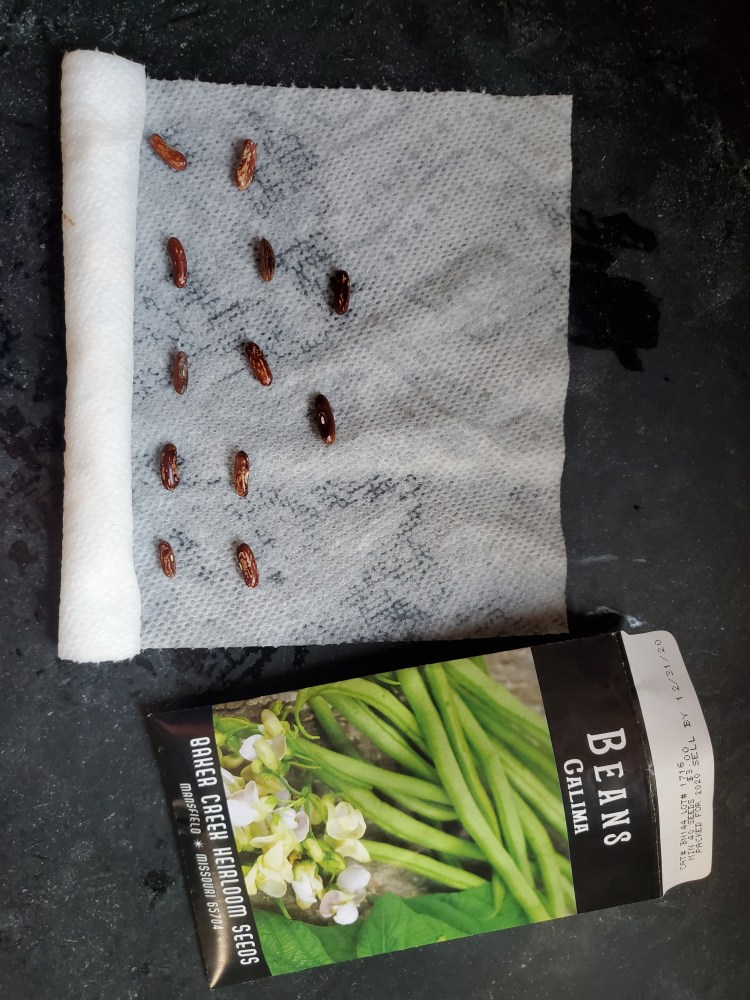
Loosely wrap beans in a moist cloth for 2-3 days 
You’ll see that they have sprouted and can be planted right away
- Cucumbers and Peas – built a trellis with old tomato cages by cutting the wire to essentially break the cage, bent them flat, and then zip tied a few old garden stakes across (see below).
You may recall the sadness and tragedy I experienced last year when deer ate all my luscious blueberries in one weekend. Well, fool me once but not fool me twice. To ensure this doesn’t happen again, Cactus and I spent about four hours installing an electric fence around the berry patch. This is an area about 20×30 feet and we already had the poly wire and enough step in posts so hoped it would be a relatively easy project. Cactus bought a solar powered fence charger from TSC and we figured it out pretty quickly watching this series of videos from McGregor Electric. The thing we had the most trouble with was determining what was grounding out the charge. I also wanted to expand our blueberry bounty so bought two additional bushes – Blue Gold and Duke.
There’s a separate garden bed in the berry patch that I didn’t use last year, largely because it was free reign for the deer. Since we got the fence installed, I decided to try corn, butternut squash and watermelon.
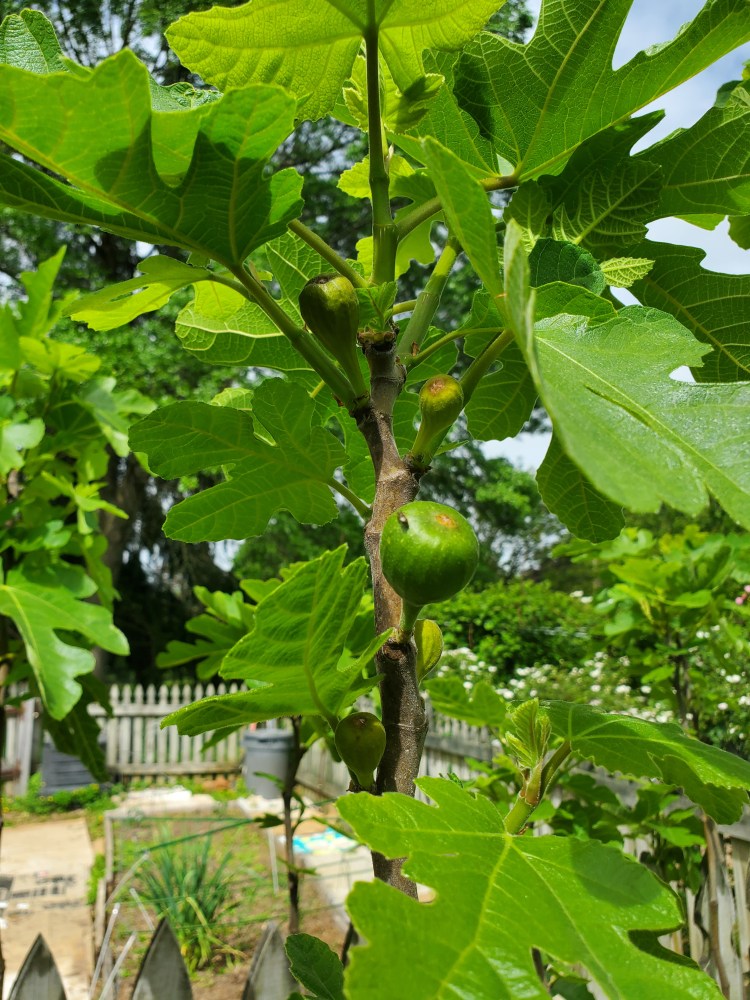
The black raspberry bushes are blooming beautifully and look way more full than last year. And fingers crossed that we’ll actually enjoy some figs this year. We put lots of leaves around the roots to keep them insulated during the winter and it was a very mild winter so it seems promising.
How to Make a Trellis with Two Tomato Cages:

Clipped two tomato cages so they would stand straight 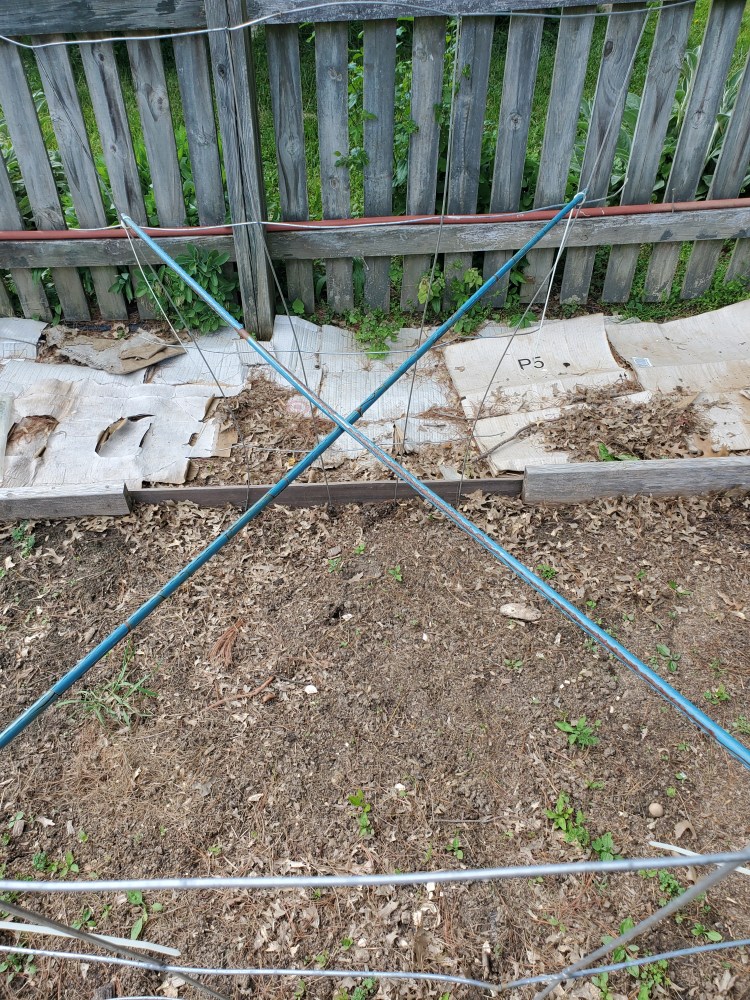
Crisscrossed garden stakes and zip tied 
Zip tied garden stakes straight across
