We’re Jammin’… and I hope you like jammin’ too
We have had quite a bounty of berries for weeks now. It’s been such a delight to be able to walk outside and pick a bowlful of berries to have on the kitchen counter for some “walk by snacking” or for an after dinner treat with a little scoop of vanilla ice cream.
Luckily, our berry bramble is growing extremely well and we already have more than we can reasonably eat so I wanted to preserve some of it. The simplest option in my mind is freezing them. I know that I should lay them all out in a single layer on a sheet pan, let them freeze individually so as to not have one big clump, and then put them in a freezer bag. However, I have found that I don’t eat frozen berries all that often throughout the winter. People always suggest throwing them in muffins or smoothies which are good ideas, I just don’t happen to do it.
Instead, I wanted to try my hand at canning some of these berries into jam. I know absolutely nothing about canning and was curious how complex it might be. I started by watching some videos on youtube of course and one of my go to bloggers is Melissa K. Norris and she has a whole 4-part series on canning that is free and extremely informative. I also read about it on the National Center for Home Food Preservation site.
Then I figured I should just give it a go. This whole year, and these first few years, are all experimental in my mind. I don’t want to set much in the way of expectations because I truly don’t know what level of effort and involvement any of this requires and whether I have the time and ability to do it. For me it’s going to be a matter of finding the things I get the most enjoyment from and that also serve my family well. I’m not gonna struggle to grow something that only I like and I’m not gonna fight the Earth to grow something that just doesn’t want to grow (except an avocado tree! I am going to grow one, I just have to).
So here are the basic steps I followed for making and canning my first ever blackberry jam*.
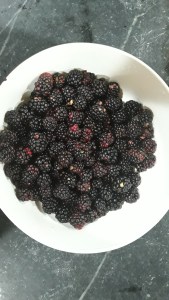
Part 1 – The Berries
Gathered about 5 pounds of berries. I tried to get a mix of pre-ripe and ripe so that the natural pectin would be sufficient without having to add any. I don’t fully understand the pectin conversation so I’m just gonna have to play around until I figure out how to get the correct gel-like consistency.
Rinsed them in a strainer and removed any stems and leaves that were in the bunch.
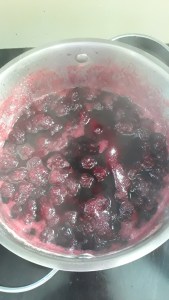
Placed them in a sauce pan on medium high heat with about a cup of sugar. (Disclosure, I actually tried this about a week ago and got to this step, ran upstairs to put some clothes away while the berries were on the stove, and got distracted doing other things. I could smell the berries from upstairs and they smelled like a beautiful berry wonderland until they didn’t. All of a sudden I could smell burning and they were a darkened charred mess in the pan. Sooo, don’t do what I did.) I suggest staying close by and stirring the berries often to keep an eye on how quickly they are breaking down. It didn’t take more than 5-10 minutes, but this depends on the fruit you are using.
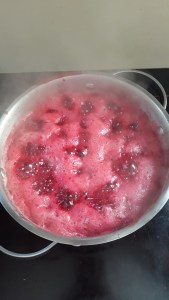
Mashed the berries a little so it was a uniform consistency and did the “spoon test” to check for done-ness. I am not 100% confident the gelling happened to the correct degree but I’ll see what happens when we try the first jar of jelly.


Part 2 – The Canning
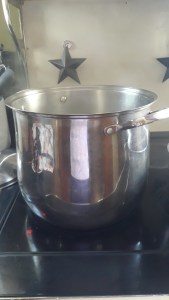
Sterilized my jars. I filled up the biggest pot we have and boiled the water. I carefully placed the Ball jars inside. I read to put a cloth in the bottom so that the jars don’t knock around so I did. I do not have true water bath canner. Again, I’m a total newbie at all of this so before I start spending chunks of change on the right equipment (which I fully support), I’m being creative with the tools and equipment I have.

Removed the jars carefully and placed them on a clean towel on the counter to dry. Placing the jars in the boiling water and removing them was when I wished I had the proper jar lifters.

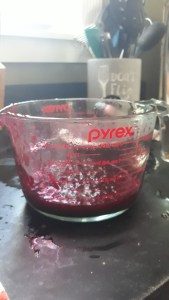
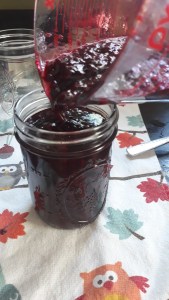
Filled the jars with the berry compote. To minimize spills and drips, I ladled the berries from the saucepan into a Pyrex measuring cup with a spout that would ease pouring.
Put the lids and rings on the jars and carefully placed them back in the boiling water for 5 minutes. They had to be completely submerged in water with about ¼ of an inch covering them.
Removed them from the boiling water and tested the seal. There was no clicking and I could lift up the jar by just holding on to the lid on and it was completely fine.
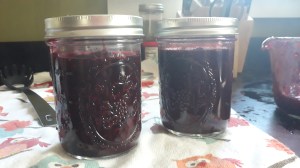
Now I have four jars of blackberry jam. What will I do with it? I’m a huge fan of PB&J so that’s an obvious one but I also think this would be excellent on blintzes for a yummy weekend breakfast or a dollop on top of a bowl of plain yogurt. I’ll let you know what else I come up with.
*I’m not recommending you follow these steps exactly; definitely consult a reputable resource on canning.
