Fire Cider for Health

a quart mason jar brewing with fire cider

Ladies and Gents, in the spirit of prevention, it is my duty to inform you that flu season is upon us and I encourage everyone to go get a flu shot. If prevention isn’t your thing, well then I’d be remiss to ask how you’ve found yourself a hobby like gardening? Homesteading and self-sufficiency is all about being prepared and doing what’s in your power to ensure a better tomorrow (the definition of prevention in my book).

On the flip side of that same coin, while I have much respect for the evidence and advancements of the scientific and medical communities, I will also emphasize that we shouldn’t solely rely on them to “make us better.” There is nothing wrong or contradictory to also use the wonders of nature, our original doctor, to boost health and immunity. That’s called complementary.

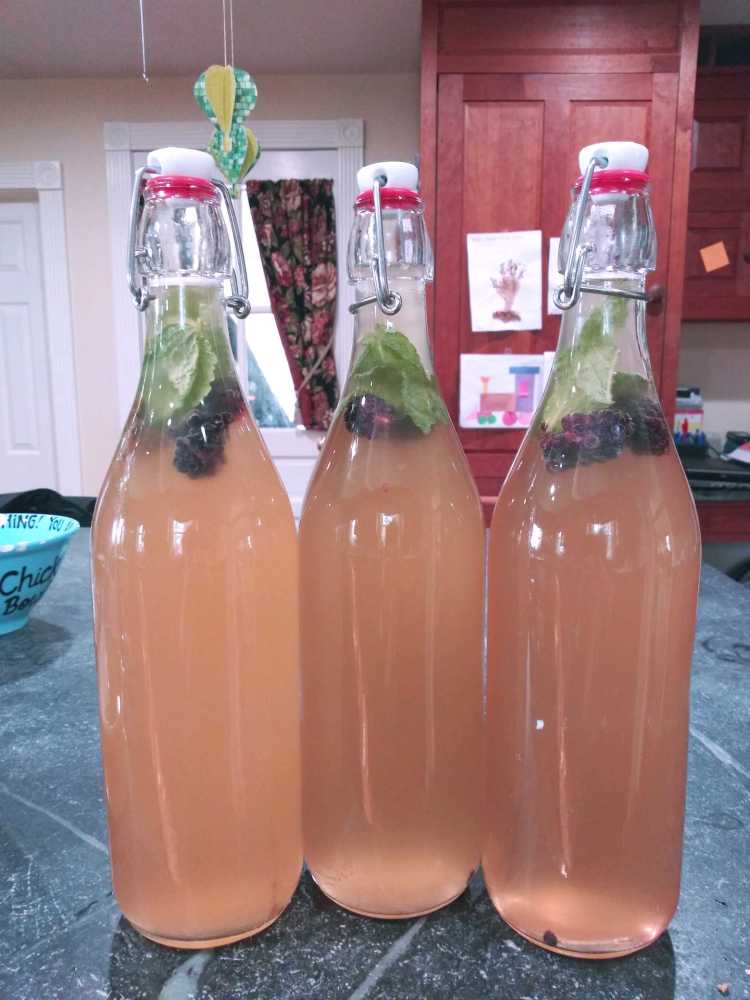
In that vein, I have been hearing about fire cider for over a year now but for whatever reason haven’t managed to find the time to actually make some <Translation: totally unmotivated and barely getting myself to accomplish the minimum each day due to the pandemic>. I had been doing The Booch for a while if you recall because that’s great for boosting gut health. But I’ve taken a break from that and figured there’s no better time to jump on some fire cider and #MIM (make it myself).

I did some searching for different recipes and found that most are built off the same baseline ingredients and the overall process seems to be pretty similar as well. The main difference between recipes seems to be the variety and extensiveness of ingredients. Basically, how much flair do you want to add?

The majority of recipes I reviewed all used the following ingredients.

  • Apple Cider Vinegar – a source of Vitamin C, amino acids, and more
  • Citrus fruit (lemon and/or orange) – source of Vitamin C
  • Garlic – a wonder food that boosts immunity, plus many other benefits
  • Ginger Root – great for soothing the stomach
  • Honey (local) – a natural allergy fighter
  • Horseradish – effective against respiratory issues
  • Hot Peppers – boost metabolism and sinus relief
  • Onion – boosts heart health and anti-inflammatory
  • Turmeric – anti-inflammatory

So here’s what I did:

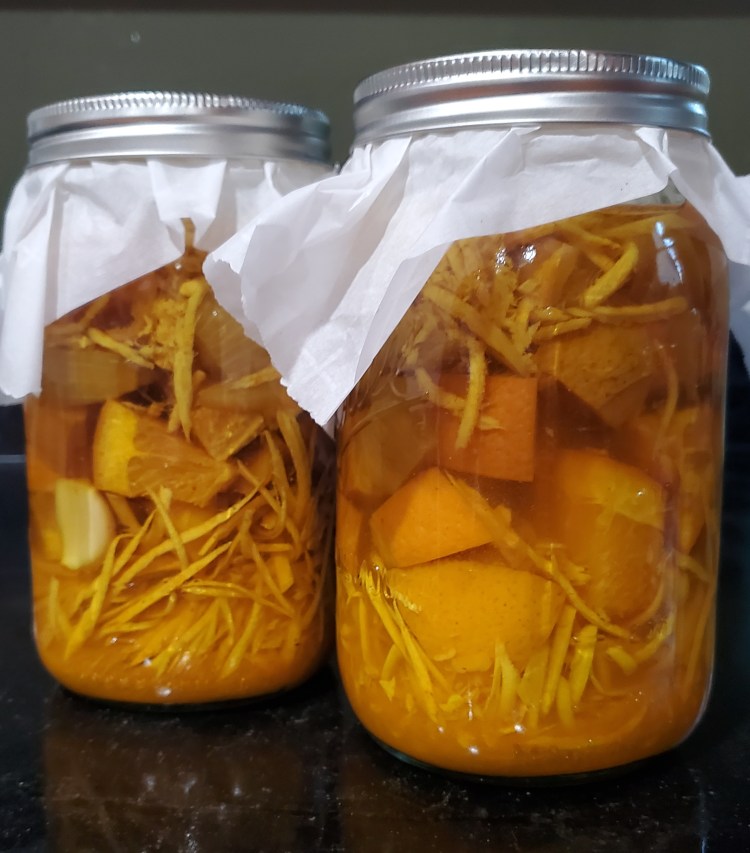
  1. Chopped an orange, lemon, onion, and four habanero peppers. Peeled a whole head of garlic. Shredded a large piece of horseradish and ginger root.  Note: If you’ve never shredded horseradish, it will open your nasal passages like never before!
  2. I divided the ingredients between two quart-sized mason jars and then sprinkled 1 tablespoon of turmeric on top of each.
  3. Then poured enough apple cider vinegar in each jar to cover all ingredients.  
  4. I covered the top with a piece of parchment paper and screwed the band on then shook it gently.
  5. I let it sit on the bottom shelf in my pantry for a month and tried to shake it up a little each day if I remembered. Realistically, it was more like 3 times each week.
  6. After one month, I strained out as much liquid as I could and then poured into a clean quart jar.
  7. I added about ¼ c of honey and stirred. You can add however much ‘til it meets your taste preferences.
  8. Then store in fridge.

I am taking a tablespoon each morning to prevent any illness. Some people think it will also help shorten any bouts of cold and flu that you may experience. If you want to check out a couple, these all tap into nature’s amazing immune-boosting properties.

Who got the Booch? DIY Kombucha

Who drinks kombucha?  Have you even heard of it?  I will be the first to admit that I was not following this trend for quite some time.  I mean honestly, there is a new wonder food or miracle antioxidant that makes headlines nearly every month.  From apple cider vinegar to bone broth to chia seeds, I don’t know how to make sense of it all.

But you know what typically makes me give something a second glance?  A personal endorsement by someone I know who has similar views on health and wellness.  It was easy for me to ignore the $5 12-ounce bottles of kombucha at the grocery store because that pricing just seemed unsustainable.  And yes, I realize every cup of coffee bought costs somewhere in that range and that’s not my life either. I would much rather forgo a coffee at a coffee shop every day and make it at home myself (think of all the trash you’re saving from a landfill!) if that meant at the end of the year I had $1200 to put towards a vacation. 

When my friend Jenny said that since she had started drinking kombucha on a daily basis, she hadn’t gotten sick, my ears definitely perked up.  I used to think I had great immunity and never got sick, until I had two little ones. Nothing like toddlers who are constantly on the floor, putting things in their mouths, and touching each other to test your immunity.  They give you one hug or touch your face and Poof!  You’ll have a runny nose and cough the next day.  So I figured what’s the harm in giving kombucha a try?

What is kombucha?  Basically, tea that has had certain strains of bacteria added to it and is then allowed to ferment.

What are the benefits of drinking kombucha?  I’m not going to bore you with scientific studies, though I am a believer in science and evidence, you can read those references here.  For me, what makes sense is improving gut health with probiotics.  I am not claiming all of these benefits will come true for you. But they might (fingers crossed)!

So here is how I make kombucha (instructions courtesy of Jenny).  How often and how much you need to make truly depends on how much you consume.  And the only caveat to this recipe is you need someone to provide you with a yeast mat (scooby or jellyfish as I like to refer to it) to start.  

Kombucha brewing instructions:

  1. Boil 1 gallon (16 cups) of water
  2. Add 1 cup of sugar to water to dissolve**
  3. Add 8 tea bags of green or black tea
green tea bags for making kombucha at home
#3 – I use Tetley Green Tea bags when I brew Kombucha

**This ratio is important (16 cups of liquid to 1 cup of sugar) for the bacteria to grow properly.  If you make more or less, keep the ratio, i.e. 8 cups: 0.5 cups of sugar.

  1. Let brew until cooled to room temperature
  2. Remove tea bags and pour into brewing container
  3. Place yeast mat into container with reserved 2 cups of liquid and stir
  4. Cover with coffee filter and secure with rubber band
  5. Let sit for 20-30 days in a warm environment between 70-75 degrees (also important for the bacteria and yeast growth).  
Making kombucha at home - yeast mat
#6 – here is the yeast mat and 2 cup reserve to add to the brewed tea
Making kombucha at home, here is the container after 25 days with two fully formed yeast mats.
#7 – the yeast mat, the brewed tea and covered with a coffee filter

After 20-30 days:

  1. Bottle all but 2 cups*.  I bought this pack of bottles but you can probably find a set of three or four at any local kitchen or home store.  Just think about how much total kombucha you want to brew and be sure the size of the bottles will hold all that liquid.

*The 2 cups and newly formed yeast mat will be the starter for the next batch.

  1. Add ginger, fruit (straw, black, blueberries), mint, basil, etc. to the bottles per your taste preferences.
  2. Store on counter for 2 days.  Burp the bottle once/day to let out gas.
  3. Refrigerate and enjoy 🙂
Making kombucha at home, three bottles of finished strawberry, basil and cucumber
Strawberry, basil and cucumber Kombucha (a batch Jenny made)
Making kombucha at home, three finished bottles of blackberry mint
Blackberry mint Kombucha I made.

PS: In case my title makes no sense, for whatever reason this song constantly comes to mind when I am brewing some ‘bucha.  Remember this fun little diddy by Everything?  I just replace the word ‘hooch’ with ‘booch’ and ta-da, genius in action 🙂