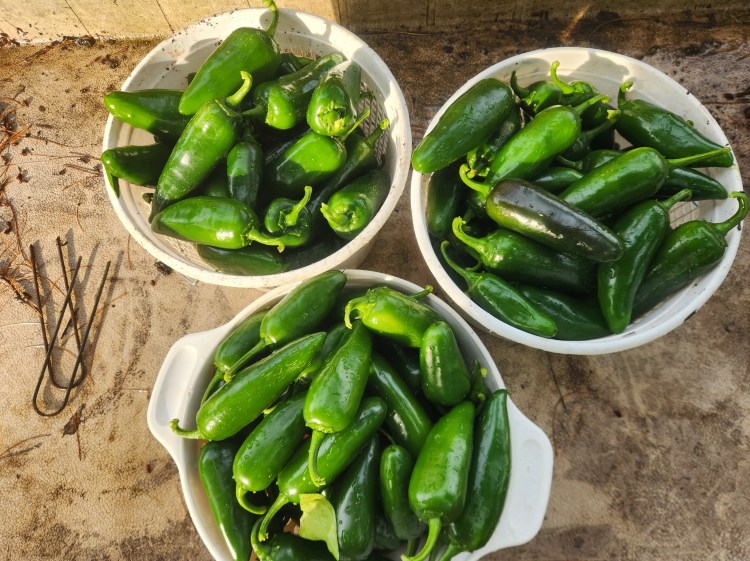
In my world, July stands for Jalapenos. And that means it’s time to Cowboy Up! Alright, hear me out before you say “I don’t like spicy foods.” I get it, you don’t need a lot of jalapenos. This is a situation where a little goes a long way.
But Jalapenos are quite versatile. I throw them on tacos, of course. Nachos and quesadillas. In my scrambled eggs with black beans and avocado. Add them to soup. Stuff them with cream cheese and roast them for a fun appetizer. We also make shakshuka for vegetarian dinners with a fresh country bread.
If you’re intimidated to try Jalapenos, start with them really thinly sliced on the diagonal. I don’t know why but they seem less potent that way.
And if you’re like me, you will become totally obsessed with Cowboy Candy. It will become your go to Friday evening munchie with your favorite adult beverage to kick off the weekend.
Where did summer go, folks? Seriously, when were kids summer felt like it lasted forever. You almost wanted school to start so you had something to do. And how come kids get 12 weeks of vacation each year but adults only get like 2 or 3?!? I’m pretty sure adult-ing is way harder than kidd-ing.
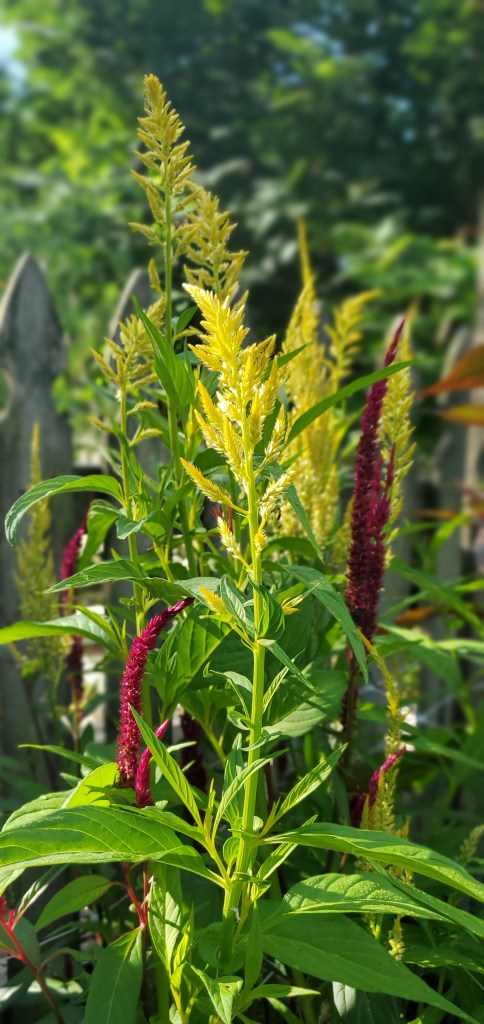
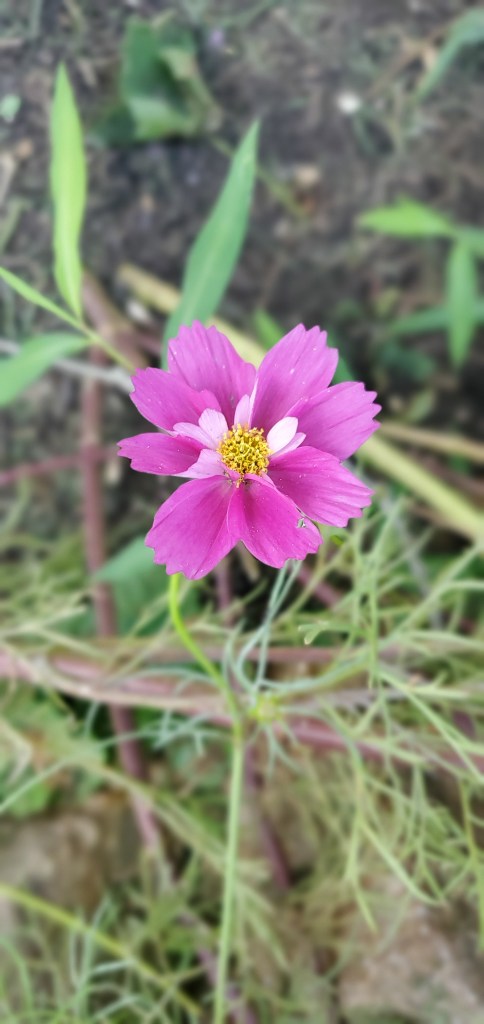
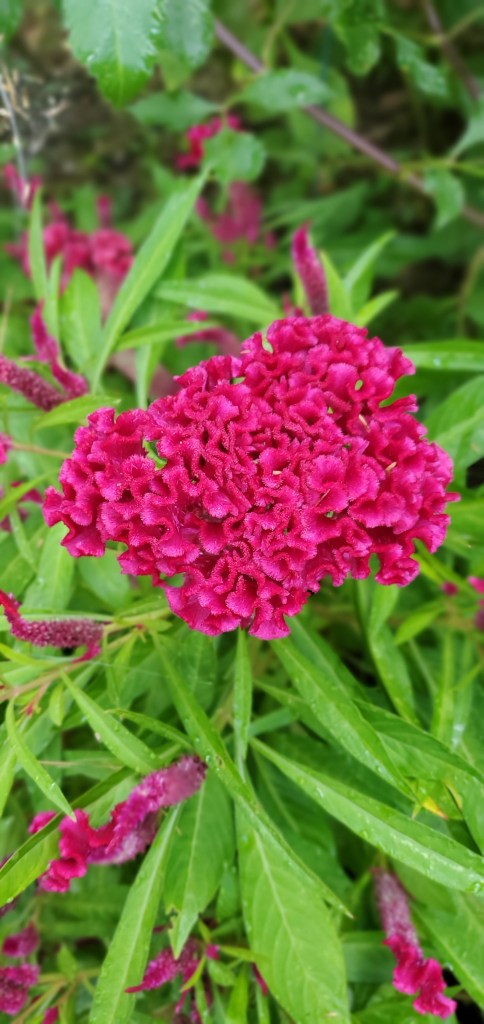
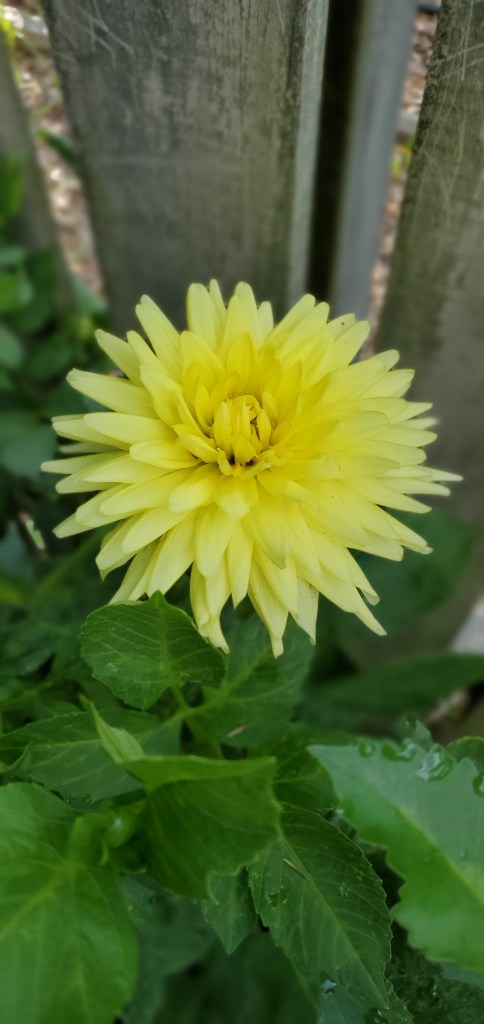
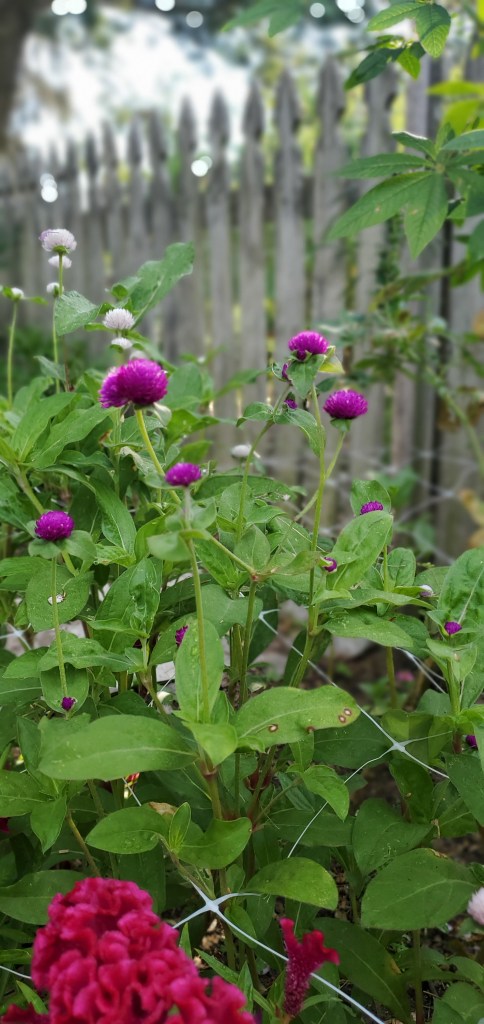
But, I’ll take the simple pleasures whenever they come and however I can get them. That’s where flowers come into my life. This summer I started experimenting with growing some cut flowers. Mainly snapdragons, zinnias, dahlias, celosia, yarrow, marigolds, and cosmos. I’ve had some fails and some wins. As much as I was hoping for big amazing blooms, I’m actually okay with the smaller production that has transpired. I’ve learned a lot about spacing, watering, and fertilizing. And of course, the adage of ‘less is more’ has been very applicable.
I started with probably 15 different types of flowers (sweet peas, bells of Ireland, china aster, scabiosa, Mexican sunflowers) and I already know that next year I’m scaling back: snapdragons, zinnias, sunflowers, and celosia. That’s it. Maybe some bupleurum 😊
I tend to take on too much at once, create a super complex schedule, and then about 6-8 weeks in I’m tired and falling behind. I always want things to turn out perfectly on the first try. And that’s just not realistic. I’m saying all this because if you are in the same boat, I’m hoping you can cut yourself some slack. Life doesn’t usually go smoothly. The frustration and mishaps are part of the process and how we learn (saying this as much for myself as anybody else who needs to hear it). In general, as I try to take on more of a homesteading lifestyle while working full-time and raising two little kids, I just feel like I’m coming up short more of the time than not. And that takes the fun out of it. I want to enjoy the successes and learn from the misses. And smell the flowers along the way.
Don’t know about you, but it’s getting pretty steamy in the Mid-Atlantic. As we head into peak harvest season, that’s when I find it most challenging to get out in the garden if I don’t go first thing in the morning. Every day is pretty hot and humid (think about walking through soup and you’ll get the idea) and we get a lot of afternoon thunderstorms that are quite strong. We lost power the other day for about four hours after a storm but thankfully it came back on right around 9:30pm for bedtime.
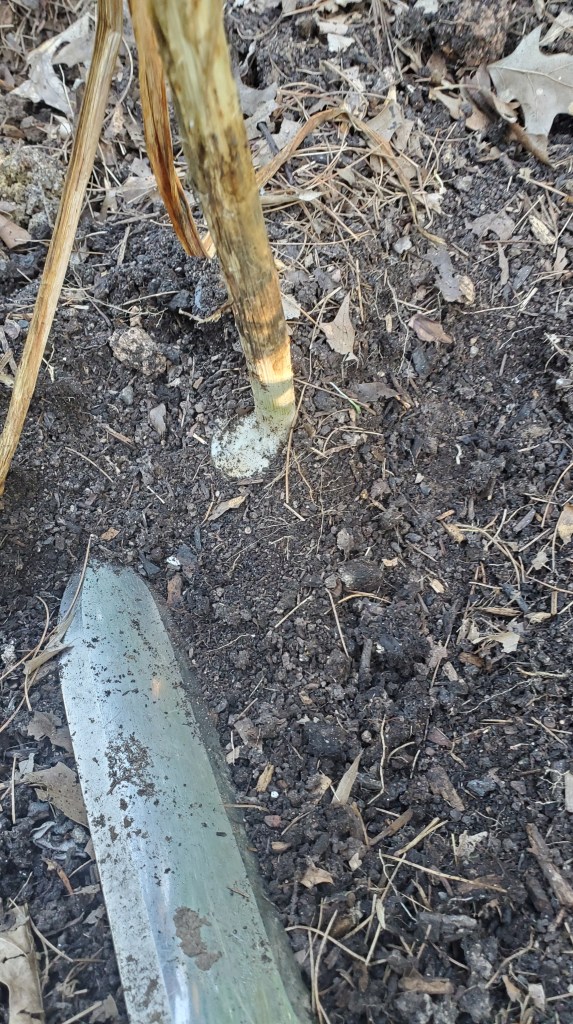
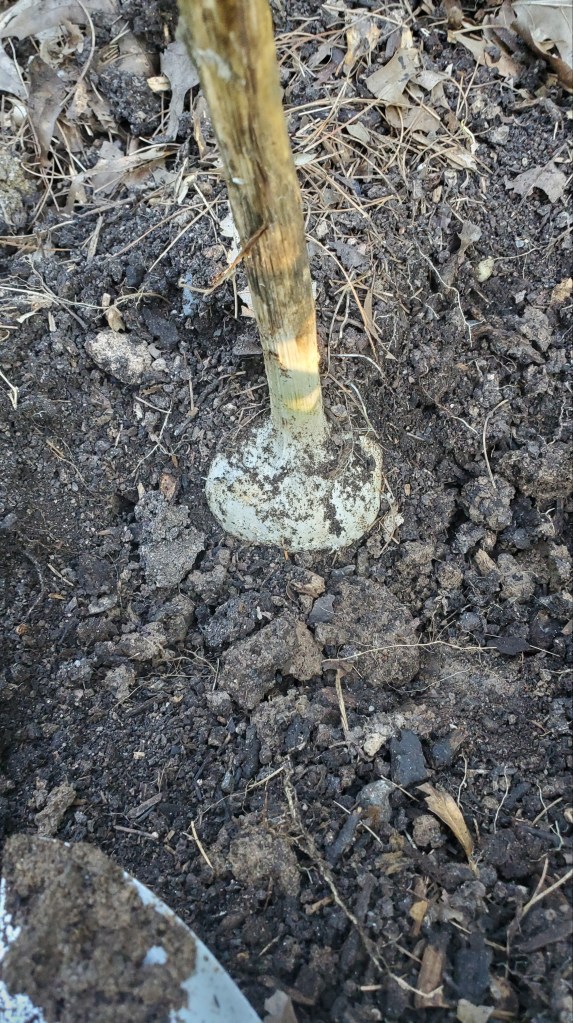
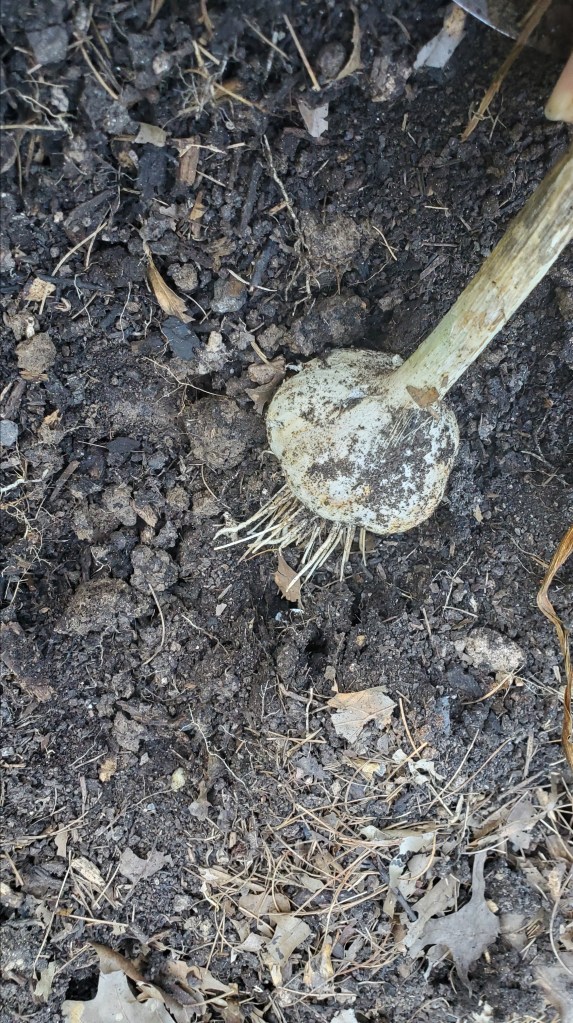
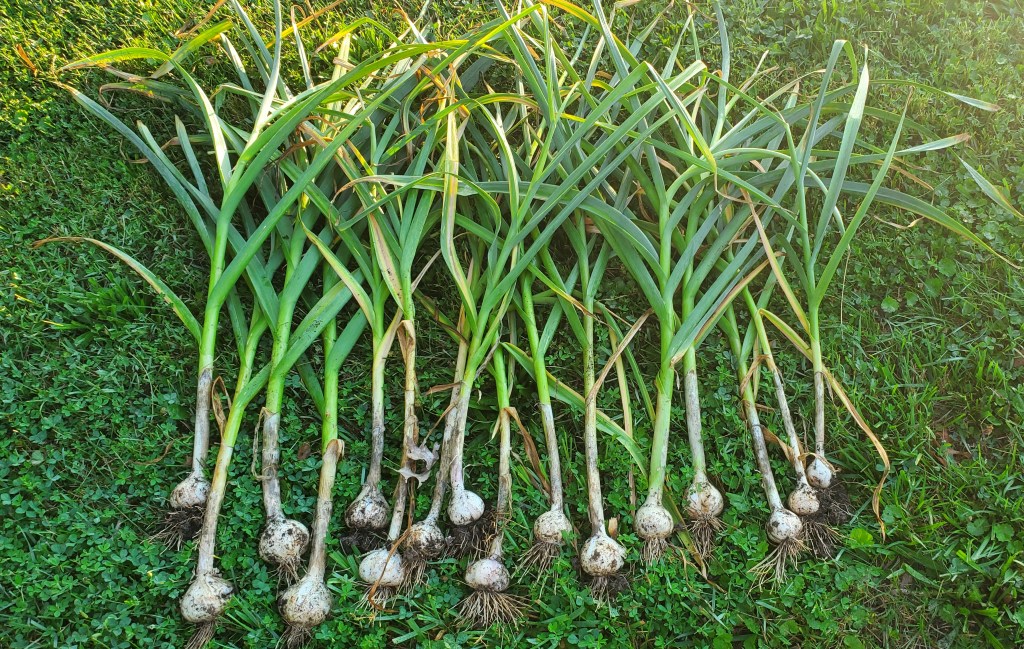
Mid- to late June is typically the time when garlic is ready to be harvested. I planted a half pound of Music Garlic in early November last year so that it would get a good 7-8 months of growing time. Last November was so mild the cloves sprouted before December so I covered them with a really thick layer of leaves and then lightly covered the bed with a layer of cardboard for the winter. I removed the cardboard in early April.
April was still pretty cold and wet so in May I started checking on the garlic every week or so. I trimmed the curly scapes that shoot up through the center so that the growth and energy would be focused toward the bulb. Then throughout June I kept checking to see when the lower layer of leaves would turn brown. That’s the sign garlic is ready to be harvested.
Garlic Harvesting Tips
When the lower layer of leaves has turned brown, pick a day or time when the soil will be relatively dry. Not right after a big rainstorm or watering.
Harvest carefully using a hand shovel to dig around and loosen the roots. You DO NOT want to just grab the stalk and try to pull it out. Be careful to not pierce the bulb as that will mean you’ll need to use that bulb sooner than later and it isn’t suitable for storing.
Once you’ve dug up all your bulbs, no need to hose them down. You can just shake or brush off the extra soil.
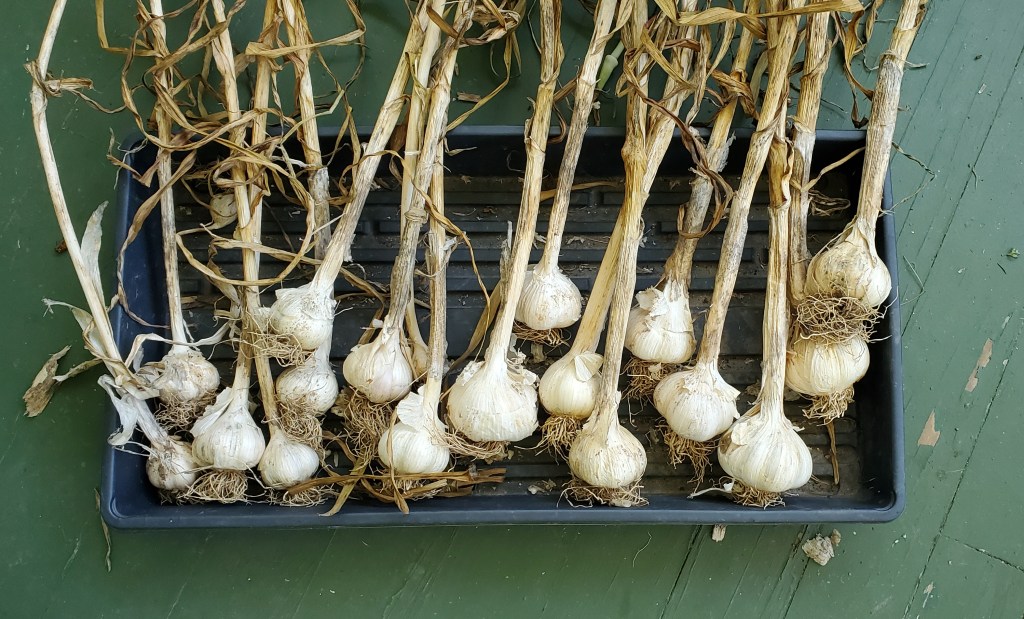
Leave your garlic in dry, shady, cool place for 3-4 weeks so it can cure. I see lots of examples of people leaving them on a picnic table or extra piece of fencing that will allow for air flow. I left mine on our front porch because it’s shaded and gets the northern exposure so it’s a bit cooler throughout the day.
After 3-4 weeks, you can trim the roots around the bottom and leave about a half inch on the neck.
Garlic should be stored in a cool location, out of direct sunlight, that gets good air flow.
Eventually, you’ll want to store enough to plant your next crop and still have enough leftover for your cooking needs for the year (which is different for every household).
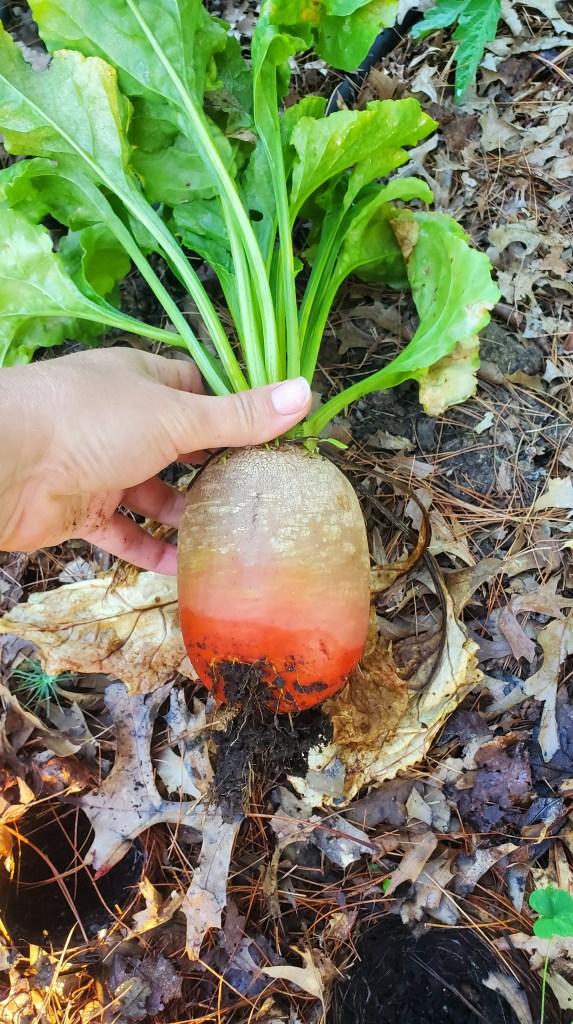
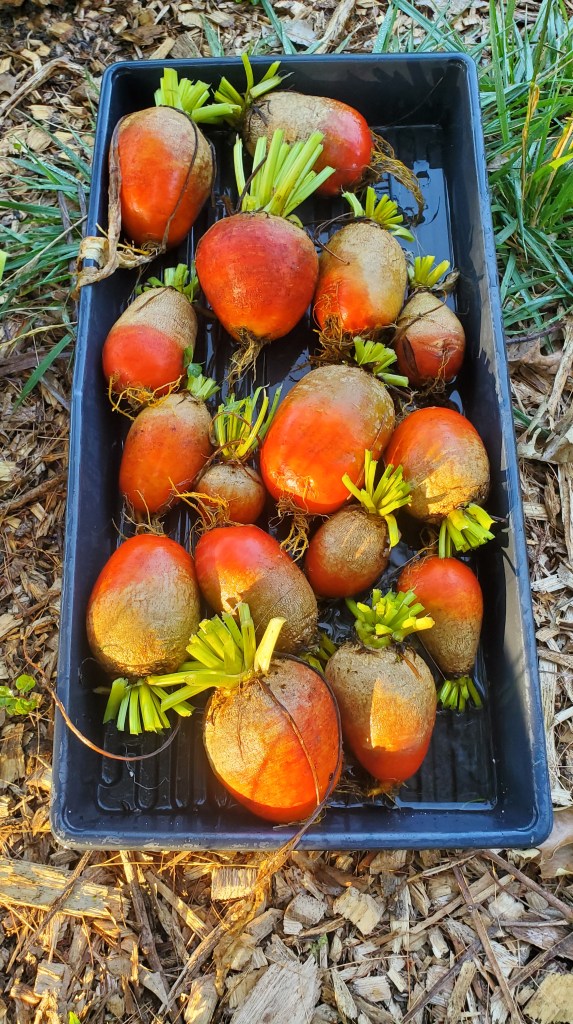
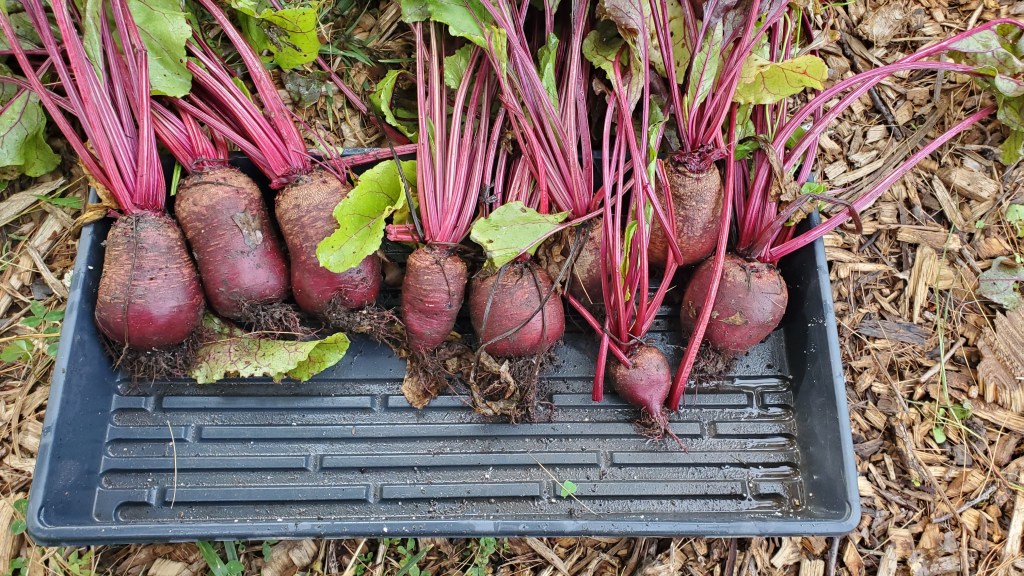
Finally, it happened to me right in front of my face and I just cannot hide it. I love that jam! If you recall, my beet crop failed miserably last Spring. I know most people are not huge fans of beets (you gotta get some rhythm, people! Oh the puns never stop), but for me this was a huge disappointment. There is not a salad I enjoy more than peppery arugula, sweet golden beets, a sprinkle of toasted pecans, some chunks of creamy goat cheese, drizzled with the easiest homemade balsamic vinaigrette (see recipe below). That’s just the perfect summer dinner with some warm, crusty French bread.
This spring, I was determined to succeed so I took a different approach and started my beets inside in early February. I did two 6-cells of golden beets and one 6-cell of ruby beets. And when I start seedlings, I always drop 2-3 seeds in a cell in a triangle formation so that I can get multiple plants.
I transplanted these in early April and should have harvested them by end of May (55-65 days usually) but I don’t know what happened. The weather kept flip flopping. We’d have 3-4 hot humid days and then a few cold days. I think I just wasn’t paying enough attention and more focused on getting my peppers and tomatoes planted. Then June came and life got busier with school getting out, planning for a vacation. La dee dah. You know the drill.
I ended up harvesting them on two consecutive days – all the golden beets one morning and all the ruby beets the next morning. I ended up with 17 of each. Never could have planned that synchronicity if I tried. I think they were all quite voluptuous and curvy.
If you’re planning on preserving, I’m sure you know you want to get them canned as quickly as possible to maintain flavor and freshness. That’s why I tend to do these things on the weekend. I’ll go out early in the morning when it’s still cool, scoop up whatever I’m harvesting, and get everything going on the stove while the house is still peaceful and quiet (as if, those words only describe my household if we aren’t home).
I followed this pickled beets recipe from the National Center for Home Food Preservation (what a mouthful!) and did a batch each morning of 8 pints. This one is super basic, so if you have a recipe you like – please share.
I don’t know why but canning always ends up being a 3-hour endeavor for me. I’m always looking for shortcuts and tips to save time while still doing it safely.
Here’s what I did:
Boil the water to cook the beets. Once boiling, add the beets and cook for 25-30 minutes.
While the beets are cooking, start heating the water for the water bath (this takes soooooo long). Simultaneously, I am heating the brine and washing my jars, lids and rings.
Once the beets are finished cooking, let them cool for about 10 minutes then remove the skins and slice them up.
Place the cut up beets in the brine for 3-5 minutes.
Last, hot pack the jars, wipe the rims, put lids on top, and screw on the rings to fingertip tight. Fingertip tight means you don’t grip it with the palm of your hand and make it crazy tight.
Finally, if I timed it right, the water bath is boiling and then I can just slide the jars right in.
Typically, my timing isn’t great because I don’t multi-task well. Instead, there ends up being a decent amount of waiting between steps, which is how this takes 3 hours of my day.
I ended up with 16 pints of gorgeous golden and ruby beets. I’m super happy with this and look forward to enjoying these this fall and winter.
Easiest Homemade Balsamic Vinaigrette
Pour equal parts extra virgin olive oil and balsamic vinegar in your dressing bottle. I usually eyeball about 3 tablespoons each.
Add a teaspooon each of dijon mustard and maple syrup.
I’m not sure there is a fruit or vegetable that better illustrates the benefits of having a home garden than tomatoes. As a kid, I DID NOT like tomatoes. I thought they had no flavor and were filled with this weird juicy somewhat gooey center. Only when I had a simple cherry tomato plant in a planter on my deck some years ago did I taste the ripe, flavorful goodness that tomatoes offer.
Tomatoes, peppers and beans are my main summer crops that I grow in bulk for preserving. So it’s important that I get as big of a harvest as possible for sauces, salsas, soups and stews.
If you want to ensure a strong tomato harvest, here are the ways to set yourself up for success
Trim all low hanging foliage. You don’t want any leaves touching the ground where they are more susceptible to soil borne diseases, like blight.
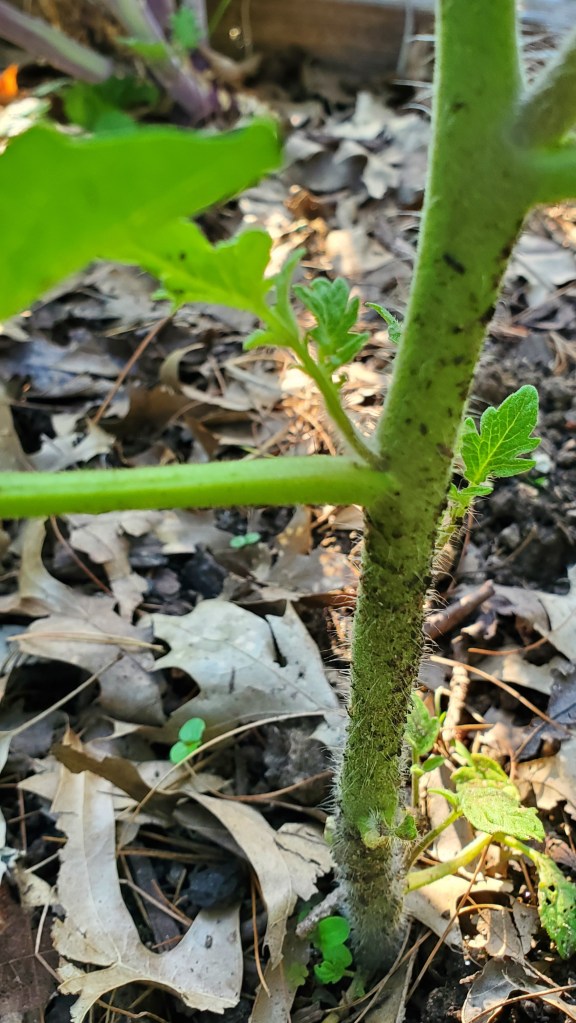
Get rid of the suckers. Suckers are the branches that grow in between the main stem and the branch. They are exactly what the name suggests – they suck extra energy and nutrients out of your plant and fruits.
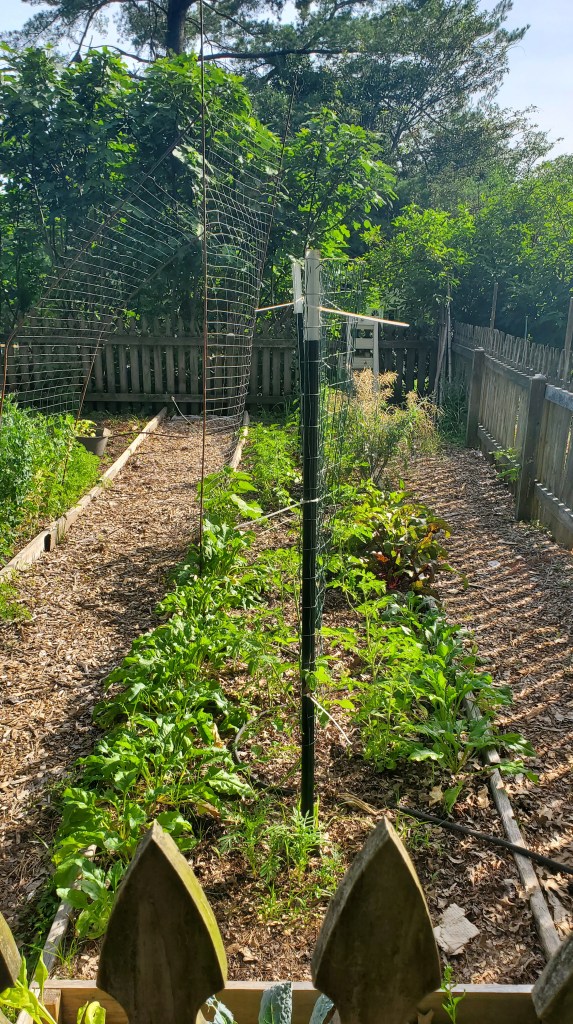
Support them. I’m a big fan of clipping them to my trellis. I’ve done the cages – nope. I’ve done the A-frame and string – not for me. The clips just make so much sense and are so precise and tidy.
Water from the ground. If you don’t want to invest in soaker hoses, typically $15-20 each, make sure you are watering at the base of your tomato plants and not showering on them from above. This creates more risk of spreading disease and pathogens.
Cover your soil. Tomatoes need a lot of water and you’ll keep them better hydrated if your soil is covered. Anything like shredded leaves, pine needles, grass clippings, or straw (NOT HAY).
TRIM THOSE SUCKERSCOVER YOUR SOIL & WATER FROM THE GROUND
Here in the Mid-Atlantic, May is “Go Time” for gardeners. [Please get a mental image of the Grinch doing his workout to steal Christmas.] Our last spring frost #LSF is usually around April 20 or thereabouts but I like to use May 1 for ease in calculating start dates.
May is the month. This is when all the preparation and care of the last 2-3 months gets to become real.
Here is a general to do list to work on throughout the month so that you are set up for gardening success all summer long. Take your time. It doesn’t all have to be done in one day or weekend. And you will undoubtedly need to modify and re-touch things as the summer goes on.
Preparation
Weed your pathways and beds if you haven’t already. This takes regular upkeep but you want to minimize it as much as possible
Put down cardboard and a 3-5” layer of woodchips on all your paths to reduce weeds. Most places have free chip drops from nearby arborists.
Prep your beds with a fresh layer of compost and manure if you can. Craigslist is a great place to get cheep manure from a local horse farm.
Plantings
Harden off your seedlings by gradually exposing them to the great outdoors over a week. Just do a few hours the first day and add 1-2 hours each day so they can acclimate to the sun, wind, and other elements. If you buy seedlings from a nursery, then you can skip this.
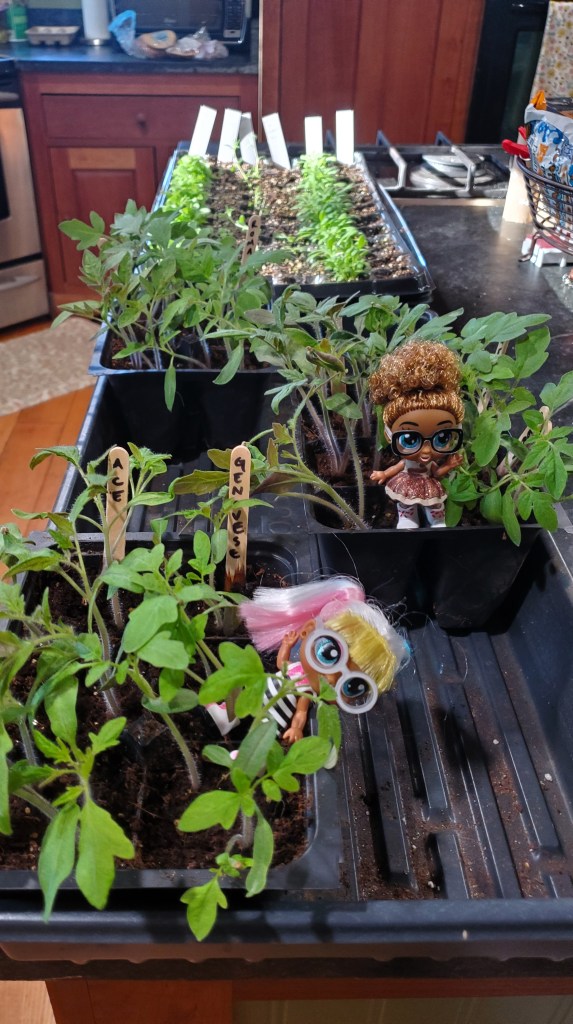
Buy any seedlings that you didn’t start yourself or that weren’t successful. It’s okay, it’s all learning and there is always next year. Two-thirds of my tomato seedlings died from gnats this year. Grrr!
Plant your seedlings later in the day on a cloudy day if possible and water them in well. It’s a big shock for these little babies so make it as easy as you can.
Equipment
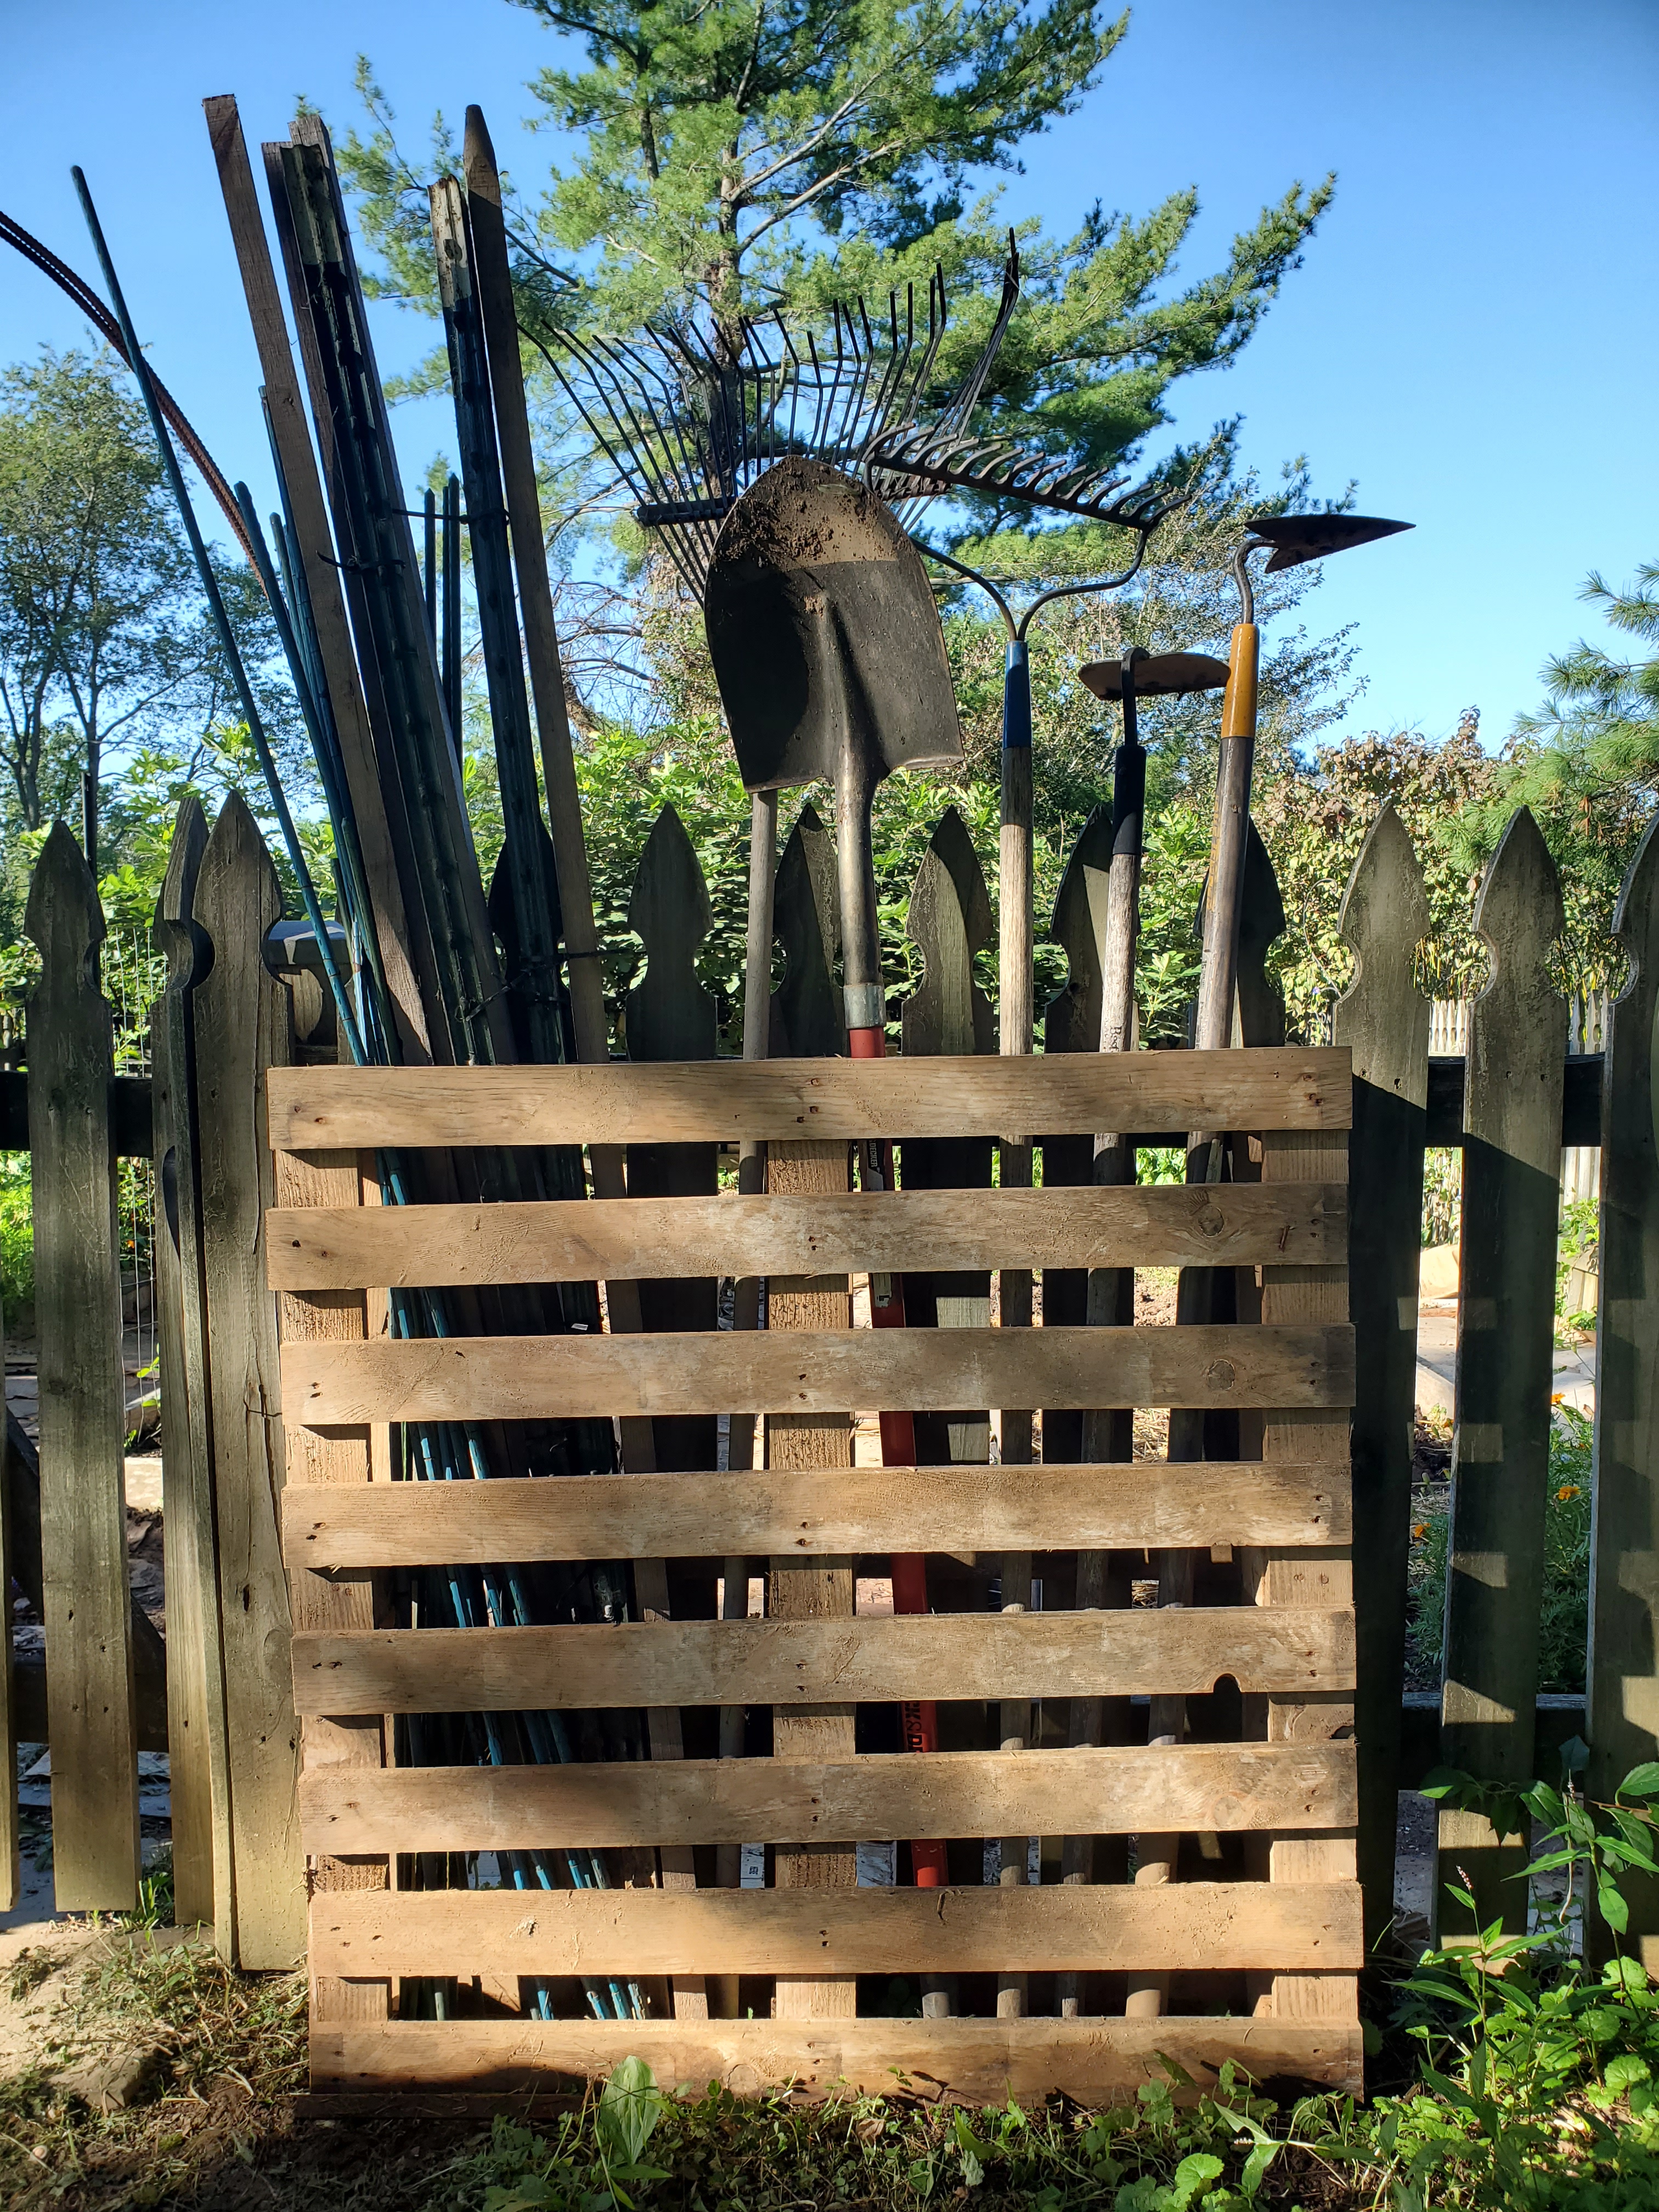
Get all your equipment and tools out of storage and located conveniently to where you will use them. On a weekly basis I use a hoe, rake, hori hori knife, a bucket, watering can, and a wheelbarrow. I keep everything right at the entrance to my garden, organized in a pallet #pallet projects
Put up fencing and trellises as needed for your crops that will need support for climbing – pole beans, tomatoes, berries, etc.
Buy clips and stakes to help support.
Get a gardening belt for your gloves and snips. I also keep a tape measure in mine too. You can use an old apron or a fanny pack. No judgement here – I bet you look fly😊
Maintenance
Buy the fertilizer you will need for the season. I like the AgroThrive brand.
Decide on your pest management strategy. Will you use BT (Bacillus thuringiensis) for X? Or DE (Diatomaceous earth) for Y? Do you plan to use a spray? If so, can you make an organic one yourself with natural ingredients? Or are you going to hand pick off slugs and remove eggs at 5am every morning? You won’t be able to prevent everything, there will be some losses. But get to know the pests most prevalent in your zone and get ahead of them.
Beautify
It can’t be all work and no play. If the garden is your retreat, add some beauty and pleasure. Plant some flowers. Add a bird feeder or bird bath. Grow some flowery vining plants along a fence or trellis.
As another growing season approaches, I wanted to step back and think about the rhythm and timing of my plantings. For me, having a plan is essential so that I don’t get overwhelmed. But I don’t really want to live my gardening life according to a highly complex excel spreadsheet with tons of equations.
This year, I am not going to expand my vegetable garden and want to keep it pretty similar to what I did last year with a few tweaks. However, I am planning to really give a big push to flower growing thus I want the vegetables to be relatively simple.
I don’t know about you, but the whole “start this 8-10 weeks before your last frost” feels a little too abstract. I’d rather work with the natural demarcations in the calendar year that signal, “Oh, it’s Spring solstice, time to… [insert task here].” In the three short years I’ve been gardening, I’ve already grown to love these little tricks because Lord knows my memory is not superb.
Here are the broad strokes and signals that work for me in the Mid-Atlantic and maybe they’ll be helpful to you.
Valentine’s Day (or a weekend thereabout) is when I start peppers indoors. Think spicy romance!
St Patty’s Day is the time to start tomatoes seedlings.
Depending on when Easter falls, that’s usually the time to get my spring garden planted with the cold hardy crops – beets, carrots, kale, lettuces, onions and peas.
Then there’s Memorial Day to seed the summer garden and transplant the tomatoes and peppers that I started indoors.
4th of July is a good time to start your fall seedlings indoors, like broccoli, cauliflower and brussels sprouts.
Labor Day, in addition to being the end of my energy and enthusiasm, is when I start letting my beds rest a bit. Just some lettuces, radishes, beets and transplanting the brassicas I started indoors.
Halloween is usually the turning point from enjoyable Fall weather with sunny days to colder, gray days with rain and wind. Halloween is my signal to go buy some manure from the horse rescue that’s nearby to amend my garden and start putting everything to rest.
Thanksgiving to Christmas is the time to be thumbing through seed catalogues and singing “my favorite things” as I pick out seeds for next year’s garden.
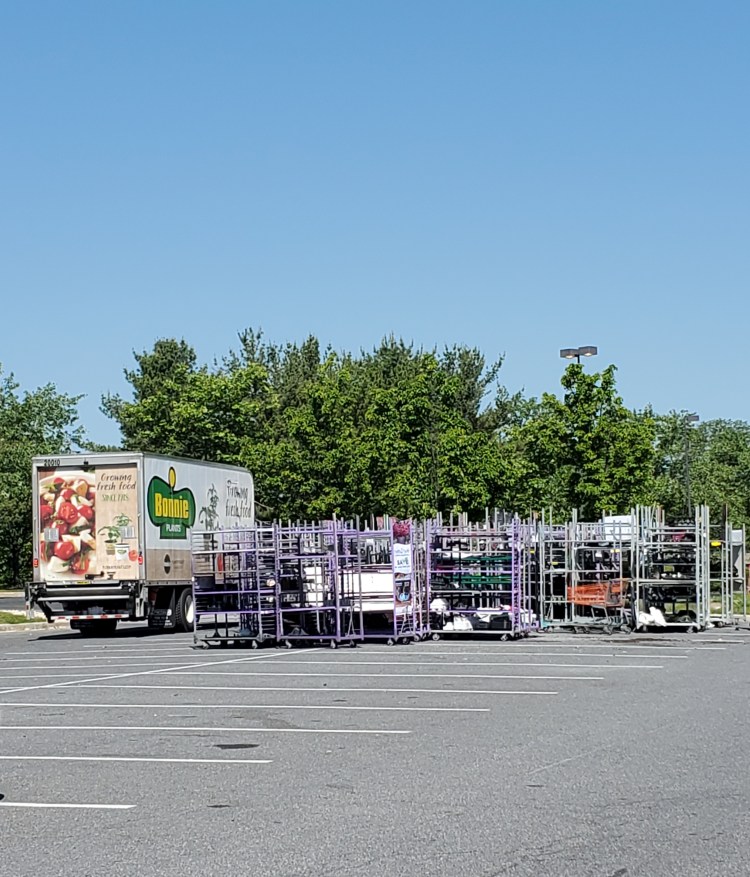
You are not going to believe this, but scoring free plants is totally a thing. A neighbor told me she gets bulbs and other plants when stores are changing over between seasons. I just sort of smiled and nodded like, “Yeah, I’m not sure that’s true but thanks for telling me.” I didn’t really put much weight or thought into the idea. But lo and behold I am a believer.
I was driving by the local Ome-hay Epot-day (don’t want to implicate anyone here) and happened to see all these rolling shelf carts at the end of the parking lot. They were not organized and at first glance appeared to be empty. But my little eagle eye said to go give this situation a closer look. Before I say more, there are two things I would say you need to know about me.
I’m a rule follower. I like order and I like predictability. However, if there isn’t a sign explicitly saying not to do something, then it’s up to me to use my brain and decide what is reasonable and sensible. There was no sign saying “Don’t take these plants.”
I love recycling! If I can save something from the trash and find a new use for it, nothing makes me happier. It’s a two-fer. Someone else enjoyed this item and now I get to enjoy it as well. And in this situation, nobody else even got to love on these plants yet. They were just wishing and hoping to have the chance to live their best lives. It was my duty to save them 😊
On that note, let’s talk about going through trash for a second. I’m not going to jump in a dumpster necessarily, but if I see perfectly usable things in the trash that I can salvage, you bet I’m gonna do it. Look, we live in a very disposable society, with short attention spans, and marketing and advertising constantly telling us we need something else to be happy. I don’t buy it! (see what I did there?) That’s why I did the whole year of enough. Stuff doesn’t make us happy. Relationships and feeling connected to family and friends, doing meaningful work, and helping others makes us happy. If someone is concerned about the appearances of resuscitating an item from the trash, look no further than the proverb one man’s trash is another man’s treasure.
So I walked on over to the rolling shelf carts and there were hundreds of plants jammed on top of each other. Yes they were dried up and on their last leg but let me tell you their time was not up. I spent about 10 minutes sorting through and grabbed no less than 30 plants – some flowers, six peppers, maybe eight tomatoes, a few mints, a couple cilantros, two basils and sages. There was even some okra and cucumbers! I pretty much won the lottery.
Food wasted is something that I’ve been learning more and more about and this was a light bulb moment for me. All these plants represent food and self-sufficiency. Maybe we all don’t have a huge yard to grow food but we could all have 2-5 plants on our windowsills, door steps or balconies. And then we have some ownership over what we eat, which leads to taking better care of our health, and then we are unstoppable.
Besides hanging out by the trash, here are some other ways to score free plants:
Pay attention to the change of seasons (April, July, October) and when certain items are going to be pulled from the shelves.
Ask the staff at your local hardware store if there are plants they are going to toss.
Volunteer at a local farm or greenhouse – there will be plants that don’t sell.
Trade with a neighbor. Take note of which neighbors have gardens and offer your extra seedlings in exchange for some of theirs.